Example Add Handsfree Automation

Before beginning you will want to

In this example we will  


Run the Design Module

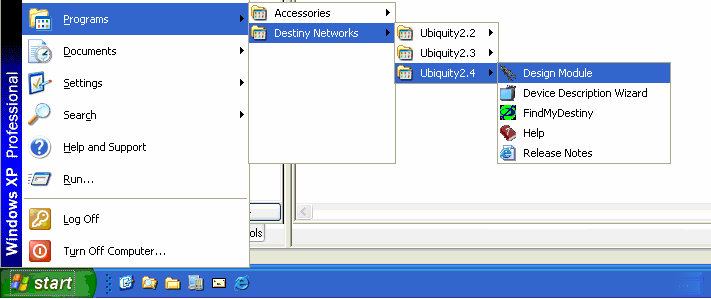
Click "Start", "Programs", "Destiny Networks", "Ubiquity 3.1", "Design Module"


Open the Project: 15 Add Handsfree Automation.ubq

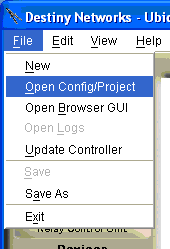
To open the project, select "File", "Open Config/Project"


You will get the following menu.

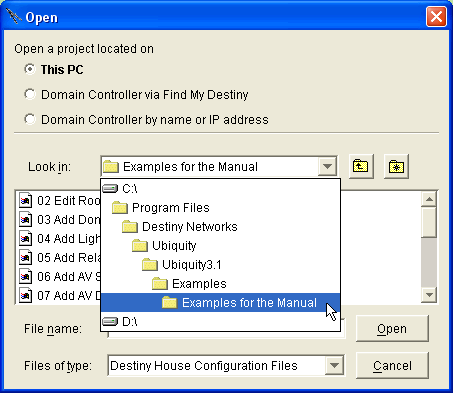
Navigate to "C:\Program Files\Destiny Networks \Ubiquity \Ubiquity3.1\Examples\Examples for the Manual"


You will get the following menu.

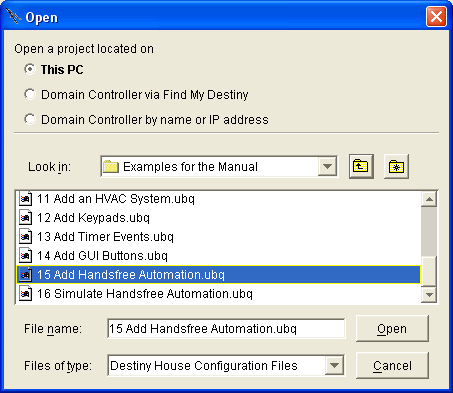
Click on the project "15 Add Handsfree Automation.ubq"

Click the "Open" button


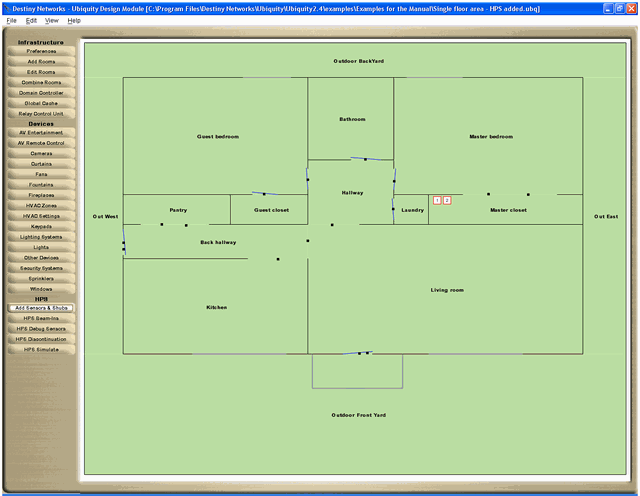
The project will open.


Add Shubs

In looking at the house, probably the most logical place to add the Shubs is the Master bedroom closet because:

  • It is relatively centrally located

  • There will be good access to view the Shubs

  • It is dry (unlike the laundry room)


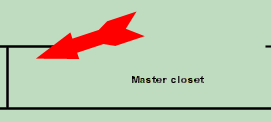
Add 2 Shubs to the Master bedroom closet to handle the Entry/Exit and Area sensors we are about to add (if we need more than that, we can add them later).

You may want to refer to Add Shubs to the floor plan in Add Sensors & Shubs.


Add Perimeter Entry/Exit Sensors

Start by adding Entry/Exit sensors to the perimeter of the HPS area. In our case, that means you should add Entry/Exit sensors to:

  • The Front door and

  • The Back door.

You may want to refer to Adding the Entry/Exit sensors to the exterior perimeter of the HPS are in Add Sensors & Shubs.


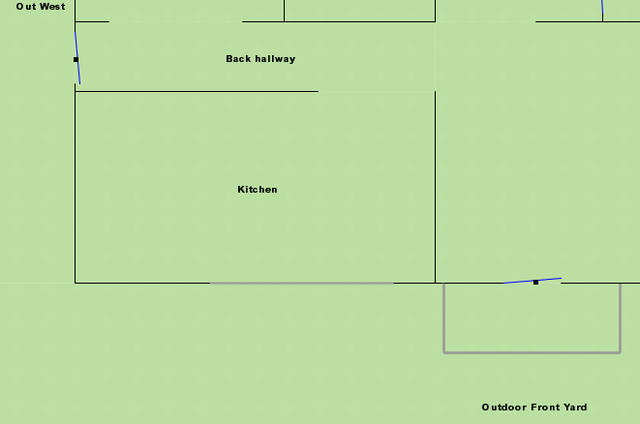
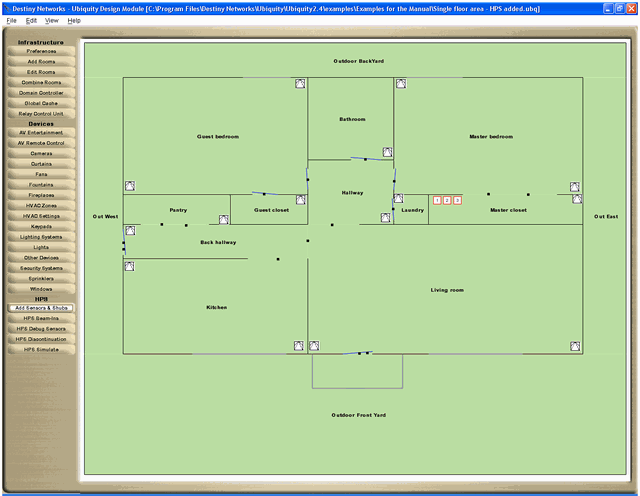
After you have added the Entry/Exit sensors, the floor plan should look like the one at the right.

By the way, if you look at the Browser GUI now, the floor plan will be green when the rooms are unoccupied.


Add Contacts to the exterior doors

Add "Normally Closed" contacts to the same two doors.

You may want to refer to Add contacts  to exterior doors in Add Sensors & Shubs.


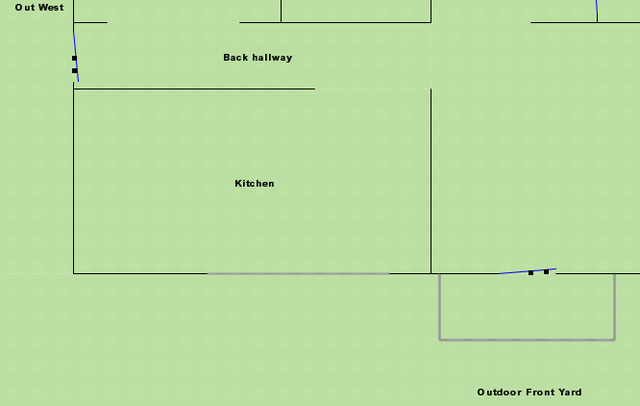
After you have added the contacts , the floor plan should look like the one at the right.


Add Entry/Exit sensors to interior doors and invisible walls

Add Entry/Exit sensors throughout the house to separate one room from another.

You may want to refer to Add Entry/Exit sensors to interior doors and invisible walls in Add Sensors & Shubs.

Note, you may want to add 2 Entry/Exit sensors for the singing doors on the Pantry and Master bedroom closet so that people do not walk around the sensors.

Also note that in the example at the right the Back hallway extends to the Living room. An alternative might to have been to have it end further to the left. However, this would mean that the rooms need to be drawn that way so you can put and Entry/Exit sensor there.


Add Area sensors

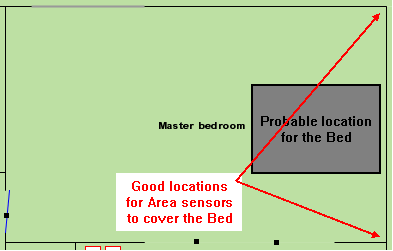
Adding Area sensors takes more thought. For example, in the Master bedroom, first we need to figure out where the bed will be. If it is on the east side of the room, then there are 2 optimal locations for Area sensors as shown at the right. The southeast (bottom right) corner may be a little better from an aesthetics perspective, but not much. Also, the other sensors want to be on a diagonal from the one next to the bed. The better location for it is in the northwest (top left) corner - as opposes to the southwest corner where it might bleed out the window.


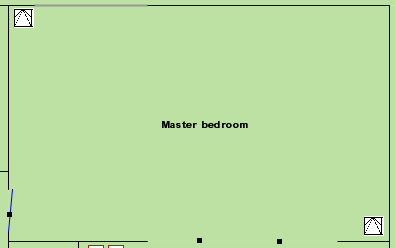
Therefore, add Area sensors to the northwest and southeast corners of the Master bedroom.

You may want to refer to Add Area sensors in Add Sensors & Shubs.


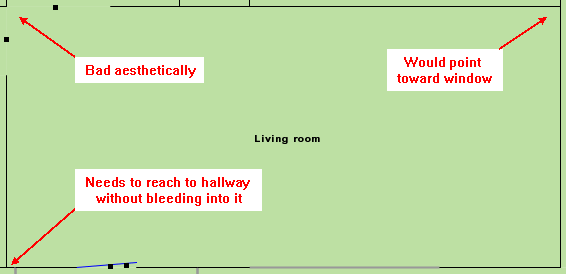
Another room that requires some thought is the Living room (including the front entrance).


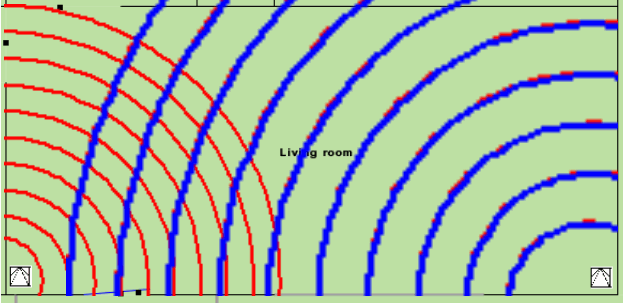
One approach is to put a sensor in the southwest corner that reaches to the Hallway, but not much beyond it.

Then add a second sensor in the southeast corner to reach the sofas and the rest of the area not covered by the other one.

The red lines at the left show the coverage pattern of the southwest sensor and the blue line the southeast sensor.

Add the rest of the sensors in the house.


After adding all of the area sensors, the house might look like the one at the right. Although yours may be slightly different.

Note a 3rd Shub was added because only 15 sensors were wired to each Shub. In addition, you might want to add wires to the other corners of the Bedrooms so you could add additional sensors if necessary (but they probably would not be needed).


Only turn on the Lights at Night

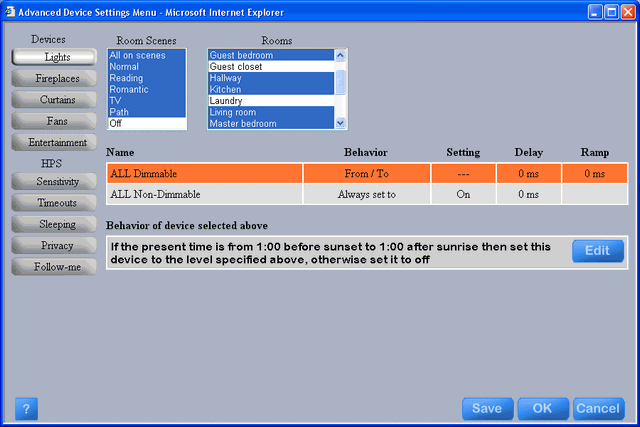
For rooms with windows, only turn on the lights when there isn't enough sunlight - that is: between 1 hour before sunset and 1 hour after sunrise.

Select "All on scenes".

Click on the first room with windows (the bathroom).

Ctrl Click all other rooms with windows.

The "Name" of the lights will change to "ALL Dimmable" and "ALL Non-Dimmable".

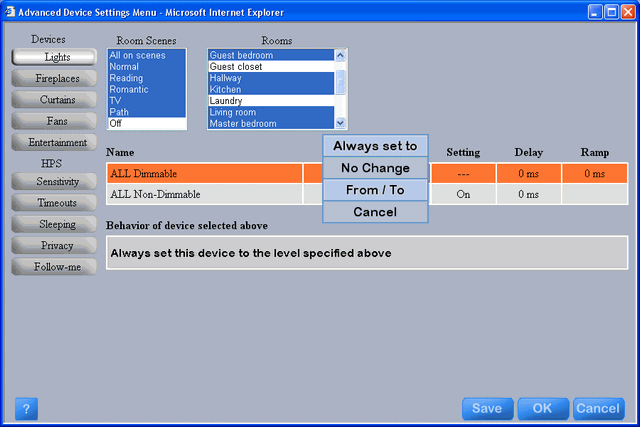
Click on "Always set to" on the top line. You will get the menu at the right.

Click on From / To.


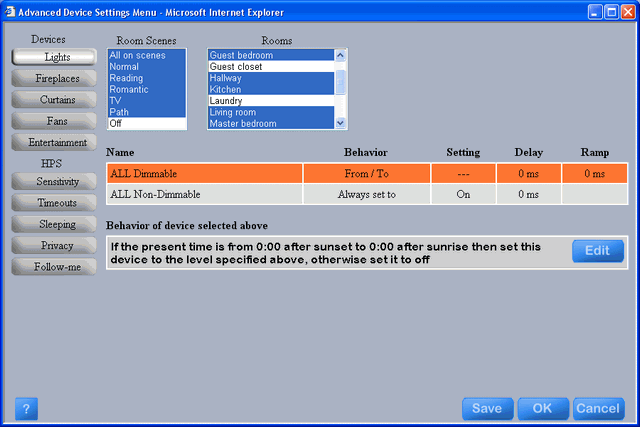
You will get the menu at the right where the "From / To" time is from sunset to sunrise.

Click on the Edit button to change the time to between 1 hour before sunset and 1 hour after sunrise.


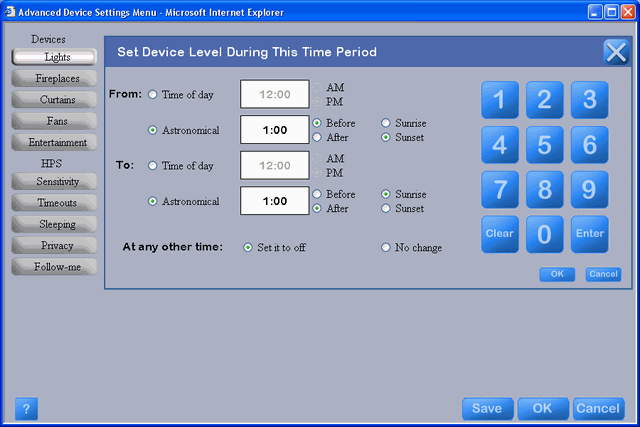
The set time menu will pop up (the example at the right has already been updated).

Set up the "From" time.

Click in the text box to the right of the top "Astronomical". It will turn orange indicating that you can modify it with the keypad.

Click on 1, 0, 0 on the keypad.

Click "Enter". You must click enter to have the change take effect.

Click "Before" and "Sunset"

Repeat for the "To" time.

You should end up with the menu at the right.

Click OK.


You will get the menu at the right.

Repeat for the "ALL Non-Dimmable" lights.


Enable Follow-me Music and TV

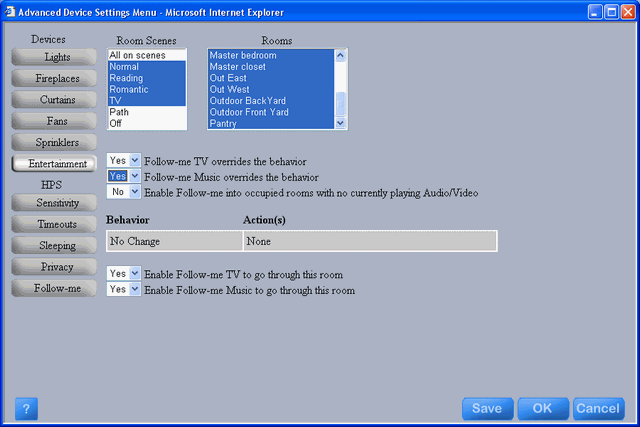
This house has a great distributed music and TV system. you will want to enable Follow-me Music and TV throughout the house. However, initially, do so only for Normal, Reading, Romantic, and TV scenes. That is, do not enable it for Path scene when others may be sleeping (Scene Continuation does not exist for Off scene).

In the Browser GUI, open the Advanced Device Settings Menu and select the Entertainment layer.

Click on "Normal" scene and shift click on "TV" scene.

Scroll to the top of the rooms and click on the Back Hallway. Scroll to the bottom of the rooms and click on the Pantry.

You will have the menu at the right.

Click "Save"


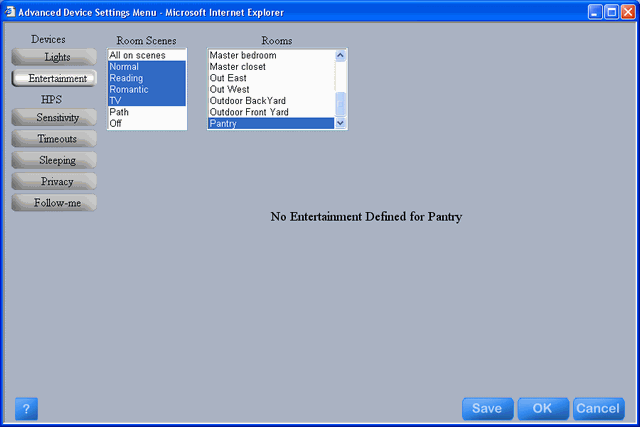
Above, we selected a number of rooms that do not have AV entertainment equipment in them. If you select the Pantry room alone, you will see we didn't actually change anything in rooms like that.


Now the music and TV will turn on when the room becomes occupied (if the previous room had them on), but we had better turn them back off when the room becomes unoccupied.

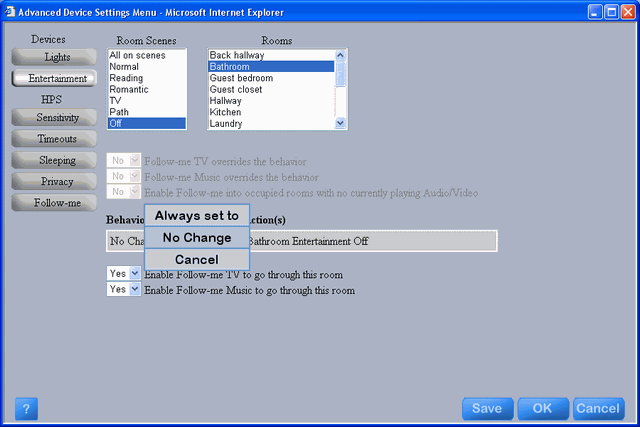
In trying to be as helpful as it can without doing something that is not intuitive, Ubiquity, by default, has set up the "Off" scene to have the "Action(s)" of turning off the entertainment in the room, but has set up the "Behavior" of "No Change". This means that by default the behavior of music and TV will not turn them off when the room becomes unoccupied, but that with a simple change we make them turn off.

Click on the "Off" scene.

Select the Bathroom.

Note that the Follow-me options are grayed out in "Off" scene because scene continuation does not happen in "Off" scene.

Note also that the "Action(s)" box has an entry of "Bathroom Entertainment Off".

Click on "No Change". You will get the menu at the right.

Click on "Always set to".

Click Save.

Do the same for the other rooms that have speakers and TVs.

Click OK to complete setting up follow-me music and TV.


Set up Sleeping Mode in the Bedrooms

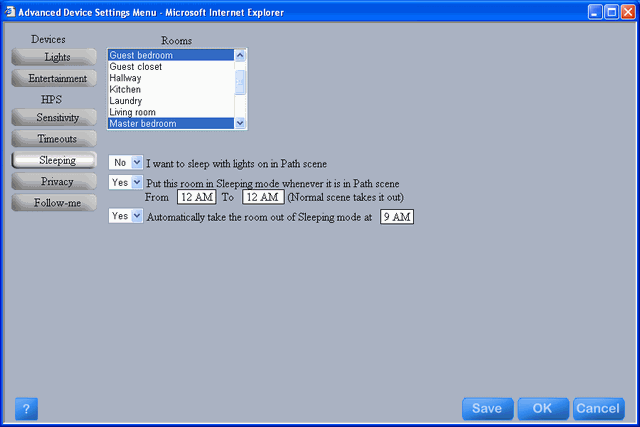
Set up the two bedrooms so that putting the room into Path scene automatically puts the room into Sleeping mode.

That way when you want to go to bed, just the room in "Path" scene first to enable Sleeping mode. With Sleeping mode enabled, the lights will turn off in "Path" scene after the "Path scene Room Timeout".

And the lights will stay off in both "Path" scene and "Off" scene.

Open the Advanced Device Settings Menu.

Click on the "Guest bedroom".

Ctrl click on the "Master bedroom".

Change the second 2 dropdown boxes to "Yes".

Change the time for automatically taking the room out of Sleeping mode to something more reasonable like 9AM.

Click OK.


Create Scene Discontinuations for Path Scene

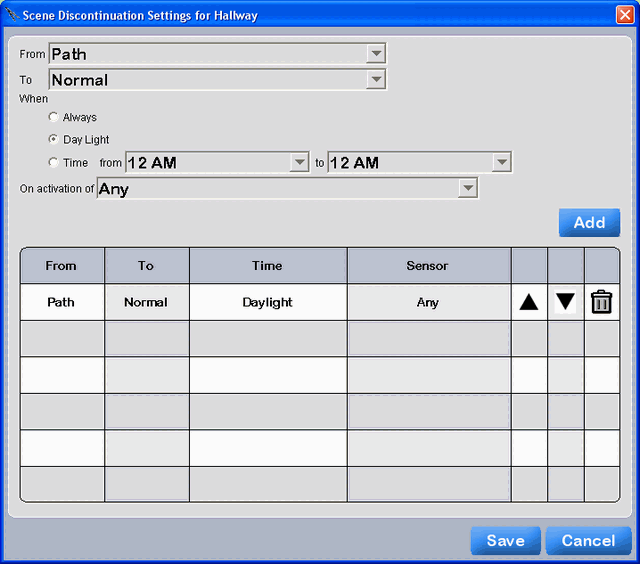
If one of the bedrooms is in Sleeping mode during the day, it will cause an automatic Scene Discontinuation to Path mode for that room. That may be OK, but we would like to prevent Path scene from spreading throughout the house during the day. Therefore, create a Scene Discontinuation for the Hallway from Path to Normal during daylight hours.

Recall that Scene Discontinuations are created in the Design Module on the HPS Discontinuation layer.


Create the Scene Discontinuation for the Hallway from Path to Normal during daylight hours.

Be sure to click Add to make it appear below.

Just to be sure, you may want to set up a Scene Discontinuation from Path to Normal in the Kitchen, Living room, and Bathroom, also.


Disable Automation in the Bedrooms

Handsfree lighting is very intuitive in most rooms of a home - as you walk into a room, the lights turn on when they are needed and off when they are not.

However, in the bedroom, it is a little less intuitive. It is not bad - all the homeowner has to do is to set the room to "Path" scene before going to bed. After that it will just work. Unfortunately, some people prefer to go directly from "Normal" scene to "Off" scene which does not work (the lights will turn back on in a few seconds).

Therefore, you may want to disable automation in the bedrooms until everyone in the home feels comfortable with handsfree automation in the rest of the house.

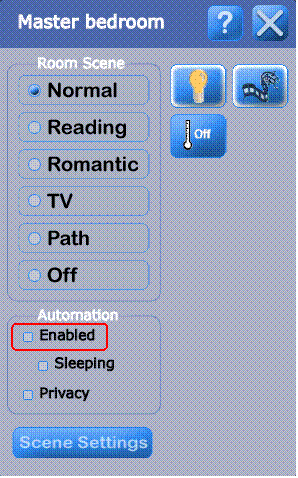
Open the Room Menu in the Master bedroom and uncheck the "Enabled" checkbox under "Automation".

Do the same for the Guest bedroom.


Disable Automation for HVAC

When the system first starts up, it is best to get people used to handsfree automation with just the lights and maybe the music. Therefore, start by disabling handsfree automation for the HVAC. The easiest way to do this is to create a Group of Events named "HVAC Disable Automation".

Click outside all rooms to get the House menu.

Click "Events".

Click "All Groups".

Click "Add"

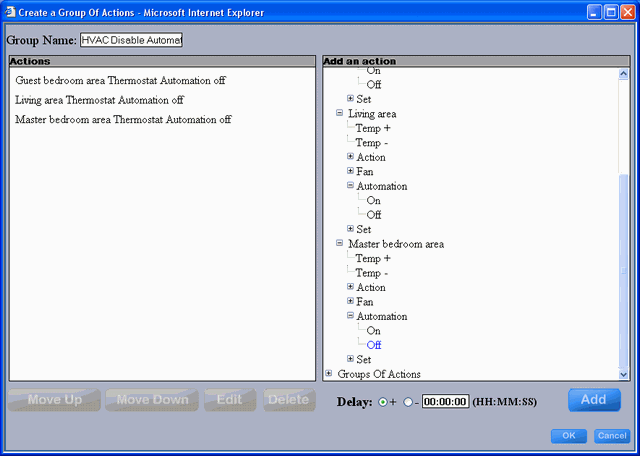
Enter the "Group Name" at the top left.

Expand "temperature", "Living area", "Automation"

Click Off and click Add.

Do the same for the other HVAC zones.

After you have added the 3 actions, click OK.


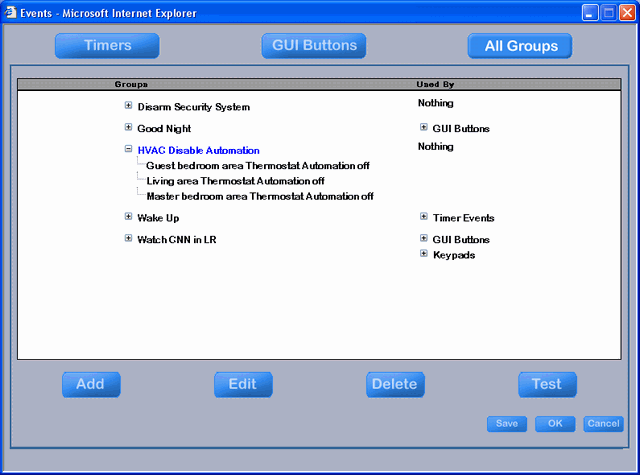
Click on the "HVAC Disable Automation" Group of Actions to highlight it.

Before clicking the "Test" button, you may want to check that Automation is presently enabled.

Recall you do this from the "HVAC Settings" layer of the Design Module.


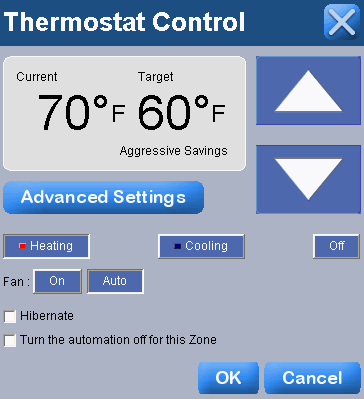
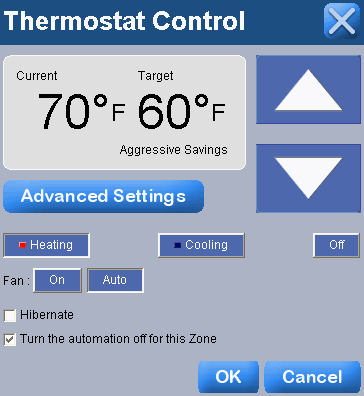
Click on the Kitchen to get the menu at the right.

Note that the bottom checkbox labeled "Turn the automation off for this Zone" is not checked.


Return to the Events menu with All Groups selected.

Click the "Test" button.


Return the "HVAC Settings" layer of the Design Module and click in the Kitchen to confirm that the checkbox is now checked.

After everyone in the home is comfortable with handsfree lighting and follow-me music, then turn HVAC automation back on.