Advanced Device Settings Menu
The Advanced Device Settings Menu allows you to change the scene settings
and behavior for multiple rooms at the same time.
Overview
Open
the Advanced Devices Settings menu
|

|
|
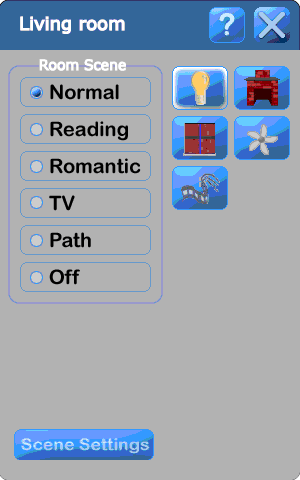
If you click the "Scene Settings"
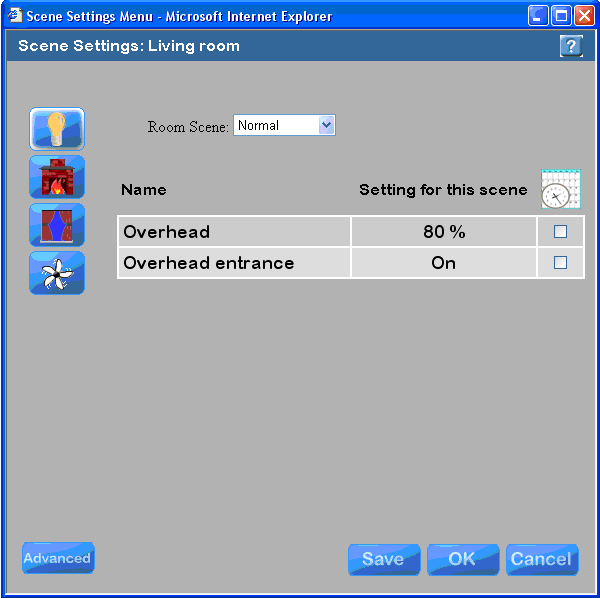
button of the Room menu, you will get the Scene Settings menu like the
one at the right.
Now click the "Advanced" button
at the bottom of the menu.
|

|
This will take you to the Advanced Device Settings Menu. Now, let's
analyze the Advanced Device Settings Menu using the example below.

Devices
In the example above, on the left side of the menu you see the list
of devices in the room that is selected. If more than one room is selected
(see below), then there will be an icon for all types of devices that
exist in any of the selected rooms. The "Lights" icon is presently
selected - indicating that we are working with Lights as a device type.
Room Scenes
The second column at the top is "Room Scenes". Normally, you
would just select one room scene. However, you can click on "All
on scenes" to select all Room scenes other than the "Off"
Room scene or you can click and "Shift click" or click and "Ctrl
click" to select multiple Room scenes. When you select multiple Room
scenes, usually, the value under the heading "Setting" will
change to "---" (see below) indicating that different scenes
have different settings and it is not possible to show one setting that
is valid for all the selected Room scenes. At this point, if you change
the "---" to a setting (by clicking on it), then all Room scenes
will go to that new setting. The same applies for "Behavior",
"Delay" and "Ramp".
Rooms
The third column at the top is "Rooms". You can select one
or more rooms to modify by clicking and "Shift clicking" or
clicking and "Ctrl clicking" the list of rooms. Just like when
you select multiple room scenes, if you select multiple rooms, usually,
the value under the heading "Setting" will change to "---"
(see below) indicating that different scenes have different settings and
it is not possible to show one setting that is valid for all the selected
Rooms.
Name
On the lower half of the menu you have information about the devices
that exist in the selected room or rooms starting with the Name of the
device. If multiple rooms are selected the name of the device will change
to "All" (note that lights are a special case in that there
will be two lines: one for "All Dimmable Lights" and one for
"All Non-Dimmable Lights" as shown below).
Behavior
For houses that only have traditional automation (i.e., they do not
have handsfree automation) there are only two options for the behavior
of the device: "Always set to" and "No Change". If
the behavior of the device: "Always set to", then the device
will always go the setting whenever the room is in the selected Room scene.
If the behavior of the device is "No Change", then the setting
does not matter because the device will not change state when the room
goes to the selected Room scene. For handsfree automation there are additional
behaviors (see below).
Setting
The setting is the On/Off state or dimming level that the device will
go to in the selected Room scene. Note that the setting does not have
any meaning if the "Behavior" is "No Change", as described
above.
Delay
Delay is only available for Lights. It is the time delay in milliseconds
from the time at which the room goes to the selected Room scene until
the light is told to turn on. If a room has both dimmable and non-dimmable
lights, one approach is to set the Ramp time for the dimmable lights to
1 second and set the Delay time of the non-dimmable lights to 1 second.
That way, when the room goes to the selected room scene, the dimmable
lights will ramp up for one second and then the non-dimmable lights will
turn on.
Ramp
Ramp is only available for dimmable Lights. It is the time in milliseconds
it will take to ramp up a dimmable light from 0% to 100%. Note that if
the light is presently "On" at a level of 25% and it is commanded
to go to 75% (a change of 50% of the total possible change), then it will
only take one half the ramp time to get there. The recommended settings
for dimmable lights are: Ramp = 1000ms.
Part of a Timer Event
The icon of a calendar and a clock is the heading that represents whether
or not the device is part of a timer event. If it is, then you will see
a check mark in this column, and you can click on that check mark to get
some information about it. If it is not part of a timer event, then you
will not see the check mark and clicking on it will not do anything. Note
that you can click on the icon of the calendar and clock at any time to
be taken to the Timer Event menu.
Quick Review

Example - Multiple
Room Scenes Selected
Multiple Room scenes selected: note
that the "Setting" for the "Overhead" light is "---",
indicating that different scenes have different values. If you change
the value of this field, it will change the Setting for this device for
all Room scenes. Also note that the "Setting" for the "Overhead
entrance" light is "On" indicating that this light will
be On for all of these Room scenes. In addition, note that the "Overhead"
light is associated with a Timer Event (see the check mark in the right
hand column).

Example - Multiple Rooms
Selected
Multiple rooms selected: Note that these rooms were selected by clicking
on the first room and then holding down the "Ctrl" key while
clicking on the additional rooms. Note also that the names of the devices
have disappeared and were replaced by "ALL Dimmable" and "ALL
Non-Dimmable" so that you can set the Delay and Ramp times of these
two types of lights separately.

Example - Behavior Pop up
Menu
Device selected and behavior pop up: Note that when you click on a device,
it becomes highlighted and an additional part of the menu becomes visible
that explains the behavior of the device in more detail. Note, also, that
the pop up menu appears when you click on the behavior of a device.

Example - Entertainment
Behavior
Entertainment: The default "Behavior" for entertainment is
"No Change". However, you can set this to "Always set to"
and then select an action to perform such as watching the PVR. That way,
as you walk in the room, you can press the keypad button labeled "TV
scene" and by the time you reach your seat, you will be watching
live TV on your PVR.

|
To set up the system to watch the PVR when
the room goes into the TV scene:
Click in the box under
the heading "Behavior", and click on "Always set to"
from the pop up display (not shown). Click in the box under
the heading "Action" (usually on the word "None")
and the Action Tree will pop up in another window. Select the action you
would like to happen. This includes selecting a group of actions. In our
example at the right, the "rooms" line item was expanded to
give us access to the entertainment menu of the Living room. Then expand
the "Watch" line item and select "Living room PVR on Living
room TV & Living room Speaker". Click OK and you will
get the menu below. |

|
Entertainment menu after changing the Behavior and the Action.

Example - Handsfree
Automation Behavior
Handsfree automation: note that rooms with handsfree automation have
some additional options that can be selected. For more information on
these options click on Sensor
Sensitivity, Room Timeouts,
Sleeping, Privacy,
and Follow-me.

From / To behavior: With handsfree automation, an additional behavior
becomes available for Lights named "From / To". When the room
becomes occupied, the lights will turn on to the selected setting during
some period of the day, but not turn on during other periods of the day.
Typically, the From / To times are set relative to sunset and sunrise
as shown below. The time can be edited by clicking the "Edit"
button. You will get the menu below.

If you click the Edit button above, you will get this pop up menu below
to set the time period during which the lights will turn on. On the menu
below:
Select whether you
want the time to be relative to the "Time of day" or relative
to the sun ("Astronomical").
Click inside the
white box on the time to highlight it in orange. Then use the keypad to
enter a time. Click "Enter" to make the
time take affect. If you do not click "Enter" the time
you just entered will go away.
Click "Before"
or "After" and then click "Sunrise" or "Sunset".
Click OK.

The setting for "At any other time" does not really matter.
If the room is unoccupied, the lights are off. So, when the room becomes
occupied at a time other than the specified time at which they should
turn on, they will already be off and, therefore, "Set it to off"
and "No change" have the same result - the lights are off.
However, if for some reason, you wanted the lights on when the room
was unoccupied such that the lights in the "Off Room scene"
were set to some On value , then "Set it to off" would turn
the lights off when the room became occupied during the "At any other
time", so you should probably select "No change" in this
fairly rare case.


