Add a Shub
Select the "Add Sensors & Shubs" layer of the Design Module.

Click on the location at which you want to add the Shub.

You will get the "Add HPS Sensor" menu.

If you click the "Shub" radio button in the upper right of the menu, the menu will change to look like the menu at the right.
It is usually best to select the defaults, but you can change the name, if you like. If you do change the name, let the last character be a number so that the number will be displayed on the floor plan as shown below.
Click OK.

After clicking OK, a square box with the number of the Shub will be added to the floor plan of the Design Module.

Add Exterior Entry/Exit Sensors
Add Entry/Exit sensors at the exterior perimeter of the Home Positioning System. Usually, this means the exterior doors, but if your HPS system extends outside, then it can mean to the Driveway entrance.
In these cases the "2nd Room" should be the same as the "1st Room" and both should be rooms that are covered by the Home Positioning System.
For example, click just on and just inside the front door.

You will get the menu at the right.
If the menu you get does not have the "Entry/Exit" option, then close the menu and click closer to the door.
If the menu you get has the "1st Room" as the room outside of the HPS area, then close the menu and click again just inside the door.

Use the dropdown for the "2nd Room" to select the same room as the "1st Room". In our example, both the "1st Room" and the "2nd Room" are the "Living room".
Select the Acuity 47 for the "Type". We will use this dropdown in the next section to select a contact for the door.
Clicking on the location of the sensor is an auto naming feature and also indicates where the sensor should be installed.
The Name is relative to both the "1st Room" and the "2nd Room" and is usually unique with the default location because usually there is only one door that connects the two rooms. However, if two doors connect the same two rooms, you will have to modify the name of one of them.
Click "Controlled by (and wired to)" and the sensor will be wired to the first available port on the first available Shub.
The wire ID can be ignored for now.
Click "Add".

After adding the Entry/Exit sensor to the Front door, you will get a black dot on the floor plan where the sensor is located. To change any of the parameters of the sensor click on the dot.

Add contacts to the exterior doors
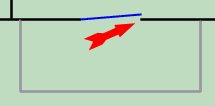
Click on the door you would like to add the contact to.

If this door is at the exterior perimeter of the Home Positioning System, then select the same room for the "2nd Room" as is listed for the "1st Room" and make sure that both are rooms that are covered by the Home Positioning System.
Use the "Type" dropdown to select "NC Contact".
The Ubiquity software will auto increment to wiring it to the next available port on the Shub.

Add Entry/Exit sensors between rooms
Click on a door or invisible wall that separates two rooms.
You will get the menu at the right.
If the menu you get does not have the "Entry/Exit" option, then click closer to the door or invisible wall.
Usually, all of the defaults are correct, so just click "Add".

Add Area sensors
Click in the location in the room where you would like to add an Area sensor.
You will get the menu at the right.
Click on the Location and it will auto name the sensor.
Usually the rest of the defaults are correct, so just click "Add".

View Sensors and Text menu
anywhere in the window of the floor plan to get the View Sensors and Text menu.
It is a good idea to check "All Sensors" so that they show up on the floor plan. However, while working with the "Sensor Name" and "Sensor's device hub" you may want to uncheck some of the Shubs so you can see the text more easily.
With the text not displayed, the floor plan may look like the picture at the right where the black dots represent Entry/Exit sensors and the larger white boxes represent Area sensors.


Viewing the sensor name is not very useful for Entry/Exit sensors because their full name includes the name of the rooms they interconnect. However, seeing the names of the Area sensors can be very useful.


The two most important uses of this menu are:
To find the Shub that the sensor is connected to.
To find the sensor that the Shub port is connected to.
Often, you will want to uncheck one or more of the Shubs while looking for the one you want. Remember to re-check it after finding what you want.
You must click the red and white "X" in the upper right hand corner of this menu to put it away. Clicking the "X" the changes you have made.
You cannot make changes to the Design Module with this menu open. If you find that you cannot make changes to the Design Module, it may be because this menu is still open but is hidden under another application. "Alt Tab" to the Design Module application and you will see this menu if it is the culprit.


That is all there is to do
Ubiquity will take care of the rest. Walk into the room and the room will respond to your presence.