A Group of Actions (sometimes referred to as a macro) is a set of multiple actions that can occur as a result of a Timer Event, a GUI Button being pushed, and/or a Keypad button being pushed. The actions within the Group of Actions can occur at the same time or can be delayed with respect to one another.
A Group of Actions can be Played, Paused, or Stopped. When adding a Group of Actions to a Timer Event, GUI Button or Keypad, . If the Group of Actions contains individual actions that are delayed from the start of the Group of Actions (see Delay below), then it is possible to create another event which can "Pause" or "Stop" the Group of Actions. If you then "Play" a Group of actions that was previously paused, it will continue from where it left off. However, if you "Play" a Group of actions that was previously stopped, it will start over from the beginning.
Note that you can create Toggle/Scroll Groups that contain Groups of Actions (including both Playing and Pausing or Playing and Stopping the same Group of Actions).
Groups of Actions cannot be created in the Keypads layer of Design Module. They must be created in the Events menu. However, having been created in the Events menu, they can be assigned to keypad buttons in the Keypads layer of the Design Module. that if you are working off line (i.e., the border of the Design Module is red) then you need to make sure the Browser GUI is running in the simulator, too, because you will not see Groups of Actions created by the Browser GUI that is connected to a Domain Controller.
Click on the topic you would like to review.
Create a new Group of Actions
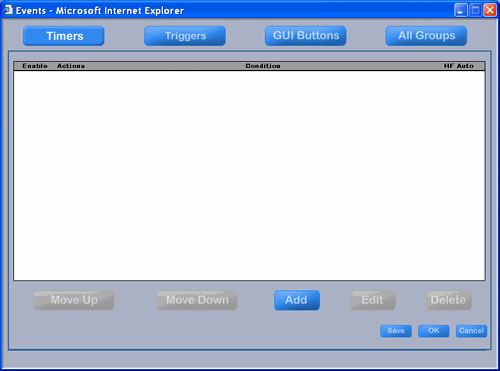
The easiest way to create a new group of actions is from the Events menu with the All Groups button active - just click the "Add" button at the bottom of the menu.
Proceed to the Group of Actions menu.
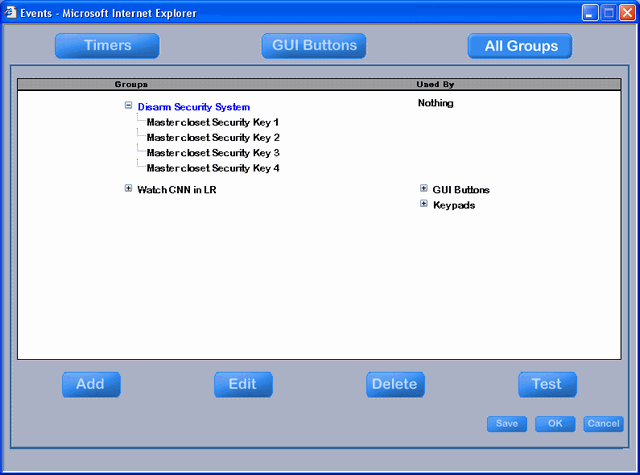
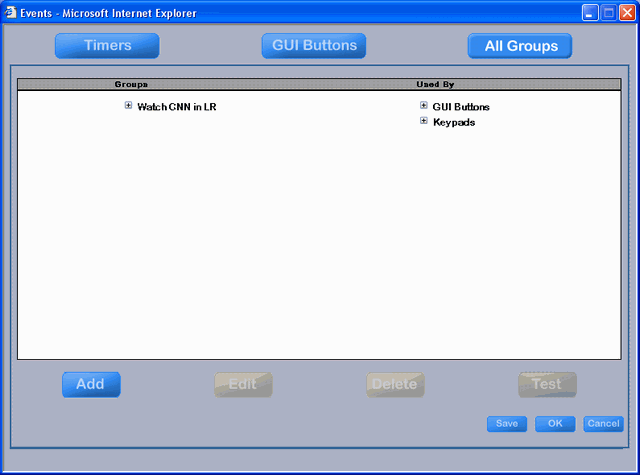
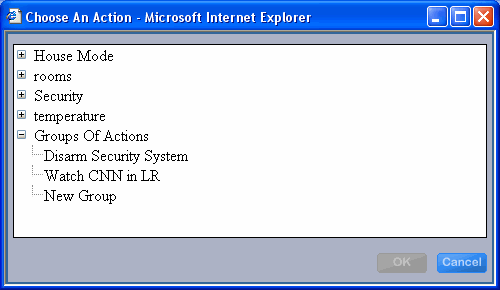
In the example at the right, one 'Group of Actions' has already been created. It is named "Watch CNN in LR" and it is used by one or more GUI Buttons and Keypad buttons.
You can also create a new Group of Actions from the Action Tree when creating a Timer Event or GUI Button (but not while assigning keypad buttons in the Design Module).
For example, while creating a new Timer event, click "Add" to bring up the Action Tree.
After clicking "Add" on the menu above, you will get the Action Tree.
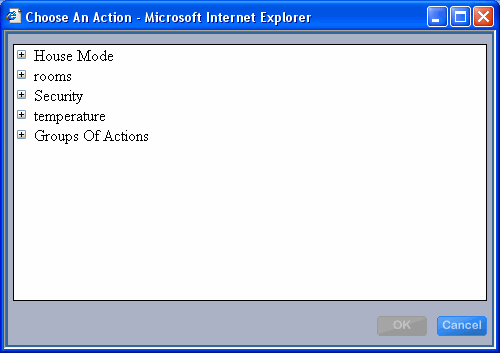
Expand the line named "Groups Of Actions" by clicking on the "+" sign on the left of the line.
This will show the list of existing groups (which now includes both the "Disarm Security System" Group of Actions and the "Watch CNN in LR" Group of Actions). At the bottom of the list is "New Group".
Click on "New Group".
Proceed to the Group of Actions menu.
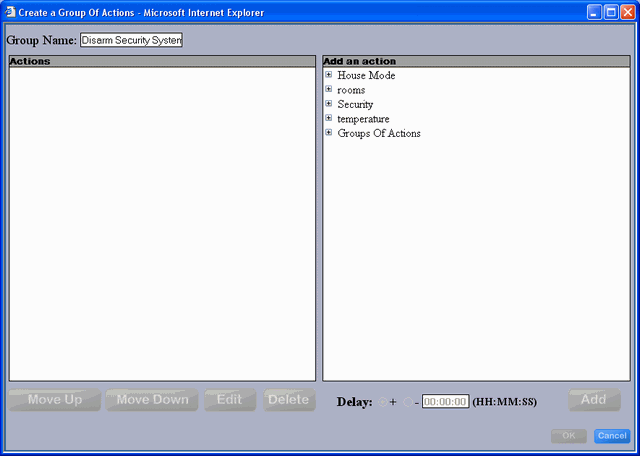
Group of Actions menu
You can get to the Group of Actions menu from either path above.
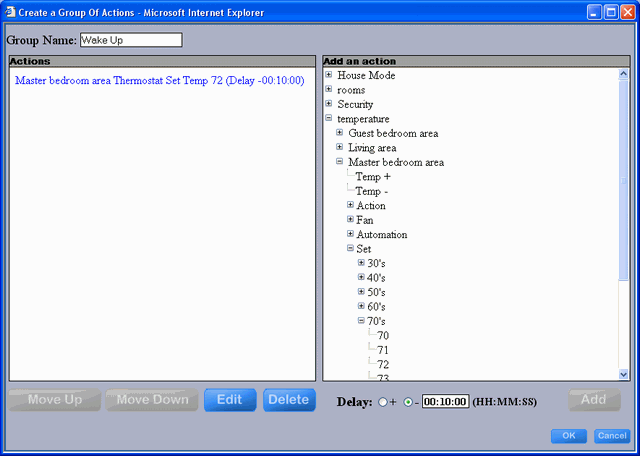
At the top left of the menu you must enter the name of the Group of Actions. In this example, the name is "Disarm Security System".
The left hand side of the menu with the heading of "Actions" shows the list of actions that have been added to the Group of Actions and the time they should execute relative to the beginning of the event (in the example at the right, no actions have been added yet).
The right hand side of the menu with the heading of "Add as action" is the Action Tree and it contains all of the devices in the house that can be acted on. To create a Group of Actions, expand the list to the desired action, click on the desired action (it will turn blue and the "Add" button at the bottom right of the menu will become available, too), click on the "Add" button. The action will then appear in the left hand side.
At the bottom are a number of buttons that are not available at this point in time and are therefore grayed out.
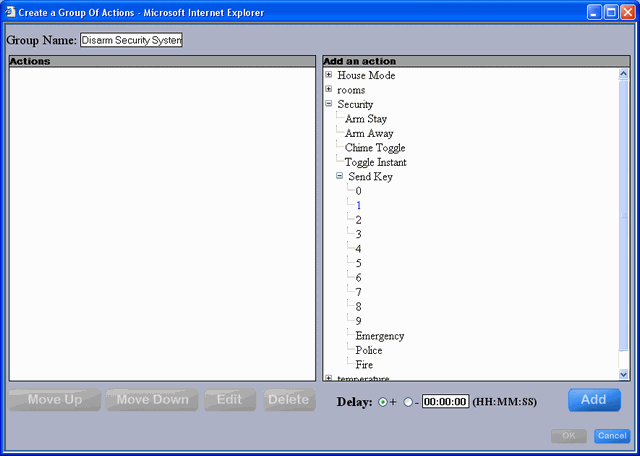
In the example at the right, the actions of the Security system has been expanded and the "1" key has been selected.
Note that the "1" is now blue and the "Add" button is now available.
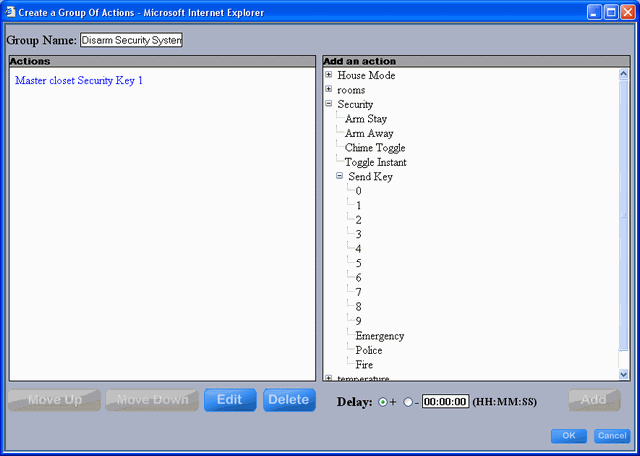
After clicking "Add" in the menu above, the 1st action has been added to the Group of Actions.
Move Up, Move Down, Edit, Delete
You would continue adding actions from the Action Tree on the right to the Group of Actions on the left by selecting the action on the right and clicking the "Add" button.
Note that each action is added immediately below the previous one.
Also note that you can select one of the actions on the left by clicking on it and then move it up or down with the "Move Up" and "Move Down" buttons at the bottom left of the menu. You can also edit or delete a selected action of the Group of Actions.
If the actions do not have a delay associated with them, then the actions are executed in the order in which they appear from top to bottom.

Delay
You can also assign a relative time delay to each action in the group of actions. The "Delay" can be either negative or positive. A negative delay is indicated with a "-" minus sign and means that the action will occur some period of time before the Group of Actions is scheduled to occur. This only makes sense for a Timer Event. For GUI button events and Keypad events, actions with negative time delays will execute immediately.
In the example at the right, the thermostat temperature is being set to 72 degrees in the Master bedroom area 10 minutes before the "Wake Up" Group of Actions is scheduled to occur. For example, if someone wants to wake up at 7am, then at 6:50 the temperature will be set to 72 degrees.
More typically, the delay is a positive number and that action will be delayed after the start of the Group of Actions occurs (note that the delays are relative to the start of the Group of actions - not to the previous action in the group).
All delays default to "+" 0 time when an action is added to the left hand side of the menu. Create a delay by selecting the action you want to delay on the left hand side of the menu and clicking on the text box below the right hand side (in the example, the box has "00:10:00" in it). A keypad will pop up enabling you to enter the hours, minutes, and seconds to delay the selected action. After entering the time, click the "Enter" button on the keypad to save your new delay time. You can then click the "-" minus sign if you want a negative delay.
When you are finished creating your Group of Actions, click OK to return to the Events menu. Note that the new group has NOT been saved yet.
From there, you can expand the list of actions by clicking on the "+" sign of the group's name.
Click Save or OK to save the group you created.