Add a GUI Button
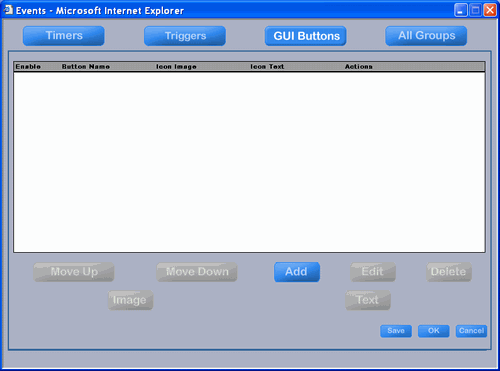
After opening the Events menu, click on the "GUI Button" button at the top middle of the menu to make it the active one.
You will get something like the menu at the right.
Click the "Add" button at the bottom middle of the menu.
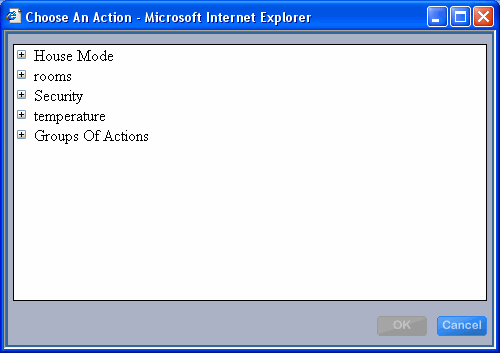
You will get the "Choose an Action" menu.
Select an action or a Group of Actions and click OK (you can also create a new Group of Actions).
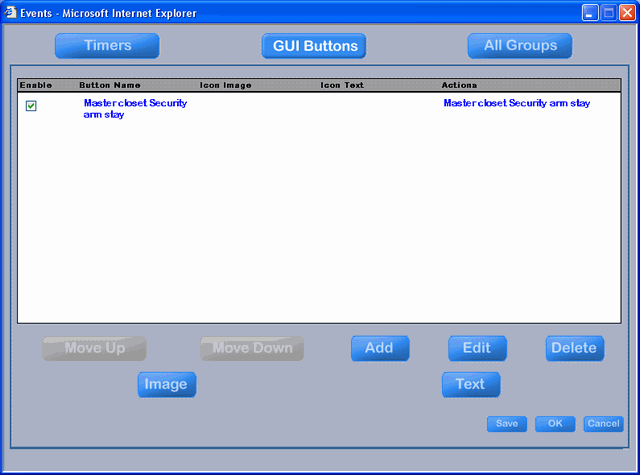
You will return to the Events menu with the GUI Button active.
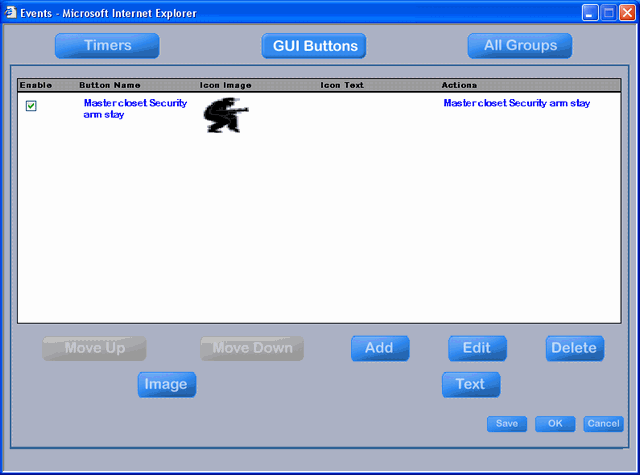
The single action (as shown at the right) or the name of the Group of Actions will appear under the "Button Name" column.
The "Icon Image" and "Icon Text" columns will be empty for the new GUI Button.
The "Actions" column will list the action of a single action event or the list of actions for a Group of Actions.
The "Move Up" and "Move Down" buttons become available when there are more than one Buttons defined. The order in which the GUI Buttons appear on the frame of the Browser GUI matches the order of the names as they appear on this menu. Use the "Move Up" and "Move Down" buttons to change the order.
The "Add" button will bring up the Action Tree to add another GUI Button.
The "Edit" button will let you change the action of the selected GUI Button.
The "Delete" button will delete the selected GUI Button.
You can add an "Image" to the GUI Button or add "Text" instead.
Add an Image to the GUI Button
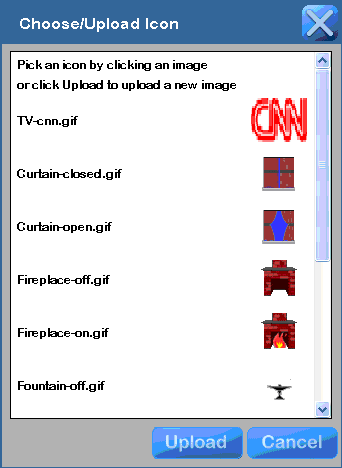
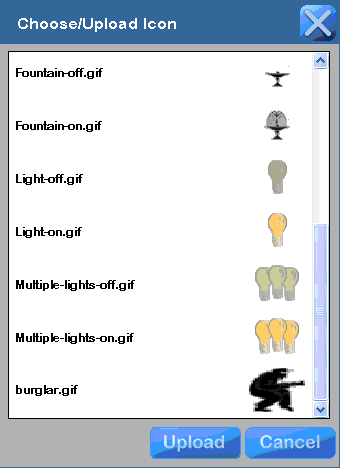
Click on the "Image" button above to bring up the Choose/Upload Icon menu. In it, you will see a short list of images you can select. If one of these is sufficient, click on it and you will return to the Events menu with it as the image for your new GUI Button.
If you do not see an image you like, click the "Upload" button.
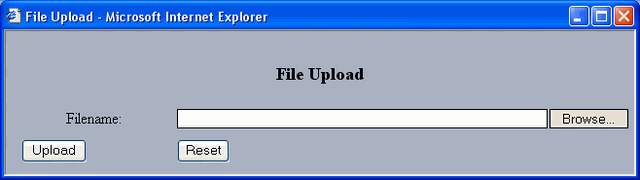
After clicking the "Upload" button in the menu above, you will get a menu like the one at the right.
Click the "Browse" button to browse for your file or type in the name.
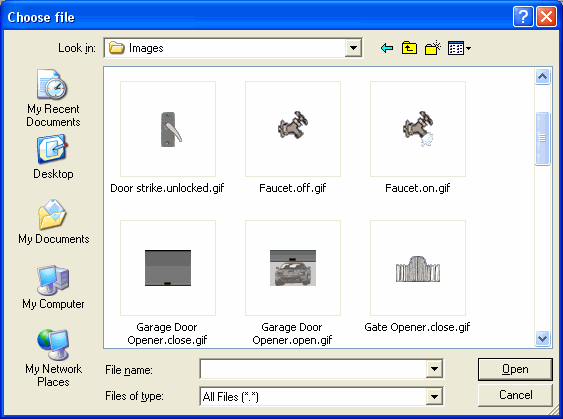
A few interesting places to browse are:
C:\Program Files\Destiny Networks\Ubiquity\Ubiquity2.4\devices \CustomDevices\Images\
C:\Program Files\Destiny Networks\Ubiquity\Ubiquity2.4\webserver\ webapps\ROOT\Images\RoomMenu
OR you can make your own image
Click on a file.
Click "Open".
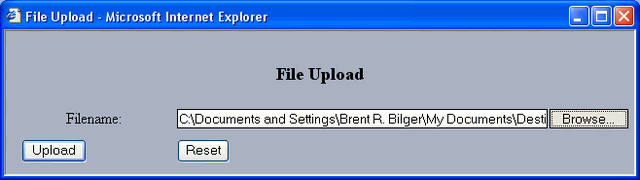
The path to the file will appear in the long text box to the right of "Filename".
If you are not happy with that one, click "Reset" and then click "Browse" again.
If you change your mind and want to cancel, click the white "X" in the red box at the top right of the menu.
When you have the one you want, click "Upload".
The image will be added to the bottom of the menu. Scroll down to see it.
Click on the image.
After clicking on the icon above, it will immediately be added to your new GUI Button.
Click OK.
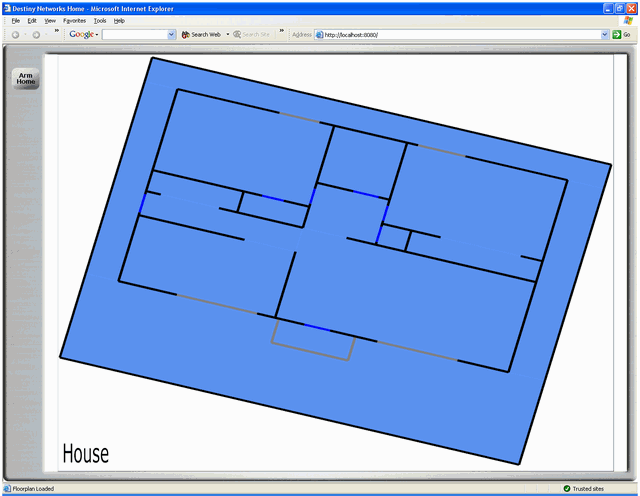
About 5 seconds after clicking OK, the GUI Button will appear on the left hand frame of the Browser GUI.
That is all there is to do.
If your browser was connected to a Domain Controller (instead of in simulation mode), then clicking on the GUI Button will arm the security system.

Add Text to the GUI Button
Alternatively, you may prefer to have a GUI Button with text on it instead of an image.
If so, then do the following.
Select the GUI Button's name by clicking on it (it will turn blue).
Click on the "Text" button in the lower right of the Events menu with the GUI Button active.
.Click on the "Text" button.
You will get the menu at the right.
Add a name like "Arm Home".
Click OK.
![]()
You will get the menu at the right.
Click OK.
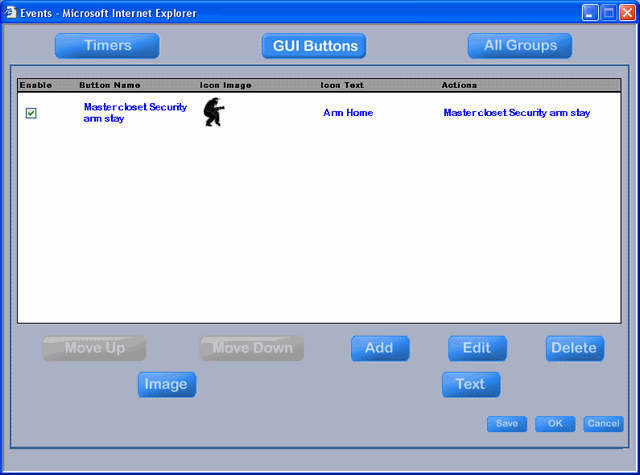
And the GUI Button changes from an image to text.