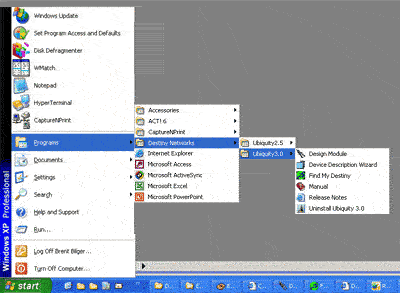
Run the Design Module
Click "Start", "Programs", "Destiny Networks", "Ubiquity 3.1", "Design Module"
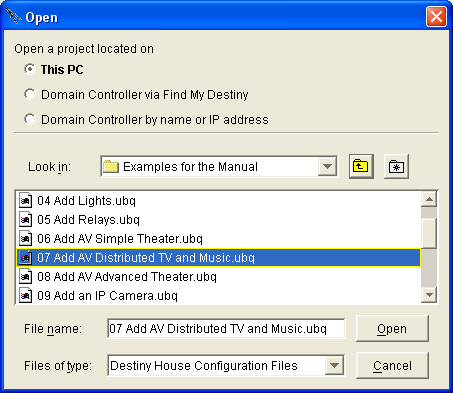
Open the Project: 07 Add AV Distributed TV and Music.ubq
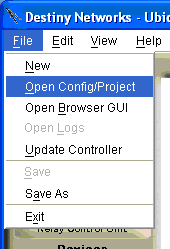
To open the project, select "File", "Open Config/Project"
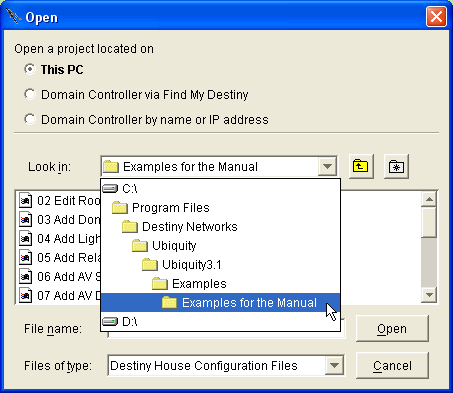
You will get the following menu.
Navigate to "C:\Program Files\Destiny Networks \Ubiquity \Ubiquity3.1 \Examples \Examples for the Manual"
Click the "Open" button
You will get the following menu.
Click on "07 Add AV Distributed TV and Music.ubq".
The project will open. Go to the next step of adding the lighting system.
Create a Distributed TV and Music system
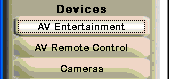
Select the AV Entertainment layer of the Design Module.
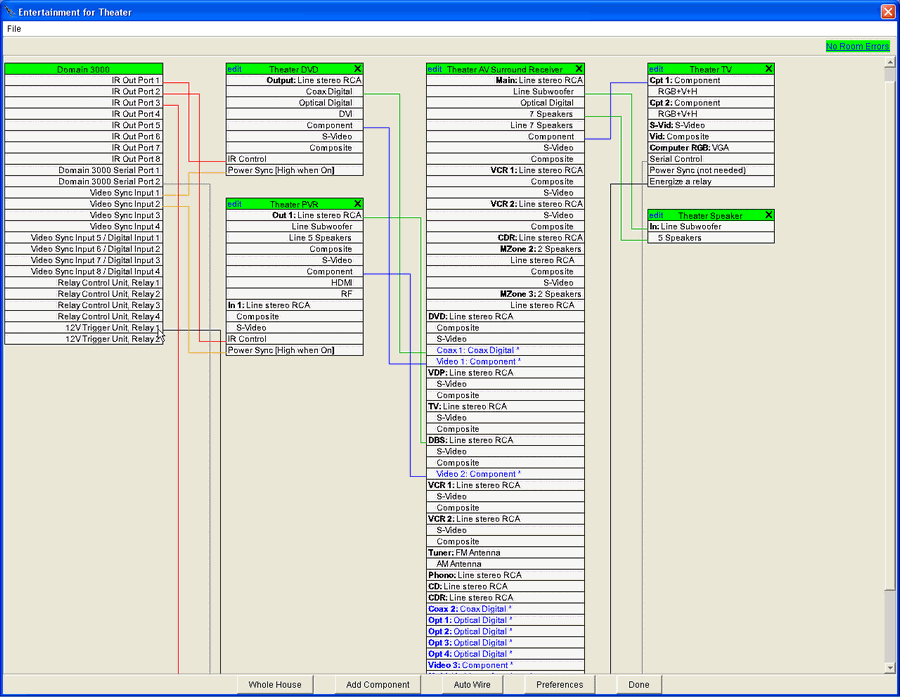
Click anywhere in the room in which you plan to add AV equipment (AV Equipment is location independent).
![]()
You will get the schematic that we ended up with at the end of the previous example (as shown below).
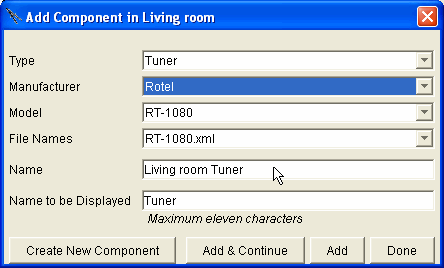
Add the Rotel RT1080 AM/FM tuner
Click the "Add Component" button in the menu above
For "Type" use the dropdown menu to select "Tuner" (or press the "T" key with this field highlighted).
For "Manufacturer" select "Rotel".
For "Model" select "RT-1080".
You can use the defaults for the rest.
Click "Add"
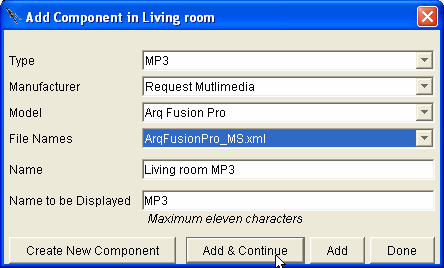
Add the Request Multimedia Arq Fusion Pro MP3 player
For "Type" use the dropdown menu to select "MP3" (or press the "M" key with this field highlighted).
For "Manufacturer" select "Request Multimedia".
For "Model" select "Arq Fusion Pro".
For "File" select "ArqFusionPro_MS.xml"
You can use the default for the name.
Click "Add"
Add the Xantech ZPR68-10
For "Type" use the dropdown menu to select "Switch" (or press the "S" key 4 times with this field highlighted).
For "Manufacturer" select "Xantech".
For "Model" select "ZPR6810".
Select the "File Name" "ZPR 6810 with 6 outputs"
You can use the defaults for the rest
Click "Add"
Save your work.

Add the 4 Sharp Aquos LC-15E1U 15" LCD TVs
Click anywhere in the Guest bedroom to get the menu of the list of entertainment equipment in the Guest bedroom.
You will get the Schematic of the AV components in the Guest bedroom. The list will be empty (other than the Domain 3000).
Click the "Add Component" button.
![]()
For "Type" use the dropdown menu to select "TV" (or press the "T" key with this field highlighted).
For "Manufacturer" select "Sharp".
For "Model" select "Aquos LC-13E1U AV-2 in".
Click "Add"
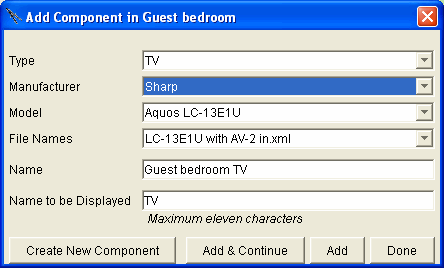
You have added the TV to the Guest bedroom.
Click Close.
Now repeat the steps above for "adding a TV to a room" for the Bathroom, Master bedroom, and Kitchen.
That is,
Click in the room to bring up the Schematic view of the AV components in that room.
Click "Add Component".
Select the Sharp TV from the dropdown boxes.
Click "Add".
Click "Done".
for each room.
View the Whole House
Click in the Family room to bring up the Schematic view.
Click the button labeled "Whole House" at the bottom left of the Schematic.
(Alternatively, on the AV Entertainment layer of the Design Module, you could have clicked outside of all rooms.)
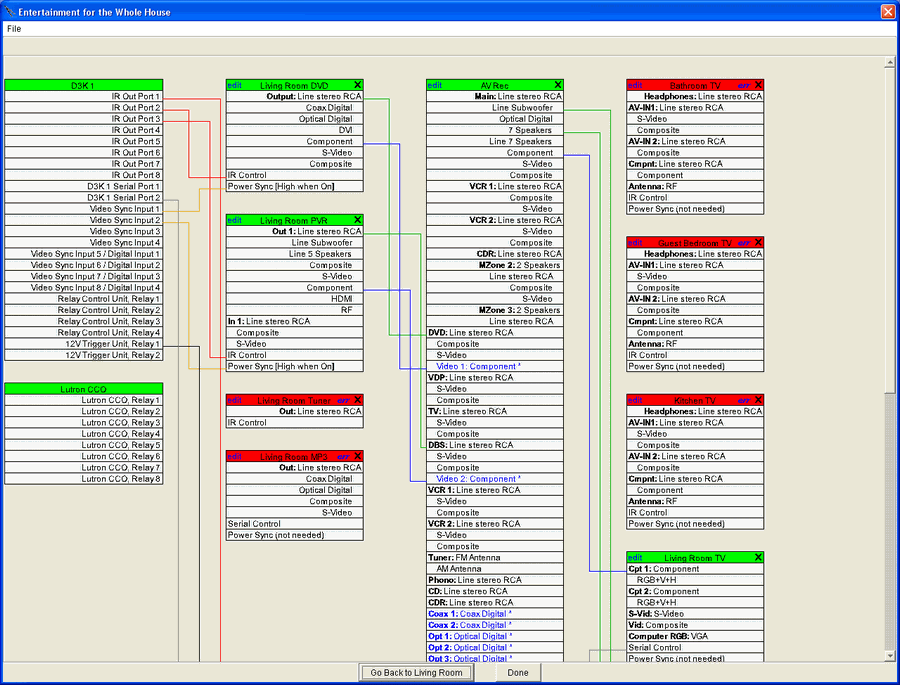
You will get the Schematic below where the AV switch is just below the bottom of the Schematic.
Wire them together in software just like they are physically wired
Connect the following wires:
Tuner
Out: Line stereo RCA to Living room Xantech In1: Line stereo RCA.
IR control to IR port 4.
MP3 player
Out: Composite to Living room Xantech In2: Composite.
Out: Line stereo RCA to Living room Xantech In2: Line stereo RCA.
Serial control to ???
We are out of serial ports on the Domain 3000. Therefore, we need to add more serial ports to the project.
Add a Lantronix USD 200
Select the "More Ports" layer.
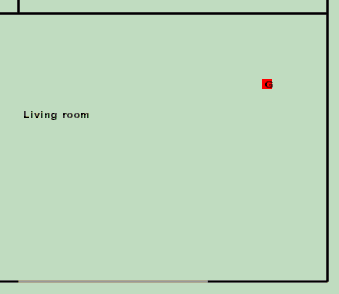
Click in the location in the Living room where you would like to add the additional ports.

You will get the menu at the right.
For the "Type" select "Lantronix".
The menu will change to the one below.
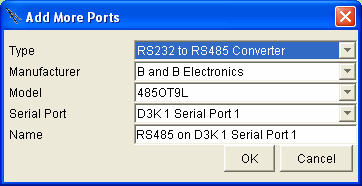
You will get the following menu.
Choose the UDS 200 to get 2 serial ports.
Enter a name something like "AV Equipment".
You must enter the IP address. Even if you do not know the final IP address, you must enter an IP address at this time.
Leave the TCP Port offset at 10001.
Click OK.

You will get a red dot where the Lantronix was added.
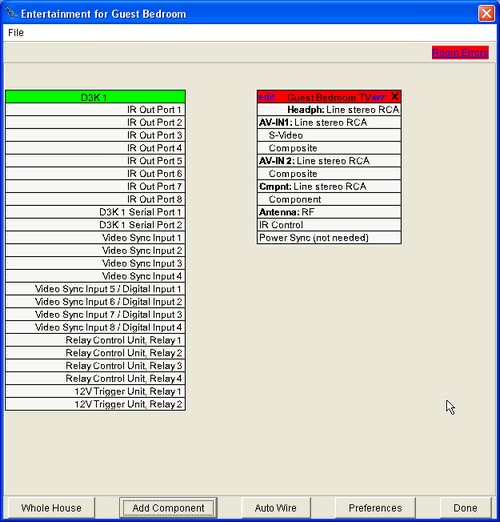
Now, let's return to the "AV Entertainment" layer and click in the Living room to bring up the list of AV components in the Living room.
Click in the Living room to bring up the Schematic view.
Note that you now have 2 additional serial ports added to the project (at the bottom of the first column).
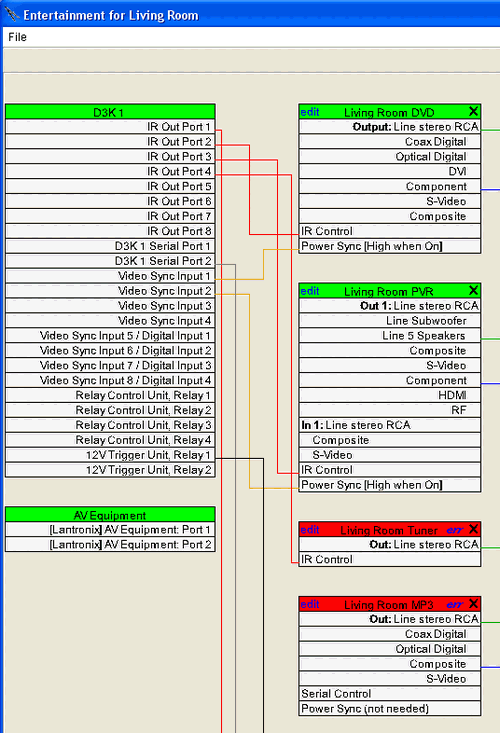
Click the "Whole House" button, again, and connect the following wires:
MP3 player
Serial control to Lantronix AV Equipment Port 1
Xantech
Serial control to Lantronix AV Equipment Port 2
Note that this device does not support Power On/Off via either discrete power commands nor toggle commands. Therefore, the "Control power (turn on and off as needed)" defaulted to unchecked. You can leave it unchecked as there is no way to control it.
Guest bedroom TV
AV-IN 1: Composite from Living room Switch Out 1: Composite
AV-IN 1: Line stereo RCA from Living room Switch Out 1: Line stereo RCA
IR control from IR port 5
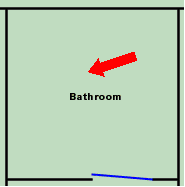
Bathroom is like the Guest bedroom with AV-IN 2 and IR port 6
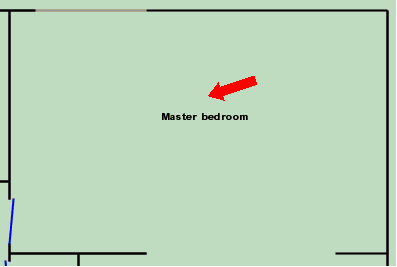
Master bedroom is like the Guest bedroom with AV-IN 3 and IR port 7
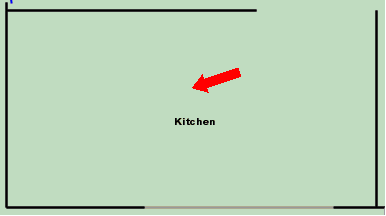
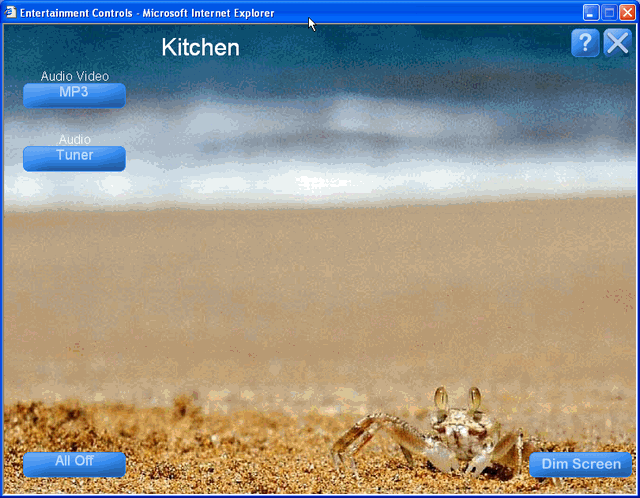
Kitchen is like the Guest bedroom with AV-IN 4 and IR port 8
View the Entertainment Menu in the Master Bedroom
Open the Browser GUI pointing at the Design Module (if you forget how to do this, please see Example AV Simple Theater). Open the Entertainment Menu in the Kitchen. You can click on the buttons and simulate controlling the entertainment devices.
Add the Theater PVR and DVD to the distributed TV and Music system
Click in the Living room to open the Schematic view.
Click the "Whole House" button, again, and connect the following wires:
Living room DVD
Main: Composite to Living room Switch In3: Composite
Main: Line stereo RCA to Living room Switch In3: Line stereo RCA
Living room PVR
Out 1: Composite to Living room Switch In4: Composite
Out 2: Line stereo RCA to Living room Switch In4: Line stereo RCA
We would like to wire the Line stereo from the PVR to the Switch, but that output is already used on the PVR. There are four things you can do: add a splitter to the PVR Line stereo output, route the signal through the Main output AV receiver to the Switch (which would mean you could not watch the DVD player in the Living room while watching the PVR in another room), route the signal through the Zone 2 output AV receiver to the Switch (but we will use that output in the next example), route the signal through the Switch to the AV receiver.
In a real situation, you would probably use a splitter, but let's go through the Switch to the AV receiver because it is interesting to see the software recognize this path.
Delete the wire Living room PVR Out 1: Line stereo RCA to Living room AV surround receiver DBS: Line stereo RCA
Add Living room PVR Out 1: Line stereo RCA to Living room Switch In4: Line stereo RCA
Add Living room Switch Out5 to Living room AV surround receiver DBS: Line stereo RCA
Close and re-open the Entertainment Browser GUI (it will not update without re-opening the menu).
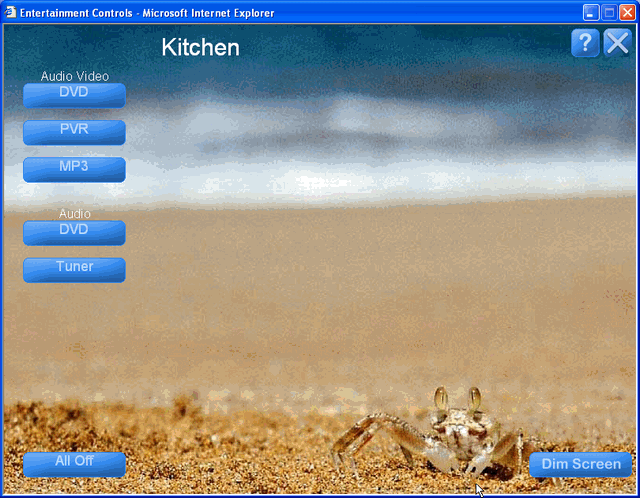
Note that by adding wires from the PVR and DVD player to the Xantech, you made those sources available on all 4 TVs in your house.
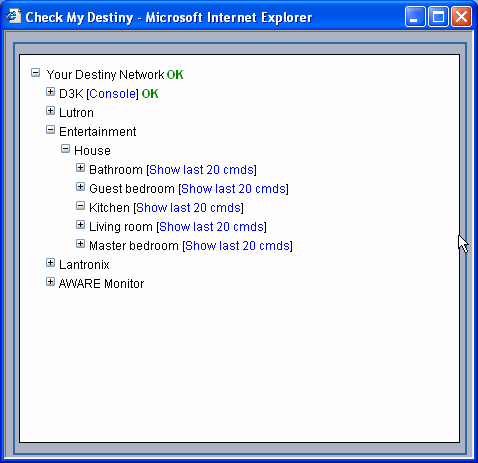
Open Check My Destiny
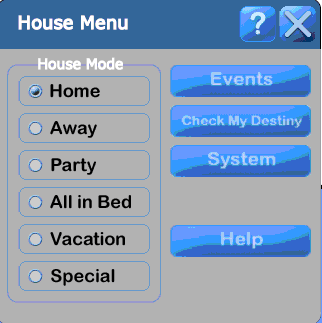
Return to the Browser GUI of the floor plan and click outside of all rooms in the upper window of the display.
![]()
You will get the House Menu.
Click on the "Check My Destiny" button.
You will get a display that looks like this (you may not have the Lutron option).
Again, as in Example AV Simple Theater you can expand the lines of text to watch commands execute.
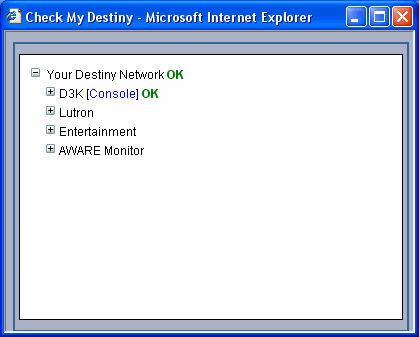
Expand "Entertainment", "House" and "Living room".
Note that "Living room" does not expand, but you can just see that the "+" becomes a "-".
Go back to the Entertainment GUI and click on the PVR button to watch the PVR in the Kitchen.
Return to Check My Destiny.
Click on "Show last 20 cmds"
This is what you would expect to see for the Kitchen.
Now,

Now, let's see what happens in the Living room.
Go the Floor plan view of the Browser GUI.
Close the House menu.
Open the Room menu in the Living room.
Open the Entertainment menu in the Living room.
Click on the PVR button.
Return to Check My Destiny.
Expand the Living Room.
Note the high lighted item below. The software knows how to route the audio through the AV switch.

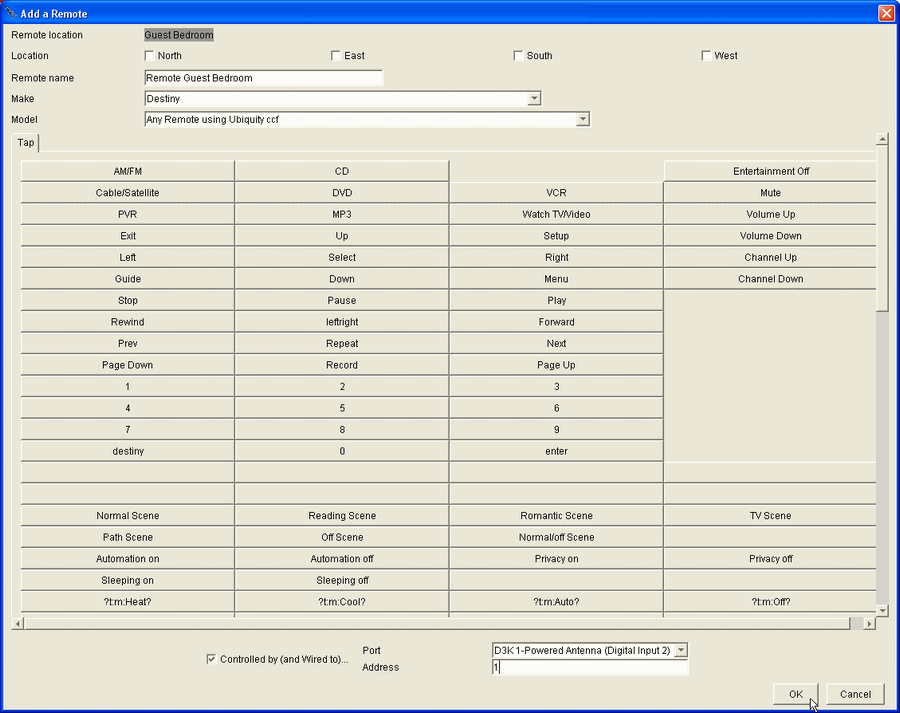
Add Remote Controls to every room that has a TV
After purchasing 4 more RC-1 remote controls, add an RC-1 remote control to each room using the address on the back of the RC-1 remote control. Alternatively, you could use a Philips Pronto or a Universal Remote MX-850. Download the "Sports Bar" program we wrote for either of these two remote controls. From each of these remotes, you can control every room in the house. Alternatively, modify the Sports Bar programs to just control one room. As another alternative, you can use the ViewSonic V210 Wireless Display.
In the example, we will add remote controls to every room that has distributed AV using the "Any Remote using ccf addr 83" model so that we can use either the Destiny RC-1 or the Pronto or Theater Master models. The issue here is that we have an RC-1 with address 1. If the one you buy is not address 1 and if you want both the RC-1 and the pronto or Theater Master in the same room, just add two remote controls to that room.
In a house this small, there is a good chance the antenna will receive the signal from the remote controls throughout the house. If this is not the case, then it would be better to move the antenna closer to the center of the house.
In larger houses, in order to receive the signal, you will want to use our new Entertainment Controller Extender. Please call us for details.
After adding a remote control to each room, your design will be complete.