Configuring a keypad or display
Go to the Keypads layer of the Design Module
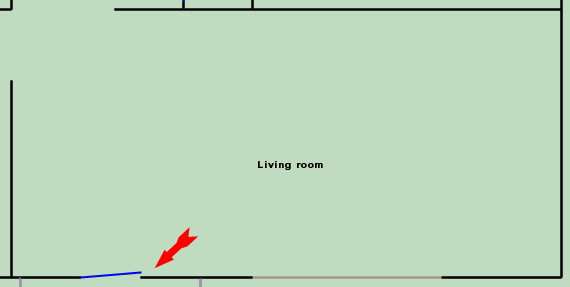
Click in the location of the room where you want to add a keypad.
The menu that pops up will look something like the one at the right (but may look a little different if you have previously added a keypad or display of a different type).
The "Keypad location" will be the room you clicked in. You cannot change this. If you want a different room, click Cancel and click in the room you wanted.
Select the geographic "Location" of the keypad in the room. This is just an auto naming extension to the "Keypad name". If you click more than one checkbox, the geographic location extension will reflect it.
The "Room controlled" is the room that is referred to when you select "This room" from the Action Tree. Usually, the room controlled is the same as the room the keypad is in and thus Ubiquity will default to making the Room controlled by the same as the Keypad location. However, if this is a keypad at the front door that controls the outdoor lights, then you may want to make the "Room controlled" the outdoor front room.
The keypad name must be unique in this room.
The Make and Model define the keypad or display.
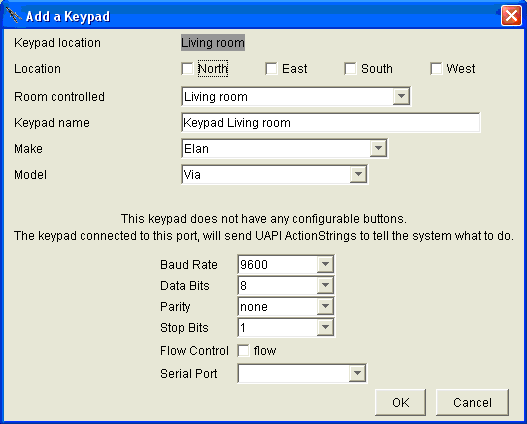
Elan, Vantage, and Xantech Displays
For the Elan Via, the Vantage LCD320C5, and the Xantech SmartPad, the menu will ask that you fill in the attributes of the serial interface. That is, the baud rate, number of data bits, parity, and number of stop bits. None of them need "Flow Control".
Use the dropdown menu to select the serial port.
All of these displays must be programmed using the application that comes with it. To control devices in the home via the Domain Controller, program the display to send UAPI serial strings. UAPI is Destiny Networks' Ubiquity Application Programming Interface. UAPI supports both relative and absolute addressing.
Relative addressing lets you send commands from the display that are relative the room that the display is located in. It is the equivalent to "This Room..." in the Action Tree. It dramatically reduces the amount of programming you have to do because, for example, you can a display in each of two rooms - each with the same program in the display - and yet each will control their own room and not the other.
UAPI also supports absolute addressing and groups of actions so that from any room you can control another room or groups of actions in one or more rooms.
Further, programs for the Vantage LCD320C5 and Xantech SmartPad have already been written for you.

Keypads
For keypads such as the Lutron, LiteTouch, Russound, and Vantage keypads, the "Add a Keypad" menu will display a representation of the buttons of the keypad. For example, the Lutron keypad at the right shows 6 buttons just like they would appear on the real keypad.
After entering the Location, Room controlled, Keypad name, Make and Model as described above.
Jump to the bottom of the menu and fill in the "Keypad Address".
On the line above the address, for Lutron Homeworks keypads, you can select whether the keypad is controlled by a wire to the processor or by RF to the RF processor.
The 3rd line from the bottom is labeled "Copy keypad Configuration" and has a dropdown box next to it. This allows you to copy the button configuration of one keypad onto another keypad. This line will not appear when adding the first keypad of a given type because there is not any other keypads to copy from. Note that if you use "This Room..." when selecting an action, then when you copy the keypad into another room it will automatically reference the room the keypad is copied into. For example, if a button makes "This Room..." go to Normal scene in the Living room, then when this keypad is copied into the kitchen, then the same button on there Kitchen keypad will make the Kitchen go to Normal Scene.
Now configure the buttons of the keypad.
Click on a button and use the Action Tree to create one of the following types of actions.
Single Action Button
LED Status
Group of Actions Button
Goto Page Button
Action and Goto Page
Action or Goto Page
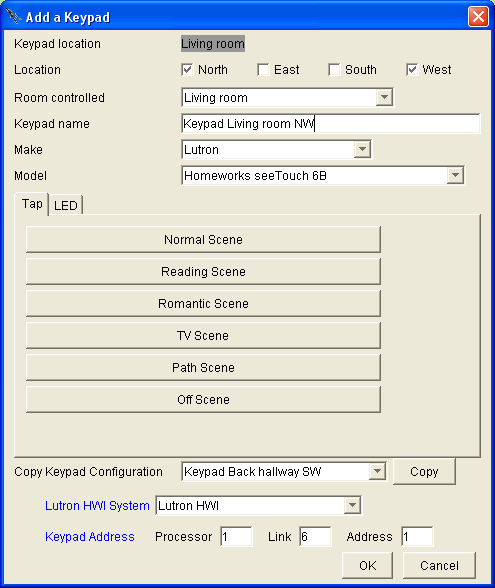
Single Action
Click on the button you want to configure and the Action Tree will pop up. Follow the Action Tree to select an action to perform.
If you use "This Room...", it will refer to the room listed on the 3rd line of the menu labeled "Room controlled", which is explained above.
In the case at the right, the top button of this keypad is used to set "This Room..." to Normal Scene. Therefore, when this keypad is copied into another room the top button of that keypad will set that room to Normal Scene.
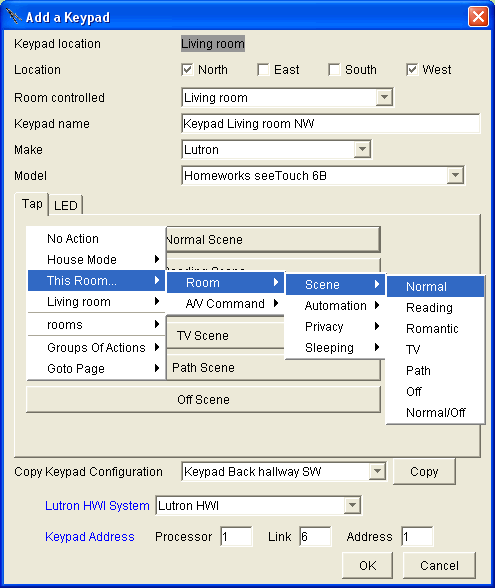
However, if you want a button on multiple keypads to act on the same room, then do not use "This Room...". Rather, select the room by name.
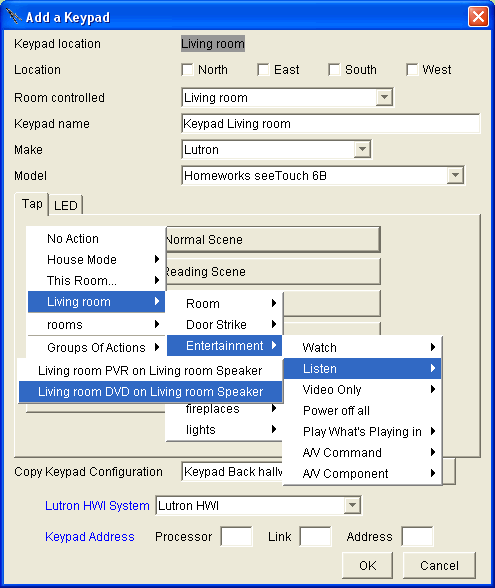
For example, the top button of this keypad is being changed to Listen to the Living room DVD on the Living room Speakers. If this keypad was copied to the Kitchen, then the top button of that keypad would still turn on the speakers in the Living room.
LED Status
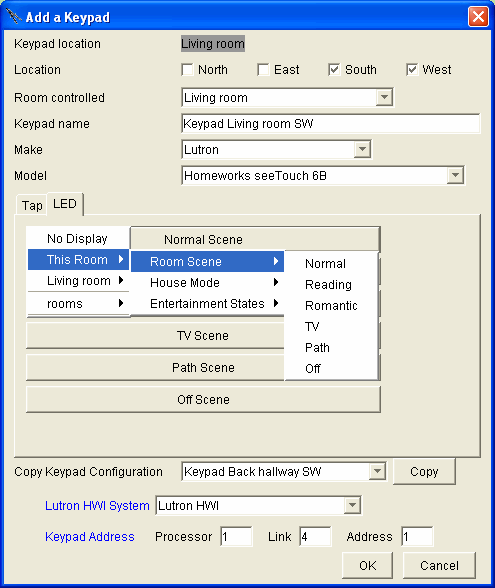
If you click on the LED tab just under and to the right of the Model label, you will see a representation of the LEDs on the keypad. It may look similar to the "Tap" tab, but it is actually saying "under what condition should the LED at this location be turned on."
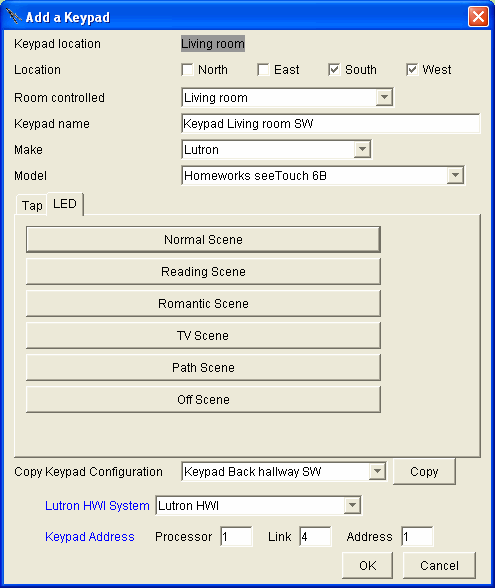
If you click on the of the buttons that represent the LEDs, you will get a pop up menu that looks like the Action Tree, but it is not the Action Tree. Rather, it is the Status Tree and contains a partial list of all devices and components for which the Domain Controller has status.
Presently, the LEDs are usually turned on when the room is in a particular scene or when the entertainment is playing in that room.
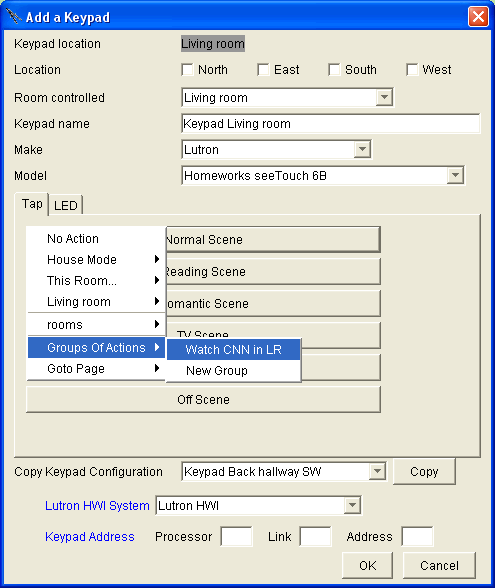
Group of Actions
You can also access all the Groups of Actions that you created in Timer Events, GUI Buttons, and All Groups.
Although there is an entry for "New Group" in the Action Tree", it will just pop up a message saying that you need to create the new group in the Events menu.
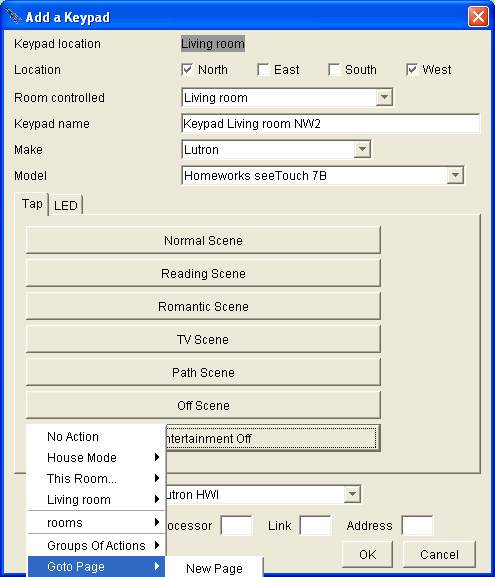
Goto Page
At the bottom of the Action Tree menu is the option "Goto Page". The first time you select this, there will only be one option, "New Page". Select this item to create a new page of buttons.
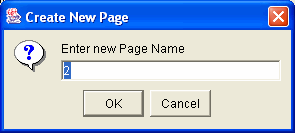
After selecting the "New Page" option above, you will get the pop up menu at the right. Enter the name of the new page of buttons you would like to add. If you want, you can accept the default numbered page.
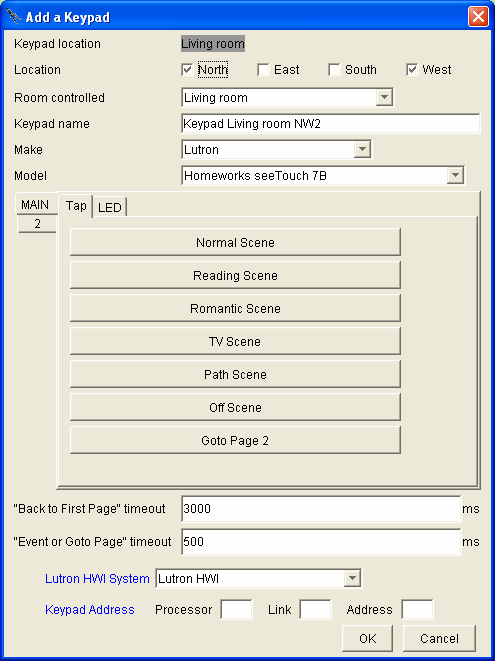
After creating a new page, the keypad menu will look something like the one at the right where there are 2 tabs on the left of the menu just under the word "Model". In this example the tabs are named "MAIN" and "2".
Note that the bottom button now has the action "Goto Page 2". Effectively, now when you tap the bottom button of the keypad it will re-map all of the buttons to the actions of page 2 such that the next press of button will execute the actions of page 2 - not the actions of page "MAIN". This is the same behavior you get when you press the "Alt" key on the keyboard of a PC - the next key you press will not be a letter, rather, it will select one of the dropdown menus.
Near the bottom of the menu (under the representation of the keypad buttons) two additional lines have been added "Back to First Page" timeout and "Event or Goto Page" timeout.
The "Back to First Page" timeout is the time the keypad will wait for you to tap a second button after tapping the "Goto Page 2" button. If you tap a 2nd button within the "Back to First Page" timeout time, then the action performed will be the action of the 2nd page. However, if you wait longer than that amount of time, the keypad will revert back to the actions of the main page.
In our example, if you tap the top button, then you have 3 seconds to tap another button to perform the actions of page 2. If you wait longer than 3 seconds, you will be performing the action of the Main page (shown at the right).
The "Event or Goto Page" timeout will be explained below.
If you click on the tab for page "2", you will see the representation for the same set of buttons you saw on the Main page, but the buttons will all be blank - meaning that they will do "No Action". You can now add actions to this page of buttons by clicking on the buttons and using the Action Tree to select the action.
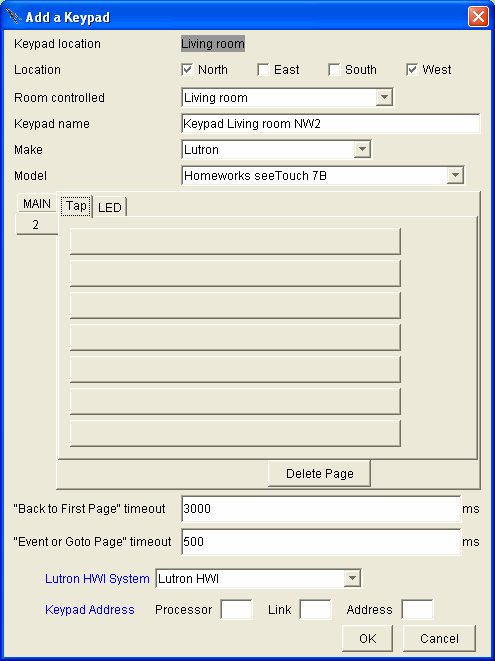
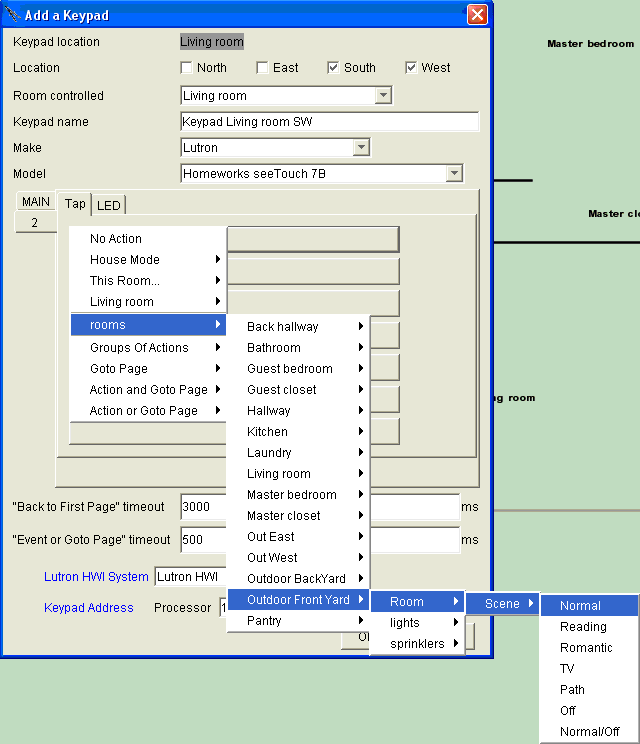
For example, you could use the buttons on the second page to control the Room scene of the front yard. That is, buttons 1 though 6 of the Main page would control the room scenes of the Living room, but when you press the bottom button, then the top 6 buttons would control the Room scene of the front yard..
Click on the top button of page 2 and follow the action tree as shown at the right to access the scene for the Outdoor Front Yard.
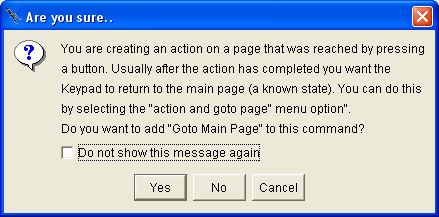
Unfortunately, when you make the selection above, you get the warning at the right. You may want to read the warning.
You will almost always want to heed the warning, so either click "Yes" or ...
... or use the path at the right to avoid getting the warning message.
This means that after pressing the second button, the keypad will return to the Main page immediately and will not have to wait for the timeout.
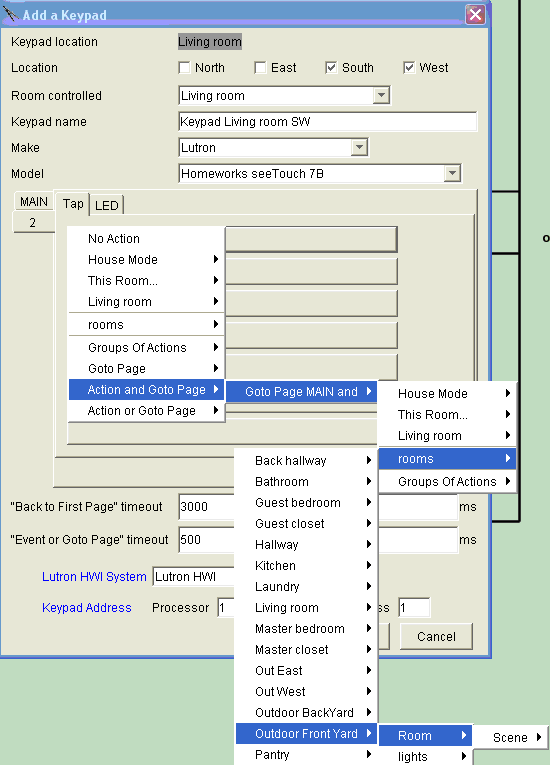
After using the Action Tree to assign actions to all of the buttons of page 2, you would end up with the keypad representation at the right.
Note that the bottom button was assigned the action of going back to the Main page. Therefore, if you pressed that button by mistake on the Main page, you could get back to the Main page quickly by pressing it again (instead of waiting for the 3 second timeout).
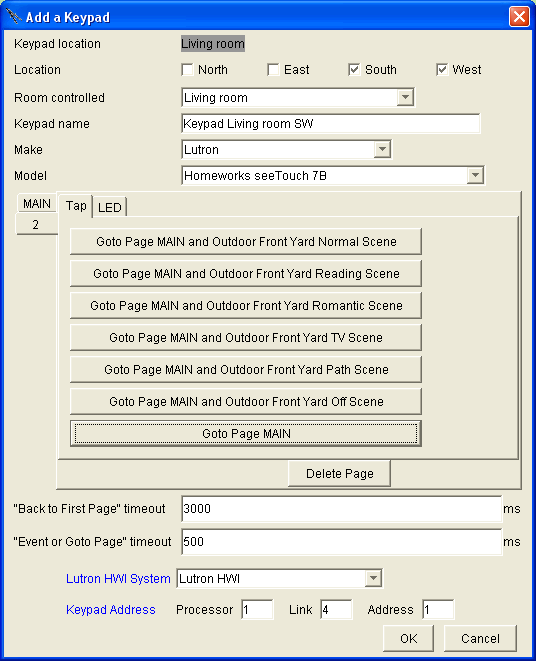
Click on the "Text" tab (where the LED tab is often located) and you will get the menu at the right.
You can change the text that is displayed by clicking on a line of the text and changing it.
Note that the Text displayed is relative to the page the keypad is on. That is, the example shows the text associated with the Main page, but the text associated with the Music page is different (as is the text associated with the Thermostat page).
Note that the "Back to First Page" timeout should probably be longer than 3 seconds because the user will probably need time to read the text before pushing the second button.
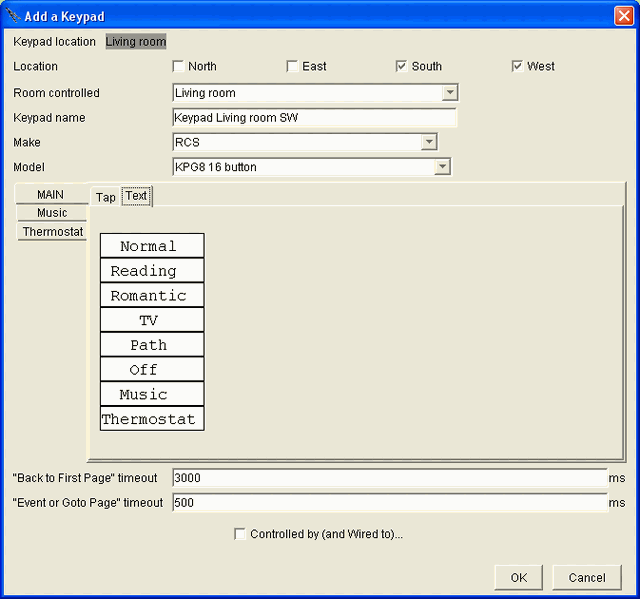
Action OR Goto Page
This allows you to create a button that functions one way if you single tap the button and a different way when you double tap the button. For example, a single tap may turn a device off and a double tap could turn it on.
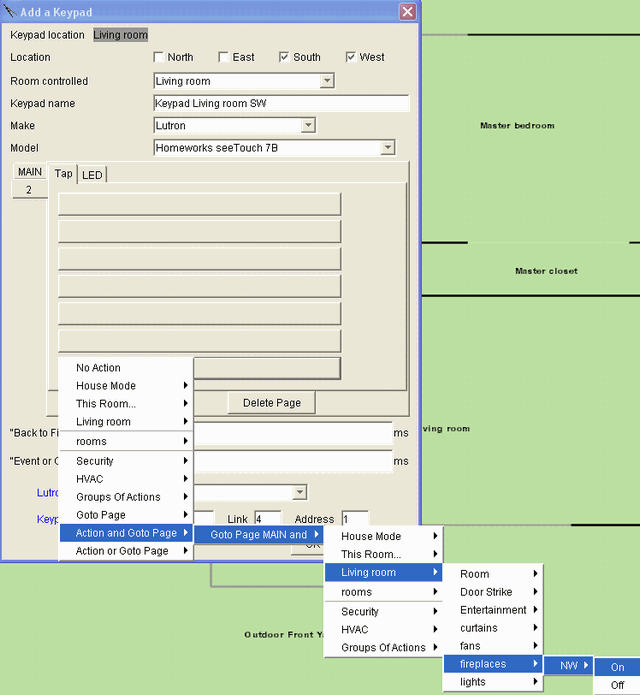
In the example at the right, the bottom button will perform the action of turning off the fireplace in the Living room OR doing some action specified on page 2.
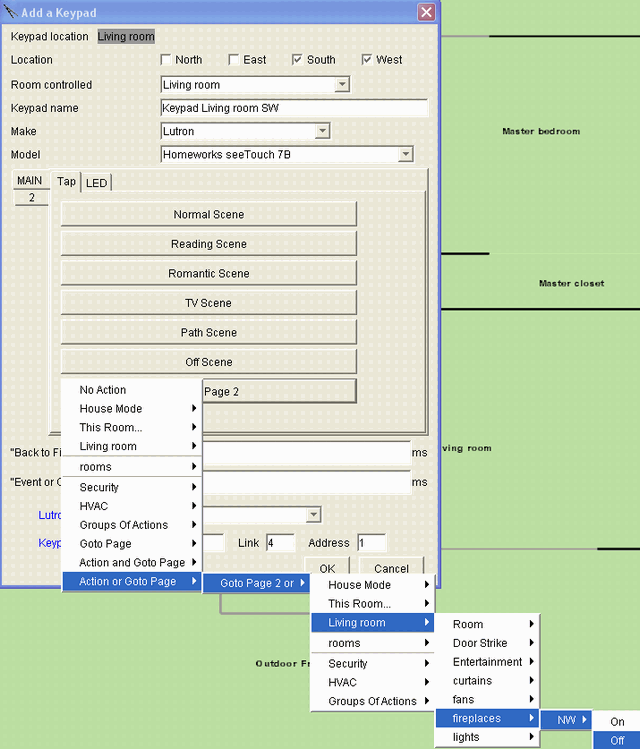
On page 2, the bottom button turns the fireplace on and returns to the Main page.
The key question is how long do you have to push the second button? The answer is you have until the "Event or Goto Page" timeout occurs. By default that time is 500 milliseconds. That is, if you press the bottom button and then press it again within 500 milliseconds, then you will turn the fireplace on. If you do not press it within 500 ms, the fireplace will turn off and the next button press will be related to the Main page. Note that the first action will not occur until after this timeout. That is, the Fireplace will not turn off for 500 milliseconds after pressing the bottom button.
When creating single tap / double tap buttons to control toggle devices you may want to remember:
Use a Light switch as a Keypad
You can use a light switch as a keypad in that double tapping the light switch can perform an action other than the action performed by single tapping the light switch. For example, double tapping the light switch can put the room in Path Scene.
This functionality is only supported on Lutron light switches.
To do this, first you must add a light to the room using the Lights layer of the Design Module. Jot down the address of the control for the light.

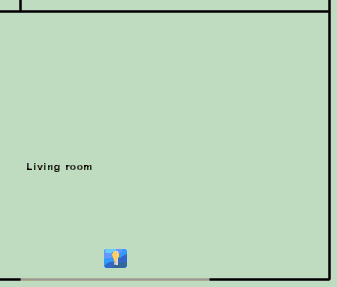
Then go to the Keypad layer.

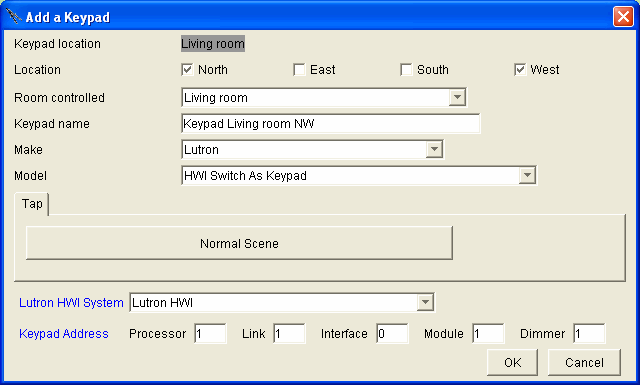
Add a keypad with the location of the keypad at the same place in the room as the location of the light switch - not the light itself as you did on the Lights layer. This is not critical, but it makes it easier to understand later on.
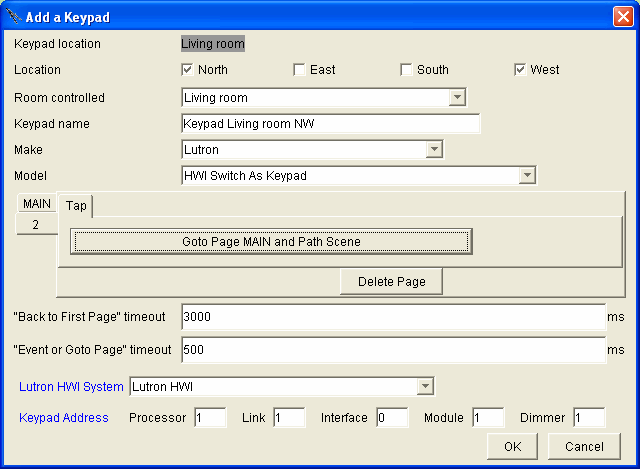
The Model should be "Switch As Keypad" and can be HWI, HWI RF, or RadioRA.
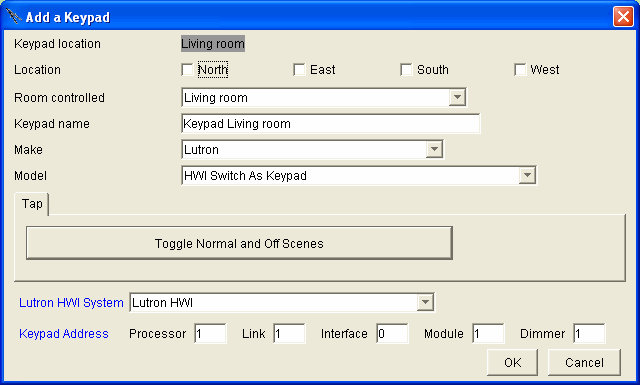
In the example, 1:1:0:1:1 would be the address of the Maestro dimmer for the light in the Living room.
Change the Room scene via the Light Switch
If you tapped the light switch above, you would set all of the lights in the room to their Normal Room scene value and it would not be possible to turn them back off.
Change the action of this light switch to make it an action that toggles the room scene between Normal and Off.
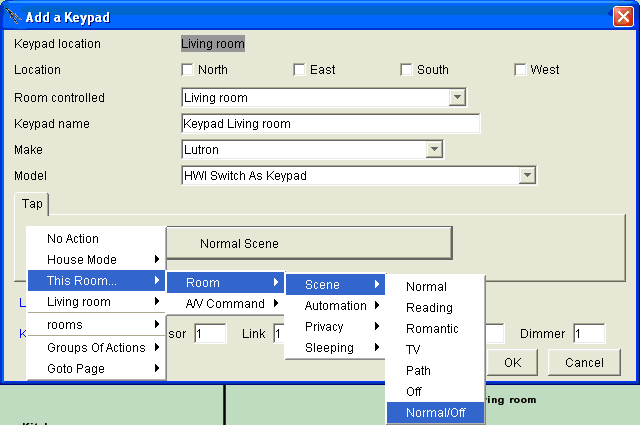
Now, if the room is in Off scene, then performing this action will put the room in Normal scene. If the Room scene is any scene other than Off scene, then performing this action will put the room in Off scene.
Note that changing the Room scene will now set all of the lights in the room to the value they should be at for that Room scene.
Add a 3rd Room Scene
You can enable the light switch to put the room into a 3rd Room scene.
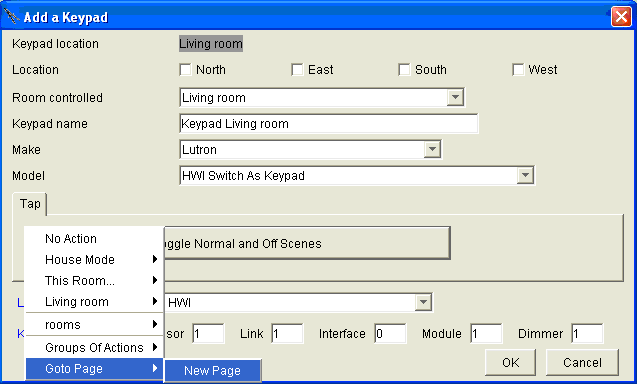
Start by creating a 2nd page for the keypad by clicking on the representation of the button of the light switch and following the Action Tree to create the new page.
Enter a name or just accept the default.

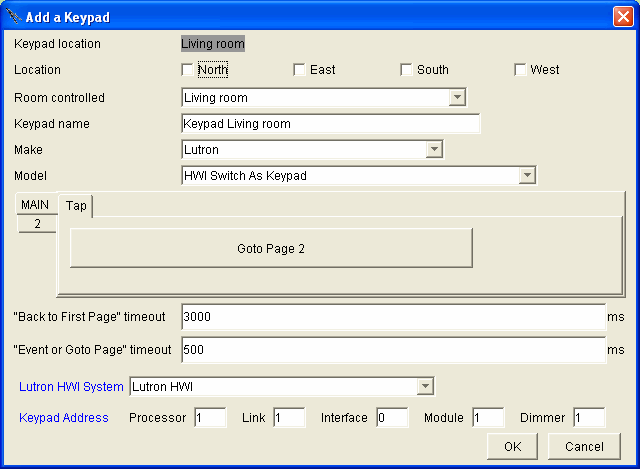
You will get the menu at the right.
Note that the timeout for double tapping will be 500 milliseconds.
Change the button that now says Goto Page 2 back to an action that toggles the room scene between Normal and Off, but only if the user does not double tap it.
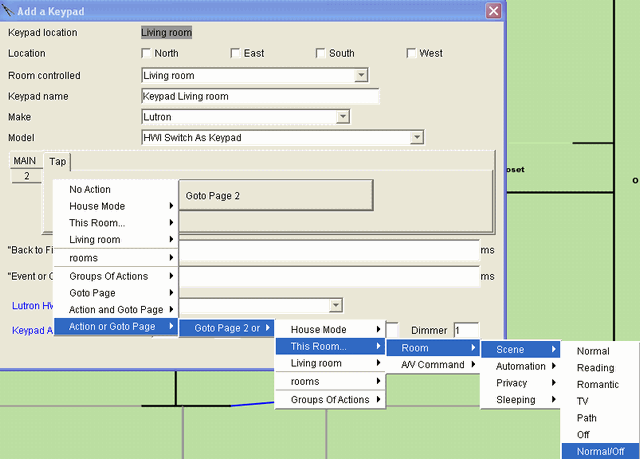
You will get the following menu: If the light switch is not tapped twice within 500 milliseconds, then it will toggle between Normal and Off Room scenes.
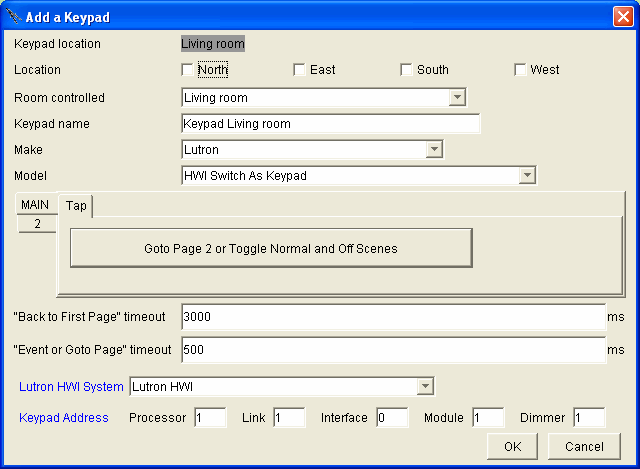
Now go to the 2nd page and make the 2nd tap of the light switch change the Room scene to Path scene.
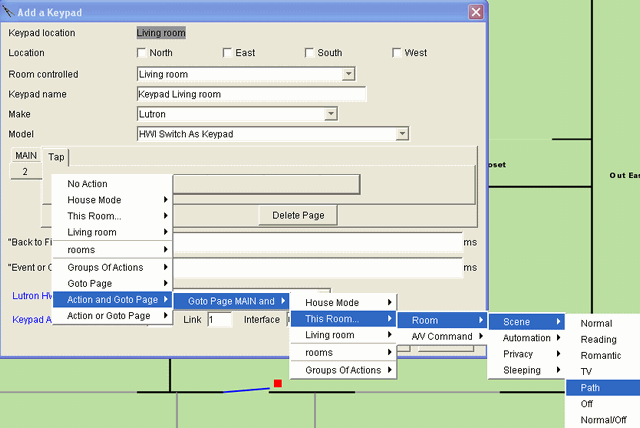
While it is fairly complicated to get here, the result is a light switch that is reasonably intuitive to use:
If the lights are off, tap it once and all the lights go to Normal scene.
If the lights are on, tap it once and all the lights go off.
At any time, tap it twice and the lights go to Path scene.
