Vantage Controller
to Domain Controller Architecture
The most common architecture will be to wire
the Vantage touch screen displays to the Vantage controller and then wire
the Vantage controller to the Domain Controller.
The Vantage touch screen sends a serial string
to the Vantage controller. The serial command contains both the command
to be executed and the address of the touch screen. The
entire serial string is forwarded to the Domain Controller. The Domain
Controller determines which touch screen sent the command from the address
information, and, therefore, knows which room to apply the command to.
|

|
|
|
|
Download the Application we Wrote for you
We wrote an application for you that you can
download and start using immediately. The path is shown at the right.
Download the application:
LCD320C5
with Ubiquity serial.qlk
to your desktop so that you can load it into
the Pronto Pro editor below.
|
http://www.destinynetworks.com/
Downloads/
Password_Protected/
Software for 3rd Party Products/
Vantage/
LCD320C5 with Ubiquity serial.qlk |
Load
the example program
Begin by downloading the Vantage QLink software
from the Vantage
download page.
First, download and install QLink 3.5. Then,
download and install QLink 3.5b update.
|

|
|
Run the QLink program.
Install and run the Vantage Touch Screen Editor
program that came with the product.
When it first opens, it will ask what file
you would like to work with. Select "Open an existing configuration
file" and click on "More Files ...".
Click OK.
|

|
|
The "Open" menu will pop up.
Navigate up to where you save the file you
downloaded from our web site, select it, and click "Open".
|
|
|
Expand the tree to the TouchPoint device,
and type "Ctrl E" to open it up (or right click and select Properties).
|

|
|
You will get the screen at the right. It provides
access to control Room scenes, AV entertainment, the Security system,
Heating and Cooling, and Groups of Actions.
All other pages have a "Home" button
on the bottom to return you to this page.
|

|
Room Scenes
Select the "Test" pointer from the
tool bar.
Click on "Scenes".
The Room Scenes page allows the user to control
lights, fans, curtains, and other devices in the room from the touch screen.
This requires that the house has an intelligent lighting system.
In addition to changing multiple devices in
the room via the Room scene, this page gives direct control of a smaller
set of devices.
|

|
AV Sources
Click on "AV".
Seven AV sources have been set up for you
("TV/Video", on the bottom right, is not a source - it toggles
the TV through its input connector groups).
If your theater uses any subset of these sources
and does not have two or more of the same type of source, then no
programming is necessary - the Domain Controller can receive the
commands that are already loaded into the Vantage Touch Screen and translate
them to control the actual equipment that exists in your theater.
With the actual Vantage Touch Screen display,
selecting the desired source will send out a short command from the remote
control requesting that the Domain Controller set up the path for playing
the selected device. The Domain Controller will do the rest. It will set
up the whole path from the chosen source to the display and/or speakers.
The Vantage Touch Screen will then jump to the transport page for controlling
the theater.
If the source is already playing, then the
user can
select "Favorites" or "Transport" at the bottom of
the page. Each will jump to a new page.
|

|
|
After selecting a source, the Vantage touch
screen display will jump to the "Transport" page to provide
control of the AV entertainment equipment.
From here, you can navigate to the menu commands
and the keypad buttons.
You can also get to the Settings menu to change
the video mode (e.g., anamorphic, widescreen, standard, or scroll through
them) and the audio mode (e.g., matrix, THX, stereo-5ch, stereo-2ch, DTS,
Prologic, Mono, or scroll through them). |

|
Security System
The Security System page allows the user to
arm and disarm the security system from the Vantage touch screen display.
This requires that the house has an intelligent security system.
|

|
Heating and
Cooling
The Thermostat page allows the user to control
the temperature in the room by set the mode and/or target temperature
in the room. This requires that the room has an intelligent thermostat.
The buttons on the right enable direct setting of the temperature in the
room.
|

|
Groups of Actions
The Groups of Actions page allows the user
to execute the default set of Groups of Actions from the Vantage touch
screen display.
|

|
Configure
Ubiquity
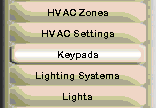
Go to the "Keypads" layer of the
Design Module.
|

|
|
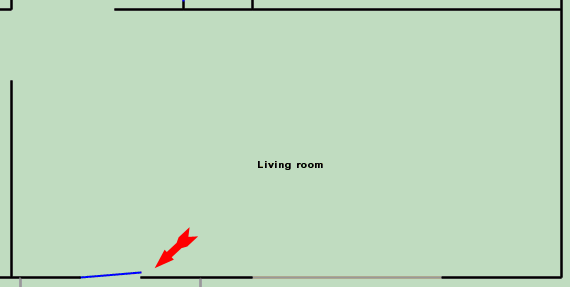
Click in the room in which the Vantage touch
screen display is located.
|

|
|
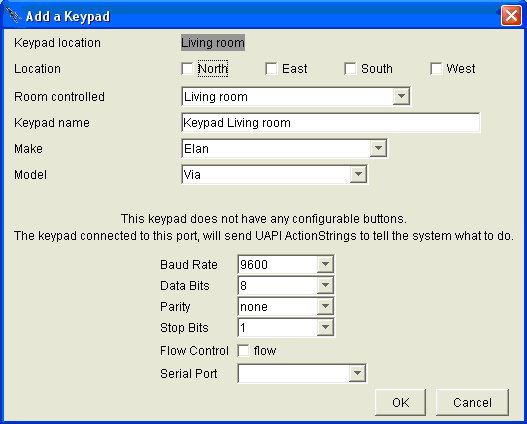
You will get the "Add a Keypad"
pop-up menu with the default being the last type of keypad that you added
Location: select the location of the keypad
to auto generate the name.
Room controlled: selecting the correct "Room
controlled" is very important. When you select "This Room"
in the Action Tree, you are referring to the room you select with this
dropdown box.
Keypad name: the default name is usually good,
but you can change it if you want.
Make: select "Vantage".
Model: select "LCD320C5".
After making the selections above, you will
have the menu below and to the right.
|

|
Configuring for the Direct to the Domain
Controller Architecture
If you are using the architecture where the
Vantage display is connected directly to the Domain Controller via an
RS-232 adapter, then you want to do the following:
Baud Rate: the Vantage LCD320C5 defaults to
9600 baud, 8 data bits, no
parity, 1 stop bit, no flow control. Please use those settings.
Serial Port: use the dropdown to select the
appropriate serial port.
Click OK.
You are done. Hook up the wires and use Check
My Destiny to check your work. |

|
Controlling
other rooms using UAPI
The Ubiquity Application Program Interface
(UAPI) provides a way to obtain the serial string to control any device
in your home that is connected to the Domain Controller.
|
|
|
r home that is connected to the Domain Controller.
|
|
|
r home that is connected to the Domain Controller.
|
|
Add
a Second Source of the Same Type
Adding a second source of the same type (e.g.,
a second DVD player) is just a little more complicated then having just
one source of each type, but still much easier than programming the Vantage
Touch Screen to control them.
Open the "AV Sources nice icons"
page.
|
|
|
First, let's see how the existing source buttons
work.
In the example at the right, we selected the
Satellite icon. Note that it links to either the Cable set top box or
the Satellite receiver - whichever one is installed in the theater.
When the button is pressed, first it sends
a command to the Domain Controller so that the Domain Controller will
set up the path for that source to play on the TV and/or speakers in the
room. Then, the button causes the Vantage Touch Screen to jump to the
Keypad page so that the component can be controlled by the user.
|
|
|
Therefore, to control an additional AV source,
start by duplicating one of the existing AV sources on the AV sources
page.
In our example, we will duplicate the Satellite
receiver.
Next, click the "Appearance" tab
at the top of the Button Properties menu..
Select the "Bitmap" of the second
device. Alternatively, you could have replicated the DVD icon for a second
DVD player, but note that the word "DVD" is part of the bitmap
of the button image. Using the Label, you can add the 2 to the image.
Important: The IR code that the Vantage Touch
Screen will send is the IR code of the device you copied. That IR code
is a reference into a table of actions. That table is the set of button
on the Remote Control menu of the Design Module.
Recall that the Vantage Touch Screen is sending
out Destiny IR codes. Each code is unique and it is mapped to one of buttons
on the Ubiquity AV Remote Control menu (the one that looks like a "field
of buttons"). Essentially, the IR code that is sent out is directly
mapped to one of those buttons. Now, you get to choose what that IR code
does by clicking on the button on the AV Remote Control menu and using
the Action Tree to select an action.
|
|
|
Therefore, we want the new button to send
out an IR code that maps to an unused button in the Ubiquity AV Remote
Control menu.
Delete the existing link.
Click "Create Link...".
Open "[Ubq]" (the hidden one, not
"Vantage Touch Screen with Ubq codes" - the active one).
Scroll down and open the "User 40, 41"
page. The User IR commands are IR commands that have been reserved for
applications like a second AV component of the same type.
Select the "User 40-1" IR code.
The number refers to the 40th row, 1st column of the Ubiquity AV Remote
Control menu (which is where we will put the Action to play the 2nd DVD
player).
Click OK.
You are done setting up the Pronto. |
|
|
|
|
Add buttons to the representation of the
remote control on the AV Remote Control layer to play each DVD player
First, go to the AV Entertainment layer and
click in the appropriate rooms to get the "Entertainment Devices"
menu.
Make sure all of the sources exist and they
have been wired properly.
You may want to "View the Block Diagram"
to check your work.
Close the menu.
|
|
|
Now, go the AV Remote Control layer of the
Design Module.
Click on the dot representing the existing
Vantage Touch Screen remote control (if you have not added one yet please
do so by referring to Configure Ubiquity)
|

|
|
You will get the Edit Remote menu.
Scroll all the way down to the bottom of the
menu using the scroll bar on the right of the menu.
You will get the menu shown at the right (but
easier to see).
Note that one of the buttons on the left is
labeled "User 40-1". When the DVD 2 button is pushed on the
Pronto, an IR code will be sent to the Domain Controller that will invoke
the action on this button. We will now change this button to play the
DVD 2 player.
|

|
|
Click on the User 40-1 button to bring up
the action tree. Follow the path shown at the right to play the DVD 2
player.
Note that you cannot use "This Room"
because relative addressing for AV components requires that only one source
of each type can be available in a room. |

|
|
You should also click on the existing "DVD"
button and give it an absolute path to the 1st DVD player. This way, if
you rearrange DVD players in the Ubiquity menus, good things will still
happen.
You are done. |

|
|
|
|
|
|
|
|
|
|
|
|
|
|
|
|
|
|
|
|
|
|
|
|
|
|
|
|
|
|
|
|
|
|


