Change
the keypad at the front door to a Lutron Homeworks seeTouch 7B keypad
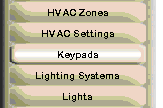
Go to the Keypads layer of the Design Module
|
|
|
You will see a number of keypads in the house.
These were added at the end of the Example
Lutron Homeworks Lights.
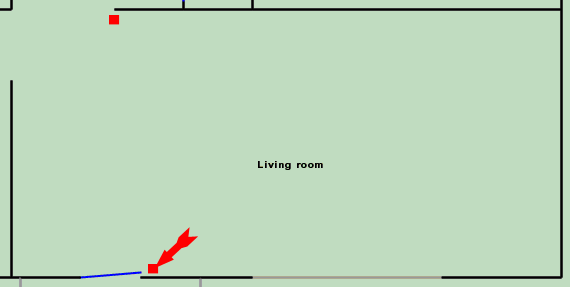
Click in the Living room on the keypad at
the front door.
|
|
|
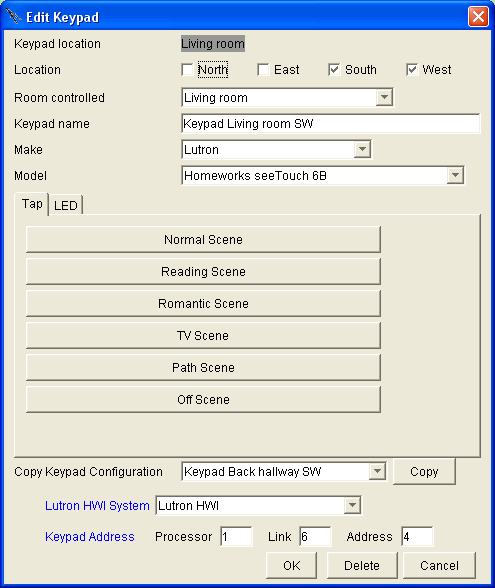
The menu that pops up will look like the one
at the right. Note that the name of the menu is "Edit Keypad",
not "Add Keypad". Also note that there is a "Delete"
button at the bottom of the menu. Both of these indicated that you clicked
on the dot to edit an existing keypad instead of near the dot to add a
new keypad.
Click on the dropdown for the "Model"
and change it to "Homeworks seeTouch 7B"
|
|
|
You will get the following warning. Please
read the warning and then click OK to change the model of the keypad. |

|
|
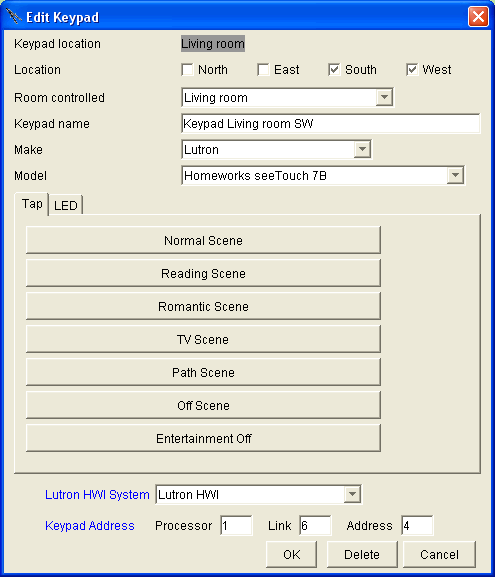
After the new menu appears, you will have
to re-enter the "Keypad Address" at the bottom.
|
|
Arm
the security system with button 7
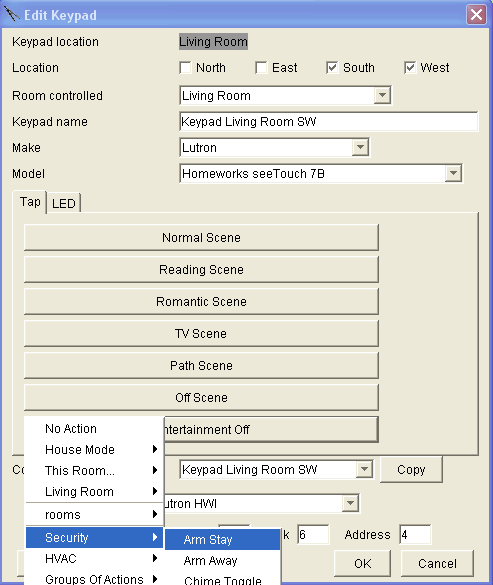
Click on button 7 (the bottom button)
Navigate the Action tree to "Security"
"Arm Stay"
Click on "Arm Stay"
After clicking OK, button 7 would then
arm the security system
|
|
Control
the Outdoor Front Yard lights with the Living room keypad
Instead of arming the security system, use
button 7 to control the Room scenes in the Outdoor Front Yard
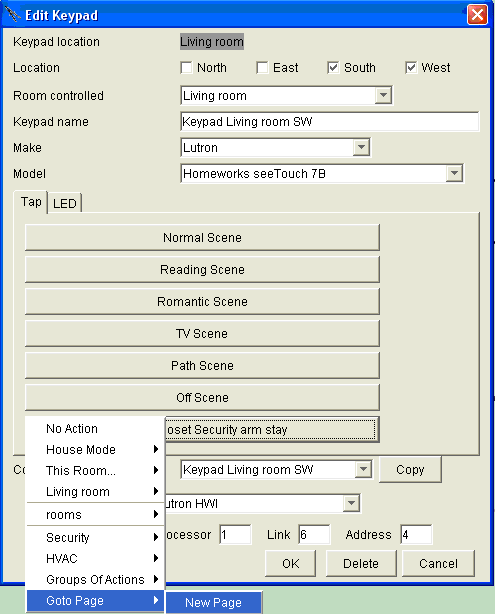
Click on button 7 (the bottom button)
Navigate to the bottom of the Action Tree
to "Goto Page" and click on "New Page".
|
|
|
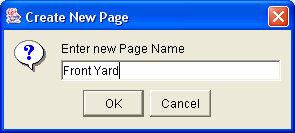
The New Page menu will pop up with a default
of "2". Change it to say "Front Yard".
Click OK.
|
|
|
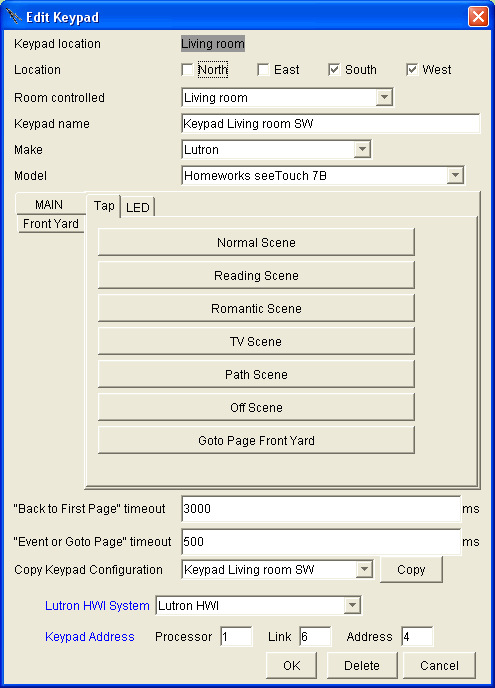
You will get the menu at the right with a
two tabs on the left: the top one named "MAIN" which is presently
the active tab and the other one below it named "Front Yard". |
|
|
Click on the tab for the Front Yard.
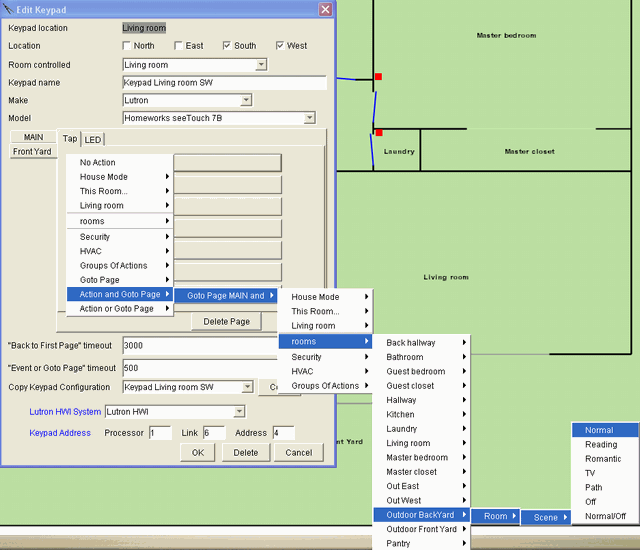
Change the action of the top button from "No
action" to putting the Outdoor Front Yard into Normal scene. Remember
to use "Action and Goto Page" as explained in Keypads
and Displays. If you forget, you will get a warning message. If you
click "Yes" on the warning message, it will fill in the "Action
and Goto Page" for you.
Change the other 5 buttons of the top 6 to
be the other scenes of the Outdoor Front Yard. You can follow the order
as they are listed in the Action Tree.
|
|
|
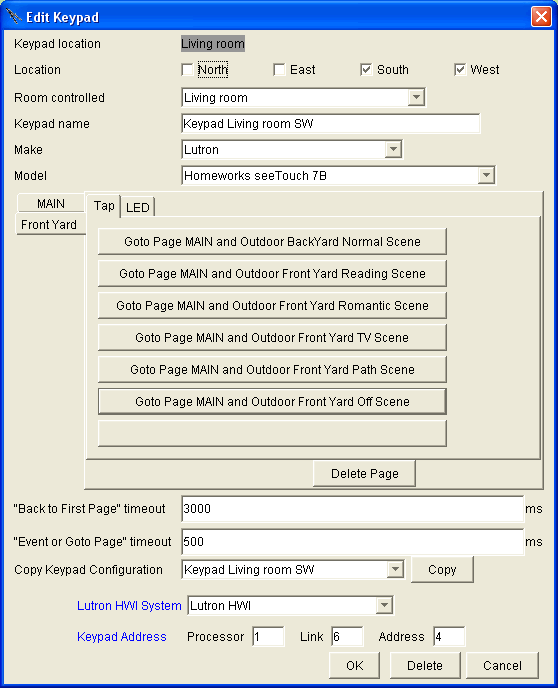
You will get the menu at the right.
Note that you can now control the Room scenes
of both the Living room and the Outdoor front yard from the same keypad.
|
|
|
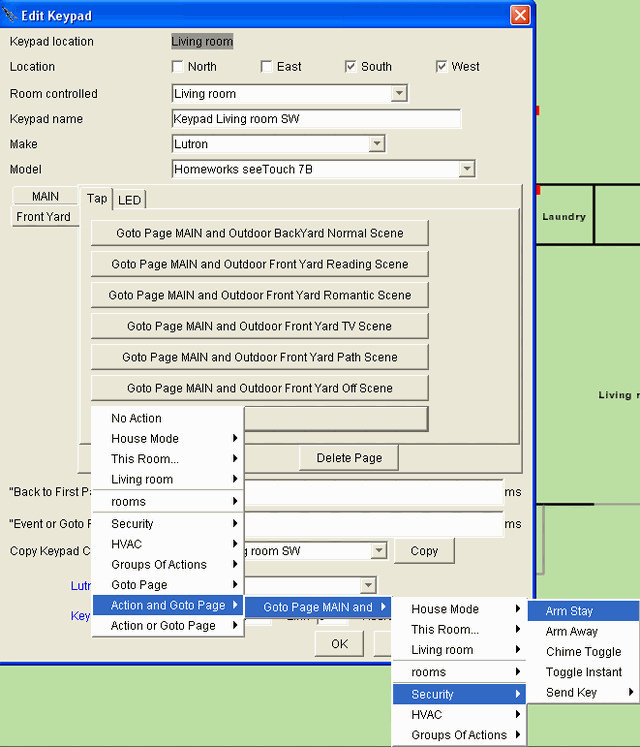
One last thing, let's re-add the ability to
arm the security system by tapping 7 - 7.
Configuring the bottom button on the Front
Yard page of the menu to arm the security system and return to the Main
page. |
|
Copy
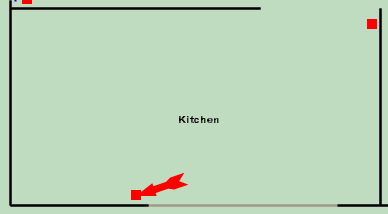
the Living room front door keypad to the keypad over the Kitchen sink
Click on the keypad over the sink. |
|
|
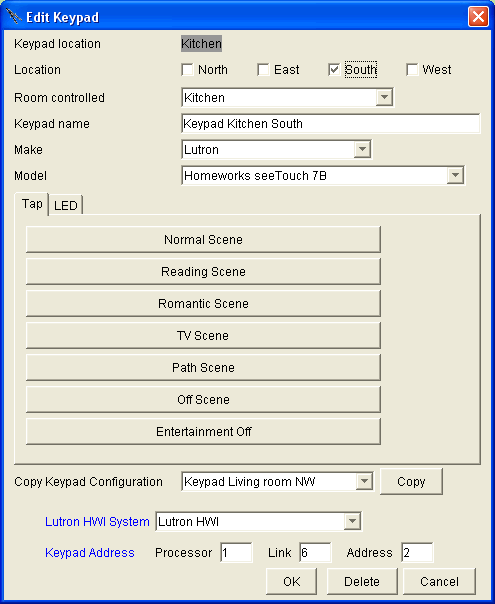
Click on the dropdown for the "Model"
and change it to "Homeworks seeTouch 7B"
Read and click Yes to the warning.
Re-enter the keypad address of 1:6:2
|
|
|
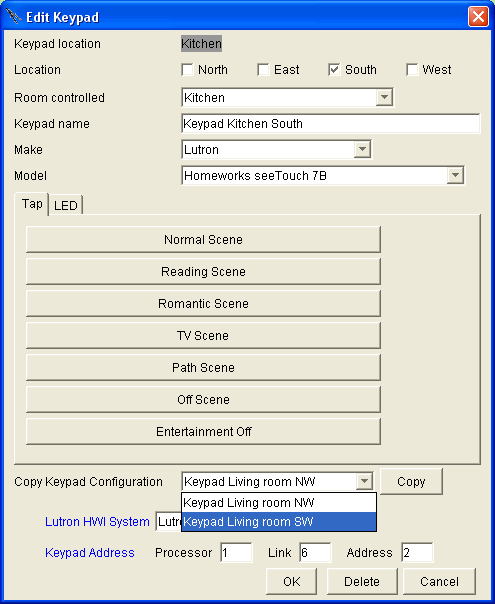
Use the "Copy Keypad Configuration dropdown
to select the "Keypad Living room SW"
Click the "Copy" button. |
|
|
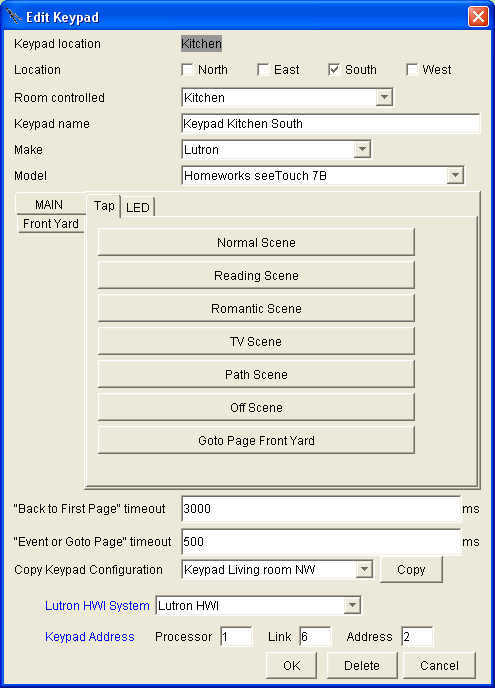
You will get the menu at the right with all
of the buttons copied from the Living room.
Note that the buttons on the front were based
on "This Room" therefore, they will now control the kitchen. |
|
|
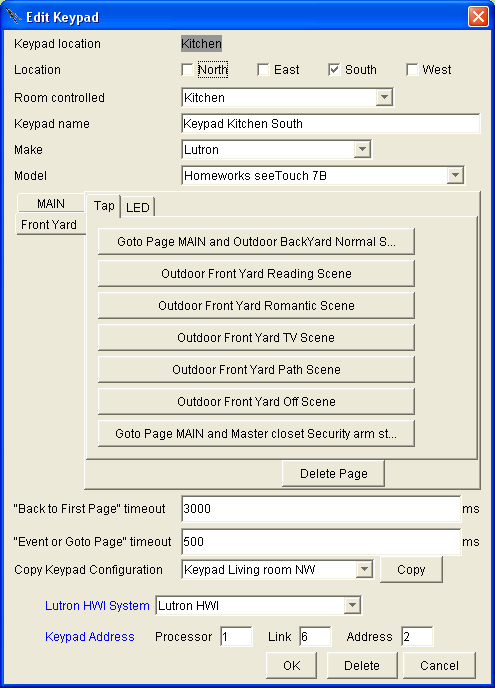
However, the buttons on the second page where
referenced to the room. Therefore, they continue to control the Outdoor
Front Yard Room scenes - just what we wanted.
Click OK. |
|
Use
button 7 of the other Living room keypad to toggle the fireplace on and
off.
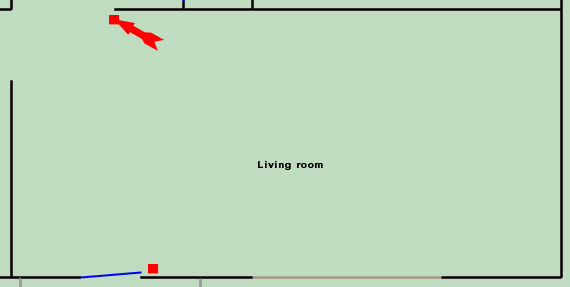
Click on the other Living room keypad. |
|
|
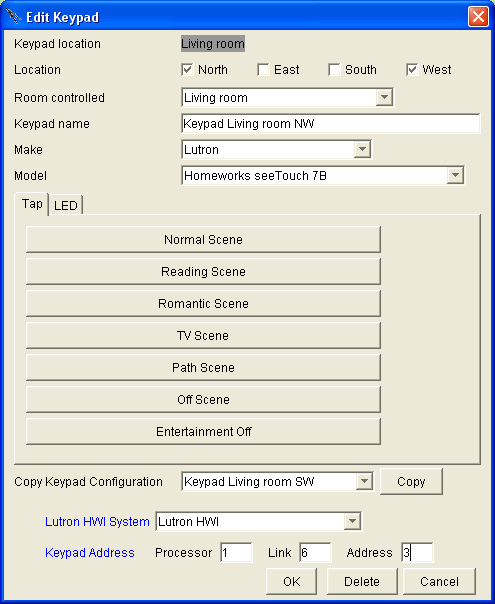
Click on the dropdown for the "Model"
and change it to "Homeworks seeTouch 7B"
Read the warning and click Yes to it.
Re-enter the keypad address of 1:6:3
|
|
|
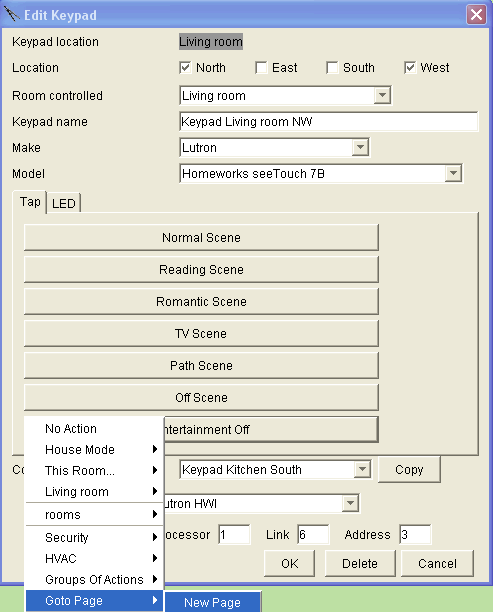
Click on the bottom button and use the Action
Tree to create a new page.
|
|
|
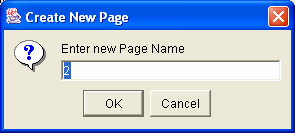
After selecting the "New Page" option
above, you will get the pop up menu at the right. Accept the default numbered
page. |
|
|
Go to page 2 by clicking on the tab labeled
"2"
Toggle the fireplace on with the bottom button
and return to the main page.
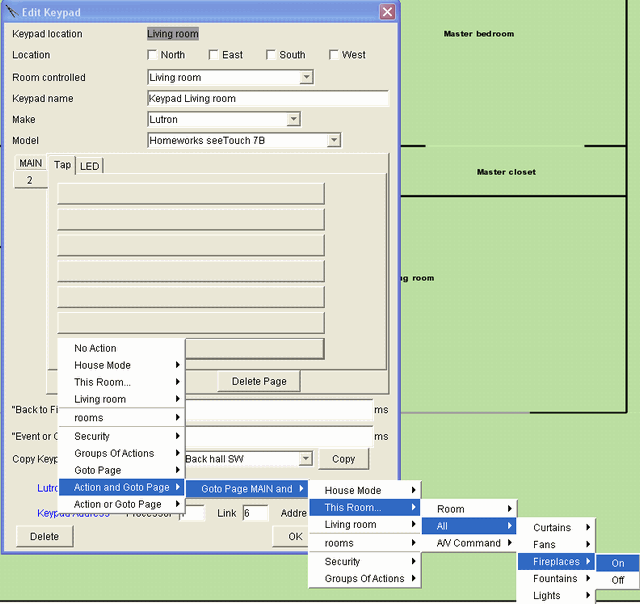
Use "This Room..." and "All"
to create a button that can be copied to other rooms.
However, if you only have one fireplace and
you want multiple keypads to control it, then do not use "This Room...".
Instead, use the name of the room.
|
|
|
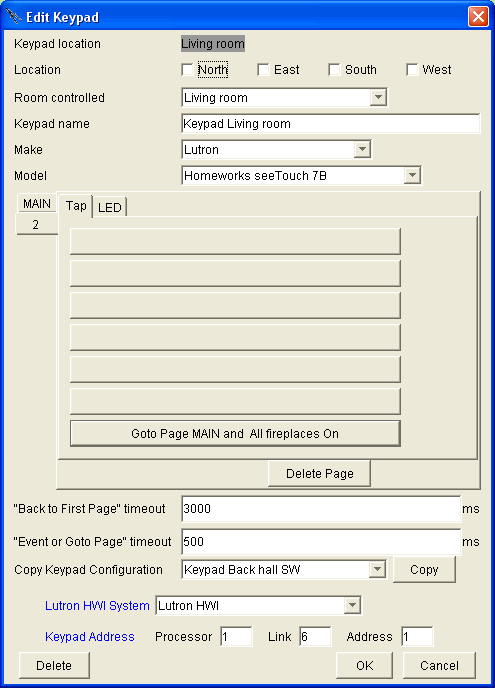
You will get the menu at the right where the
tapping the bottom button twice will turn the fireplace on.
|
|
|
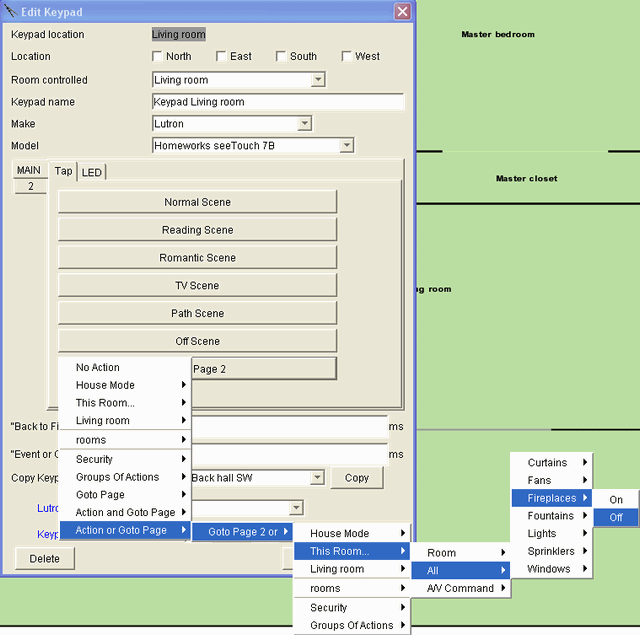
Return to the Main page by clicking on the
tab labeled "Main".
Configure the bottom button to turn the fireplace
off OR go to page 2.
|
|
|
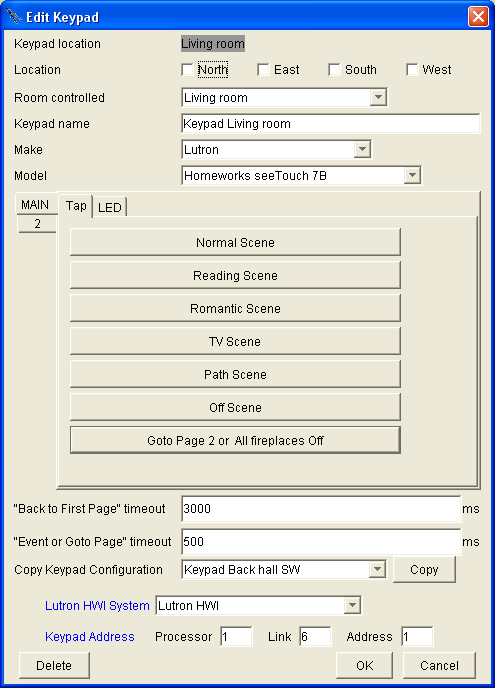
Now we have a keypad where tapping the bottom
button twice within the 500 millisecond "Event or Goto Page"
timeout time will turn on the fireplace.
And we have a keypad that can turn off the
fireplace by tapping the bottom button once (it will turn off after a
500 millisecond delay).
Click OK. |
|
Create
button presses to disarm the security system
Create a page of the keypad to be a subset
of the keypad numbers. Then use those numbers to disarm the code. One
constraint will be that the disarming code will have to map to the subset
of numbers represented on this keypad. For example, suppose the security
code is 1-2-3-4, then we will create a page of the keypad that includes
these numbers.
Open up the keypad next to the front door.
|

|
|
Go to page "Front yard" by clicking
on the tap for that page.
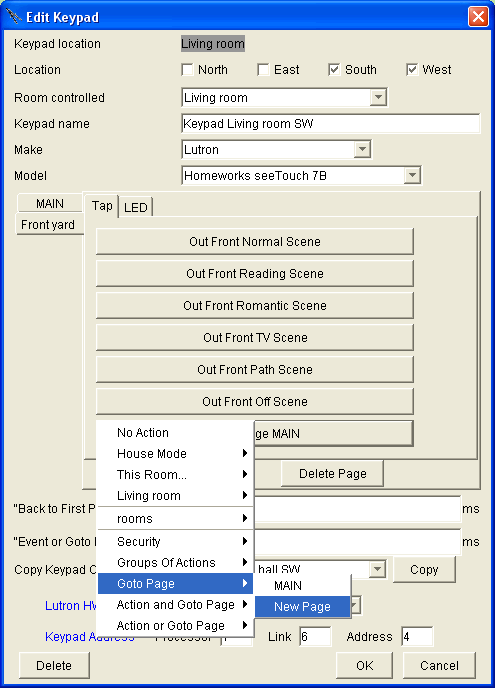
The bottom button will say "Goto page
MAIN".
Click on that button and select "Goto
Page", "New Page". |
|
|
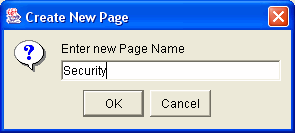
Call the new page "Security".
Click "OK".
|
|
|
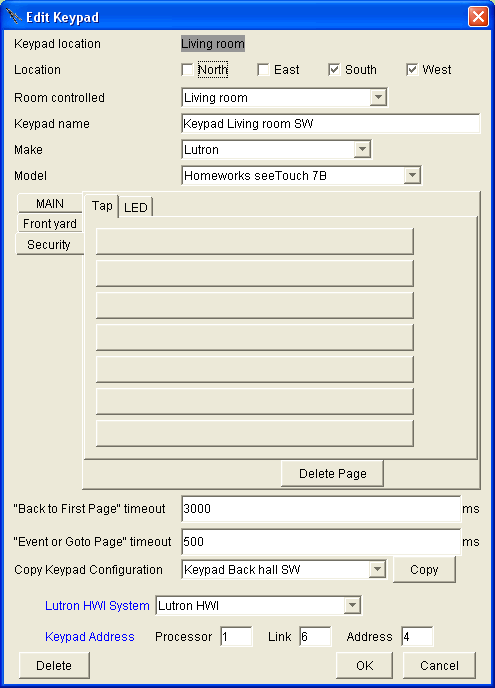
Click on the tab for the Security page.
|
|
|
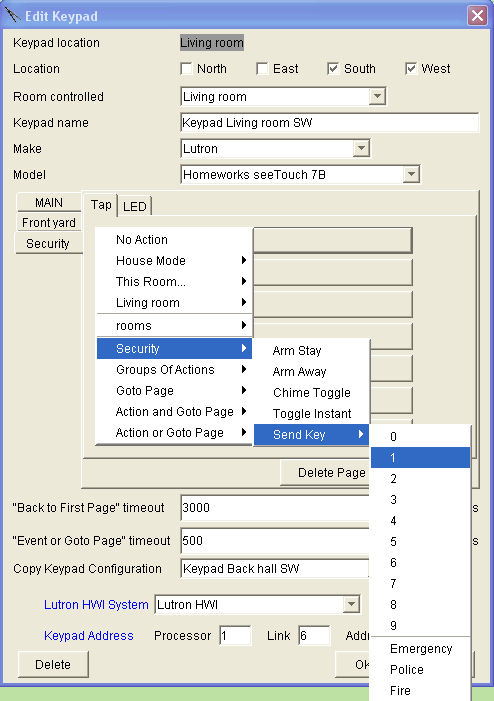
Click on the first button and follow the Action
Tree to have it send a "1" to the security system as shown at
the right.
|
|
|
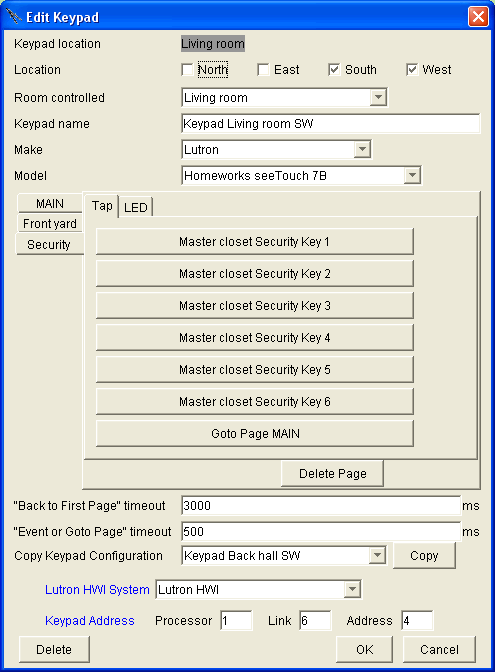
Continue adding the actions for sending security
keys to the security system using the Lutron keypad.
For the last button, make it return to the
main page (so you don not have to wait for the "Back to First Page"
timeout of 3 seconds).
Now entering "7" (to get you to
the Front yard page), "7" ( to get you to the Security page),
"1, 2, 3, 4" (the security code) will disarm the security system.
If you change the security code, the keypad
will be able to enter the new security code (provided it is comprised
of the numbers 1-6 only). |
|
|
Arming the security system
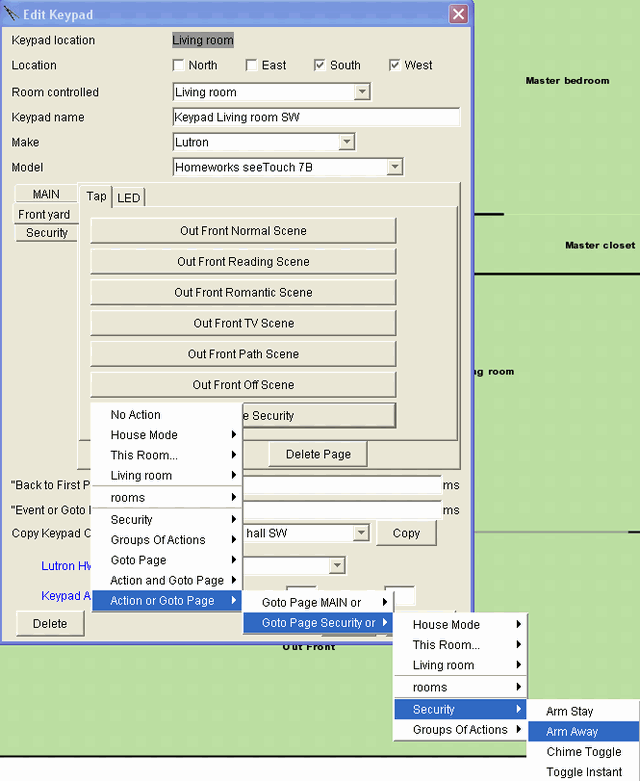
Go to the page named "Front yard"
by clicking on its tab.
Change the bottom button to do an "action
or goto page" where the page it goes to is the Security page and
the action it takes if another button is not pressed quickly is the to
arm the security system for leaving the house. |
|
|
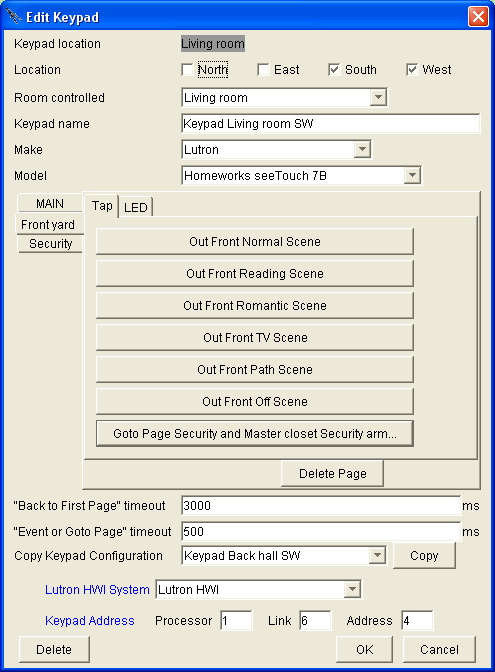
Now pressing the bottom button of the Lutron
keypad three times will arm the security system as you are walking out
the door.
As you walk in, you can use the keypad to
disarm your alarm system (provided your code only uses the digits 1 -
6). For example, you your code is 1,2,3,4, then press buttons 7,7,1,2,3,4.
You are done. Click "OK".
Then copy this keypad into the Kitchen by
the window and change arming the security system from arming it for away
to arming it for staying home. |
|
