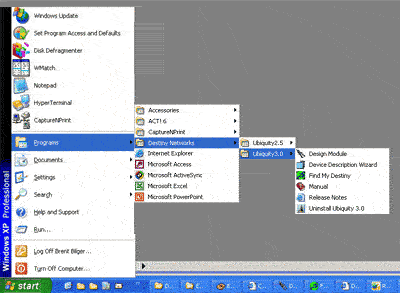
Run the Design Module
Click "Start", "Programs", "Destiny Networks", "Ubiquity 3.1", "Design Module"
Open the Project: 08 Add AV Advanced Theater.ubq
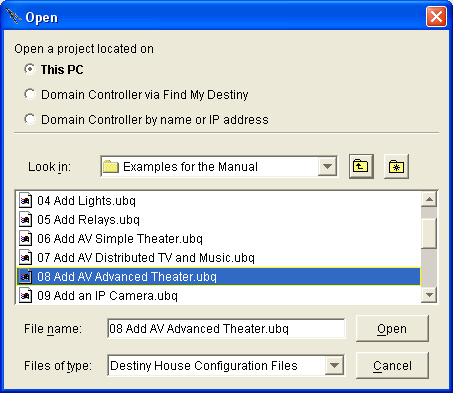
To open the project, select "File", "Open Config/Project"
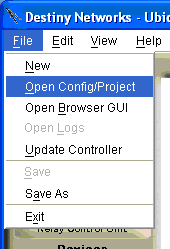
You will get the following menu.
Navigate to "C:\Program Files\Destiny Networks \Ubiquity \Ubiquity3.1\Examples\Examples for the Manual"
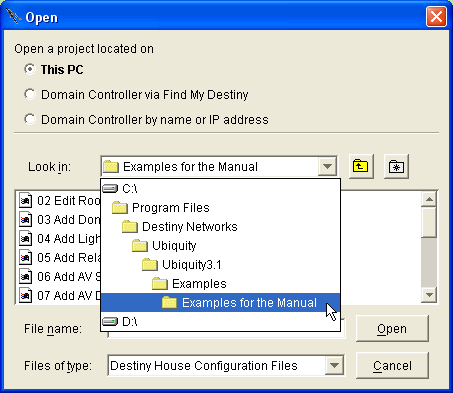
You will get the following menu.
Click on the project "08 Add AV Advanced Theater.ubq"
Click the "Open" button
The project will open.
Add a second TV to the Living room
The purpose of the 2nd TV is to watch the PVR without having to turn on the projector and darken the room. At the same time, you may want to have the video of the PVR on the small TV while watching and listening to the PVR.
Open the Schematic in the Living room
Add the Sharp 15" LCD TV to the Living room and name it LCD TV and give it a display name of LCD TV.
Click OK to add it to the list of entertainment equipment in the Living room.

Wire the new TV
AV-IN1: S-Video from the PVR Out: S-Video.
AV-IN1: Line Stereo RCA from the AV surround receiver VCR1: Line Stereo RCA
IR control from the Domain 3000 IR Port 3 (the same port as the AV surround receiver - the Domain 3000 can drive 2 IR emitters without amplifying the signal).
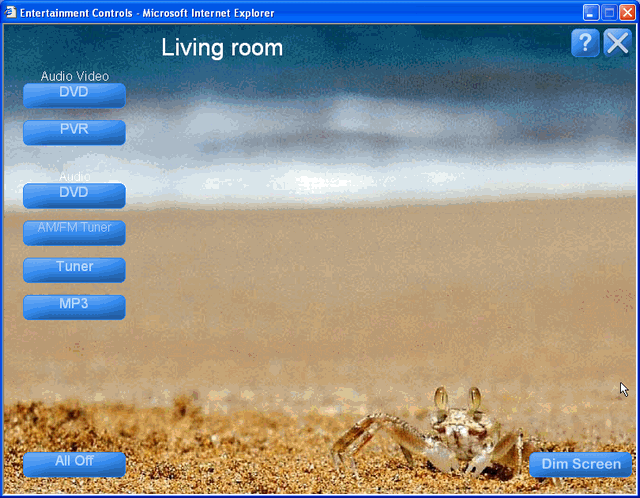
However, when you open the Entertainment Browser GUI menu for the Living room, it doesn't look any different. The second TV didn't create any new buttons.
Use the entertainment Preferences to set the Path
Go back to the Design Module and open the Schematic in the Living room. and click on the Preferences button at the bottom to get the menu at the right.
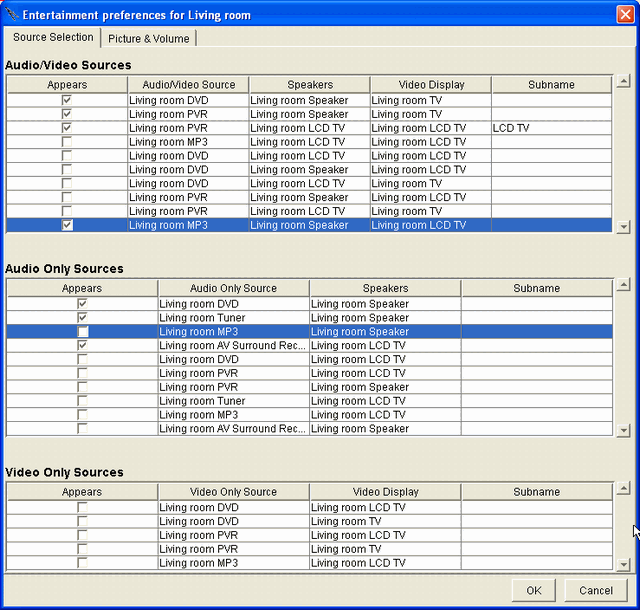
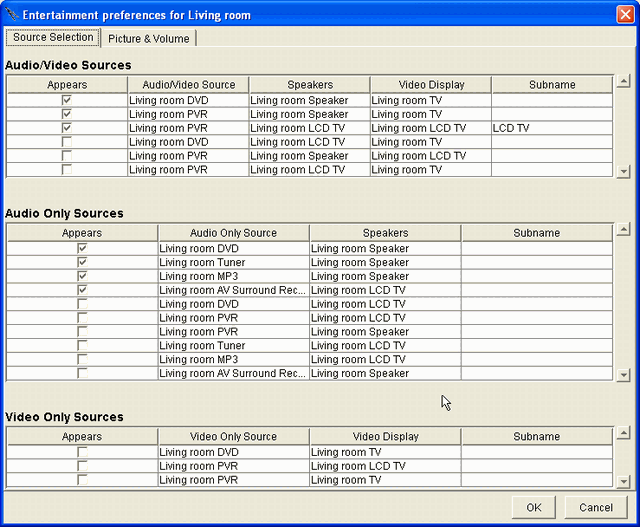
This menu has 3 subsections: "Audio/Video" at the top, "Audio only" in the middle, and "Video only" at the bottom.
In the "Audio/Video Sources" subsection at the top, under the "Video Display" column, note that the LCD TV shows up with 2 paths from the PVR - one using the speakers of the TV and one using the speakers connected to the AV receiver.

Add the appropriate selections such that:
The PVR appears on the Living room LCD TV speakers / Living room LCD TV video to watch and listen to the PVR.
Click in the Subname field for the path and you will get a little pop up menu in which to enter the subname "LCD TV" and click OK.
Click OK. You must click OK for the changes to take affect.
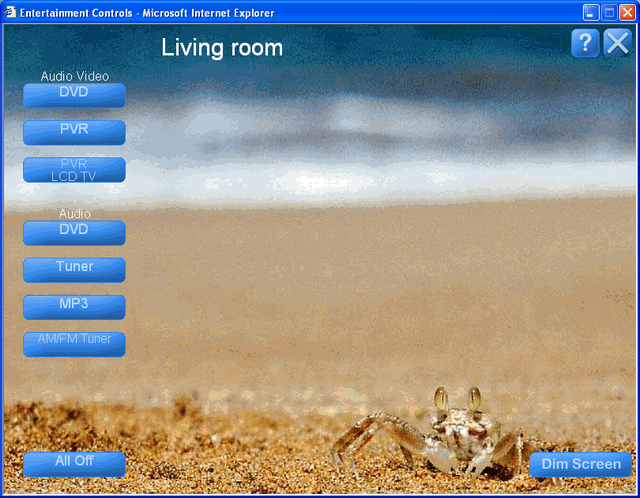
In the Browser GUI click on the icon for entertainment in the Room Menu of the Living room and you will get the Entertainment Browser GUI at the right.
Note that a second PVR button has been added with a subname of "LCD TV". If you click on this button the LCD TV will turn on, not the projector.
Create a GUI button for watching the news
To do this we will need to create a group of actions to select the PVR to the LCD TV and turn the PVR to channel
204.
Click outside all rooms on the Browser GUI to get there House menu.
Click on the Events button to get the menu at the right.
Click the "Add" button.
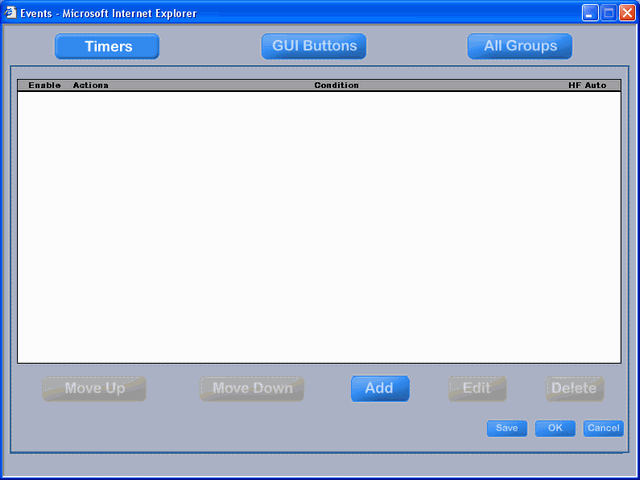
Click on the button labeled "GUI Buttons" at the top middle of the menu.
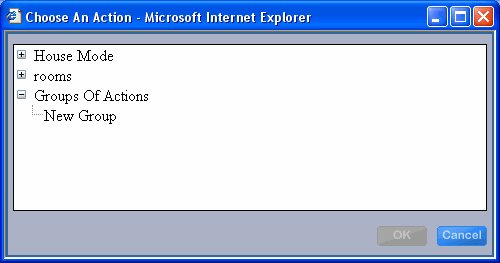
Expand the "Groups Of Actions" line to the "New Group" option.
Click on the "New Group" option.
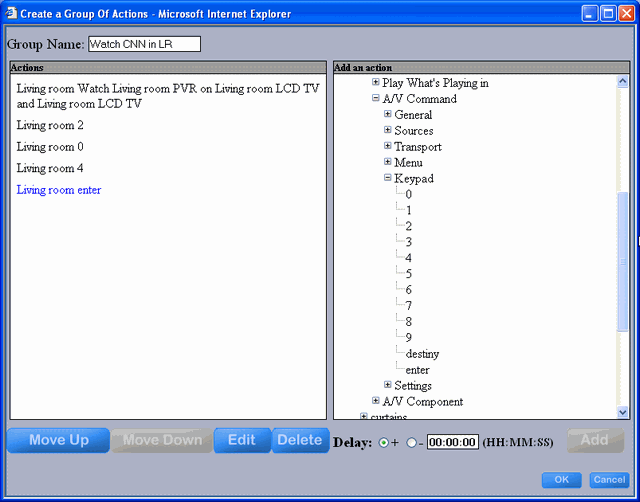
Enter the "Group Name" at the tope left of the menu - call it "Watch CNN in LR".
Expand the "rooms", "Living room", "Entertainment", "Watch" and select the path from the PVR to the Sharp TV.
Click "Add" to get the menu at the right.
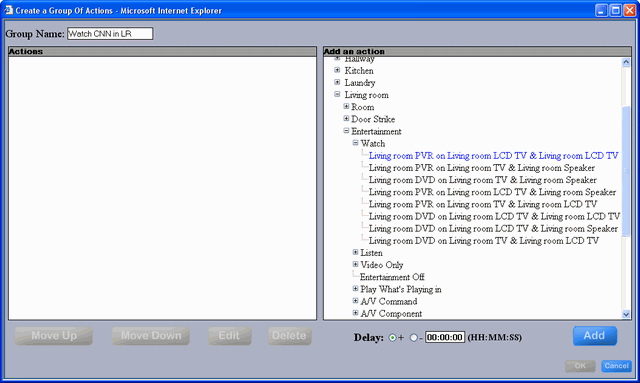
Expand "A/V Command", "Keypad" and click:
2, Add,
0, Add,
4, Add,
Enter, Add
to tune the PVR to channel 204 (presumably the channel for watching CNN).
Click OK.
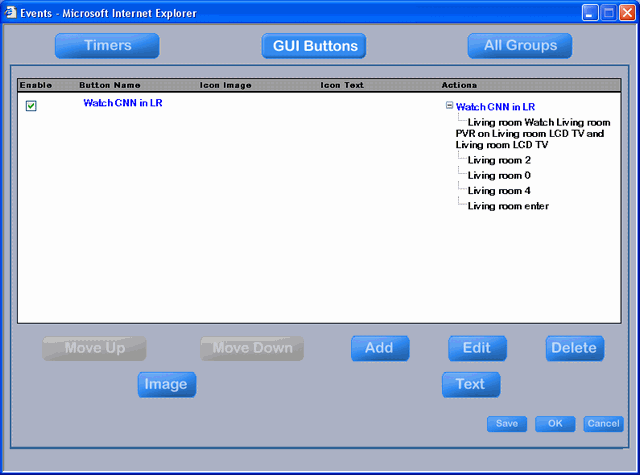
The Group will be added to the list of GUI Buttons. Expand the actions of the new group to see the menu at the right.
Click the Image button.
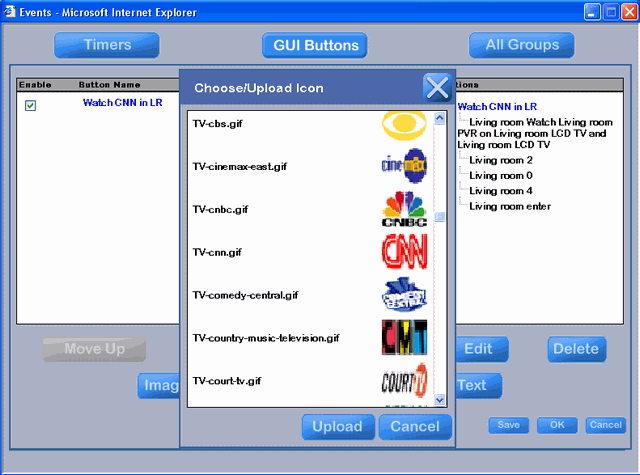
Click the Upload button.
Scroll through the images until you come to the CNN image. The images are in alphabetical order and all of the TV images start with "TV-".
Click on the CNN image and it will automatically become the image for your GUI button.
.
And you will get the menu at the right.
Click OK to finish creating your GUI button.
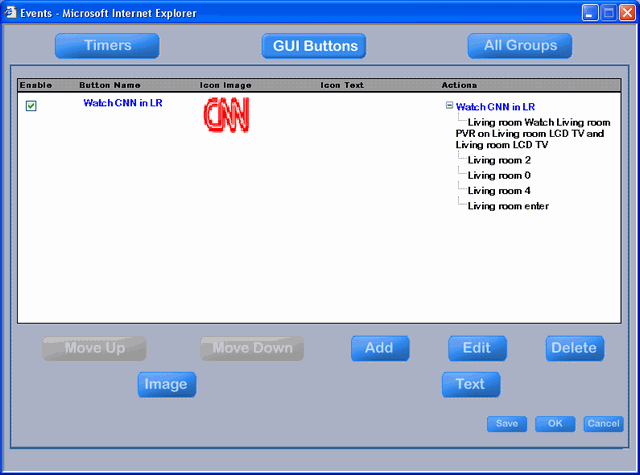
A new GUI button will appear on the Browser GUI frame.
Clicking on this button will turn on the PVR, Denon, and the LCD TV. It will also select the PVR as the source and tune it to CNN.
You may want to test it and see the result on the Entertainment GUI menu and, then, look at Check My Destiny to see what commands were actually sent.
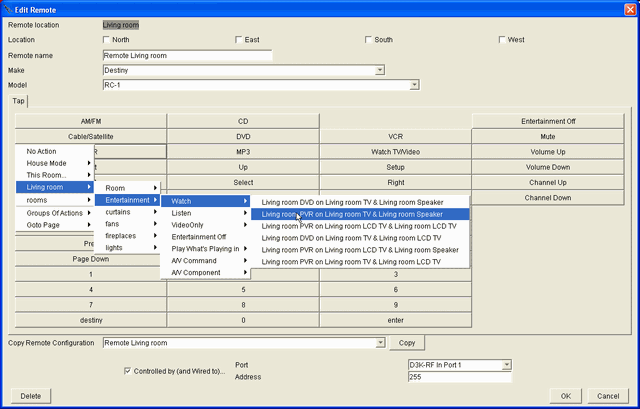
Configure the "TV/Video" button of the remote control in the Living room to Watch CNN on the LCD TV
In the Design Module, go to the AV Remote Control layer.
Click on the Red dot in the Living room to bring up the Keypad menu for the Remote Control.
Since there are 2 TVs in the room, .
Click on the PVR button to bring up that Action Tree for that button.
Follow the path at the right for that button to watch the PVR on the projector.
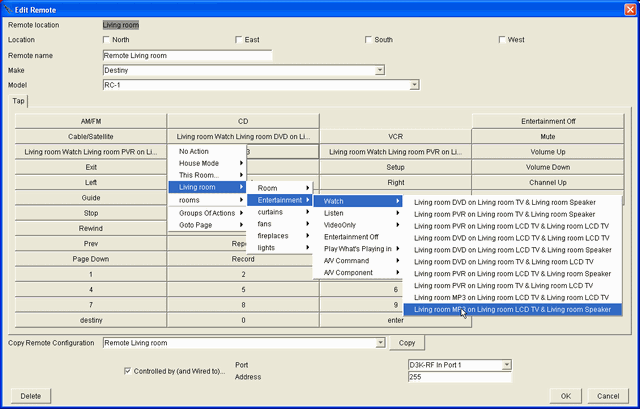
Select the DVD, CD, and AM/FM buttons and create a specific path to the appropriate TV and speakers for each of them.
Configure the TV/Video button to the PVR on the LCD TV.
To play the MP3 in the Living room, connect the coax digital output of the MP3 player to the CD input of the Denon (not that you will have to assign the Coax input to the CD connector group).
Note, you may want the MP3 to display on the LCD TV. To do that, you also need video from the MP3 to the TV. Connect the AV6 Composite output of the AV switch to the AV IN2 of the LCD TV.
At the right, you see selecting:
MP3 video on LCD TV
MP3 sound on AV surround receiver
On the menu at the right, the AM/FM and CD have not been set to a specific path. They must be set to a specific path before using these buttons.
Here's the Entertainment GUI after adding the wire for MP3 player.
An MP3 button was automatically generated by the software, but we don't know where the audio and video will play.

Configure a Path to the Speakers
Open the Preferences menu.
As it turns out, the MP3 that is Audio/Video is using the LCD TV speakers.
You don't want that.
Uncheck that path and check the path at the bottom of that section to use the surround speakers.
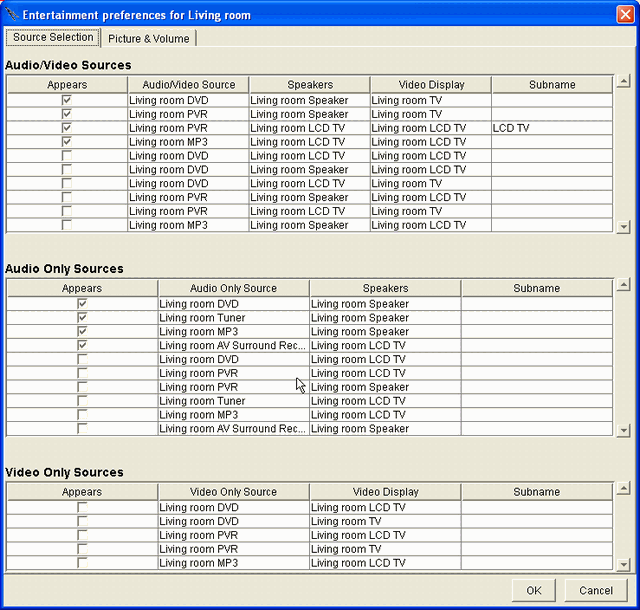
Remove the button for MP3 as Audio only
In the menu above, uncheck the MP3 under the Audio Only section.