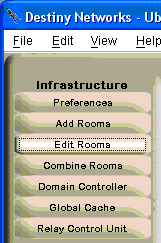
Select the Edit Rooms layer to:
Move the text name of the room
Change the name of the room
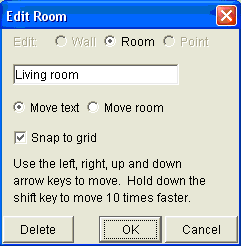
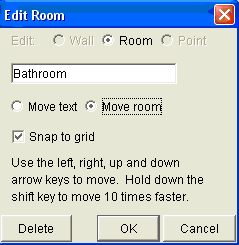
Click inside of the room to get the pop up menu at the right. If you get a different menu that has two columns (please see below), uncheck the wrong room and select the "Room" radio button at the top.
Modify the room name in the white text box.
Click "OK".
Delete the room
Click inside of the room to get the pop up menu at the right. If you get a different menu that has two columns, uncheck the wrong room and select the "Room" radio button at the top.
Click "Delete" and confirm the delete by clicking yes.

Edit the walls
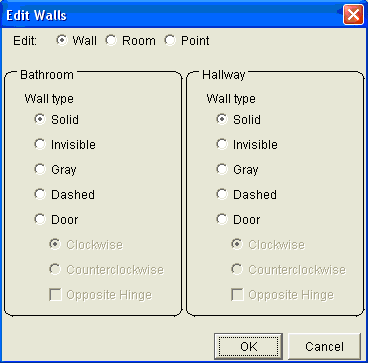
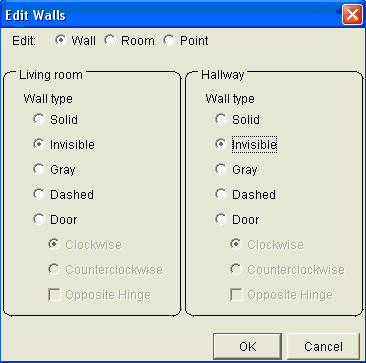
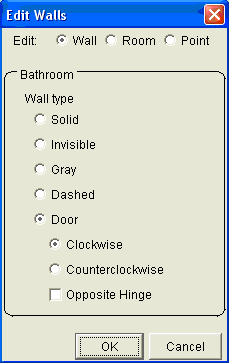
Click on a wall. Usually, you will get the menu at the right (if you did not, please see below). At the top of the menu is a set of radio buttons and "Wall" will be selected. This allows you to modify the two closest walls to the point at which you clicked. Each wall belongs to a room and the name of the room is near the top of the menu. Recall that when you drew the rooms you drew one wall for each room and you drew them on top of each other. For each room you can change the associated wall. Use this menu to:
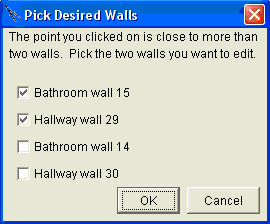
Pick Desired Walls
If you get the menu at the right, it means that you have clicked on a point that was close to more than 2 walls (in the example, the point clicked was close to 4 walls), and it is asking you to select the walls you want to modify. If you really wanted to modify the walls, the default check boxes are almost always correct and you can just hit enter to get back to the Edit the walls menu. If you really wanted to move a room or move a point in a room, uncheck the room you do not want to modify and click OK.
If, after clicking OK, you find that you are modifying the wrong walls, the best thing to do is be more accurate with the location at which you click. Alternatively, you can remember the number to the right of the name of the wall (it is the internal number associated with the wall) and select a different one. However, we have not had to do this yet.
Make a wall into a door
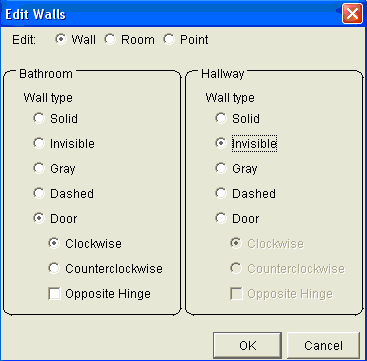
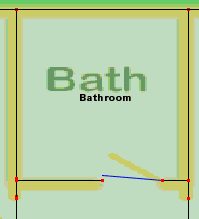
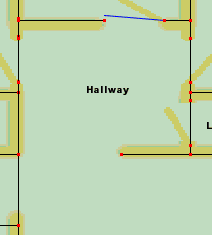
Click on a wall. You will get the Edit the walls menu. To make a wall into a door, recall that you will usually be working with 2 walls (one from each room). Therefore, you will need to make one wall into a door and the other wall invisible. Usually, the floor plan gif or jpg shows the door opening into a room. For wall type of that room select "Door" as shown at the right. On the floor plan, the wall of that room will immediately turn blue and open in a clockwise direction - hinged at the first point you drew of the door. If the door opens the other direction, select "Counterclockwise". If the door is hinged on the other side, select "Opposite Hinge".
Now select "Invisible" for the wall of the other room (as shown in the example to the right) and you will have the door you want.
Make a wall into a window
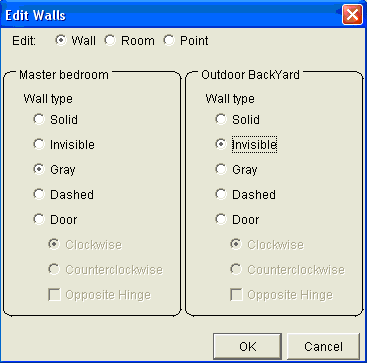
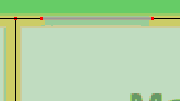
Click on a wall. You will get the Edit the walls menu. To make a wall into a window, recall that you will usually be working with 2 walls (one from each room). Therefore, you will need to make one wall into a window and the other wall invisible. As shown in the example to the right, select "Gray" for one wall and "Invisible" for the other. The result is that the floor plan will have a gray line for the windows. Note that it is not necessary to show windows on the floor plan. You can still add automatic curtains and windows to rooms that don't have their windows represented as gray lines. However, the gray lines do make the floor plan more attractive and more intuitive for the homeowner.
Make a wall invisible
Click on a wall. You will get the Edit the walls menu. To make a wall invisible, recall that you will usually be working with 2 walls (one from each room). Therefore, you will need to make them both invisible. Do this by selecting "Invisible" for both walls as shown to the right.
Make a wall gray
Click on a wall. You will get the Edit the walls menu. To make a wall gray, recall that you will usually be working with 2 walls (one from each room). Therefore, you will need to make one wall gray and the other wall invisible. As shown in the example to the right, select "Gray" for one wall and "Invisible" for the other. The result is that the floor plan will have a gray line for the windows. Note that it is not necessary to show gray walls on the floor plan. However, the gray lines do make the floor plan more attractive and more intuitive for the homeowner.

Move the text name of the room
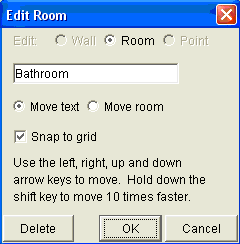
Make sure the room names are visible (see Room Name). Click in the middle of the room. and you will get the menu to the right (if you did not, please see above). It will default to enabling you to move the text name of the room. Use the up and down, left and right arrow keys on your computer to move the text name. Click OK.
Move a room
Click in the middle of the room. You will get the menu shown in Move the text name of the room (above and to the right). Select the "Move room" radio button. Now use the up and down, left and right arrow keys on your computer to move the room. Click OK.
Move a point of a room
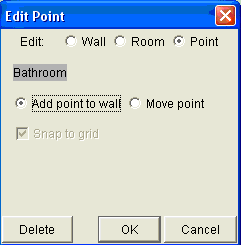
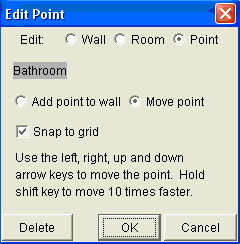
Click on the point of the room that you would like to move. At first you will usually get the "Pick Desired Walls" menu (the first menu at the right) because the point is usually close to multiple walls and editing walls is more common than moving points. Uncheck the room whose point you do not want to move and click OK. At this point, you will get the Edit Walls menu with just one room listed (if you get two rooms, you did not uncheck the room whose point you do not want to move in the Pick Desired Walls menu). At the top right, select the "Point" radio button and you will get the "Edit Point" menu (the menu you want).
The Edit Point menu defaults to "Move point". Therefore, you can use the up and down, left and right arrow keys on your computer to move the point of room. You may want to uncheck "Snap to grid" to move the point one pixel at a time. Click OK.

Add a point to a room
Click on a wall as close as possible to the place at which you would like to add the point (note that when you add the point, it will snap to the grid, but that you can move the point after adding it). At first you will usually get the "Pick Desired Walls" menu (the first menu at the right) because the point is usually close to multiple walls and editing walls is more common than moving points. Uncheck the room whose point you do not want to move and click OK. At this point, you will get the Edit Walls menu with just one room listed (if you get two rooms, you did not uncheck the room whose point you do not want to move in the Pick Desired Walls menu). At the top right, select the "Point" radio button and you will get the "Edit Point" menu (the menu you want).
The Edit Point menu defaults to "Move point". Therefore, select the "Add point to wall" radio button. Click OK to add the point to the wall.


