The Xantech SmartPad LCD touch screen panel can control any device in
the home via an RS-232 to the Domain Controller (or to a Global Cache
connected to a Domain Controller). The display can use relative commands
to control the devices of the room it is in. This may mean you will not
have to program this keypad at all. You may be able to literally load
the Destiny Network sample program into the display and install it in
a room.
Architecture
of the Xantech SmartPad LCD
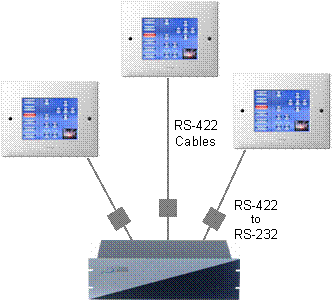
The Xantech SmartPad LCD uses Cat 5E wire
to send an RS-422 signal through the house to an RS-422 to RS-232 converter.
The RS-232 port of that converter plugs into the Domain Controller.
All button presses are sent directly to the
Domain Controller.
Each keypad is connected to a separate serial
port on the Domain 3000 or Lantronix Ethernet to RS-232 converter.
All three versions of the Xantech SmartPad
LCD are supported.
|
|
Domain 3000
Wiring
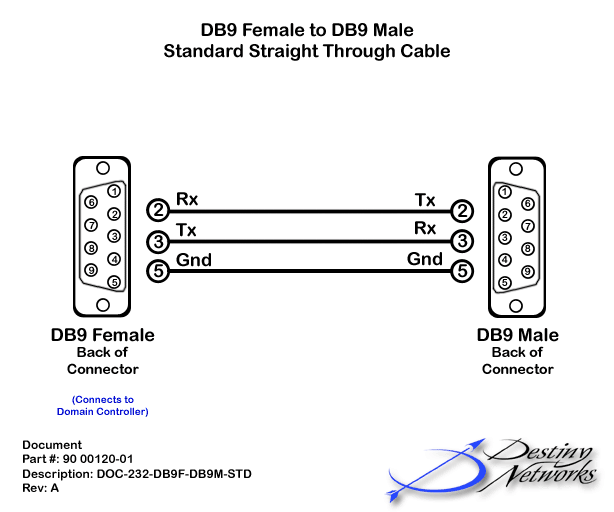
Use the DB9 female to DB9 male standard straight
through cable to connect the Domain 3000 to the RS-422 to RS-232 converter.
|
|
Add
the Xantech SmartPad LCD display
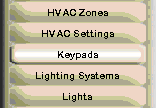
Select the Keypads and
Displays layer of the Design Module.
|
|
|
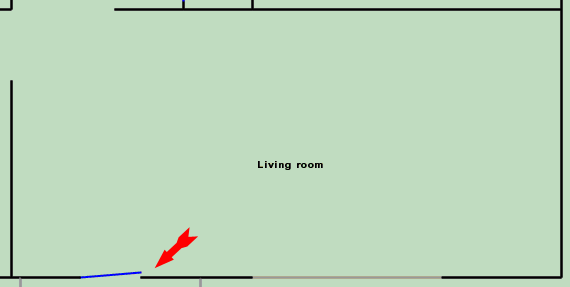
Click in the location in the room in which
you plan to install the Xantech SmartPad LCD. |
|
|
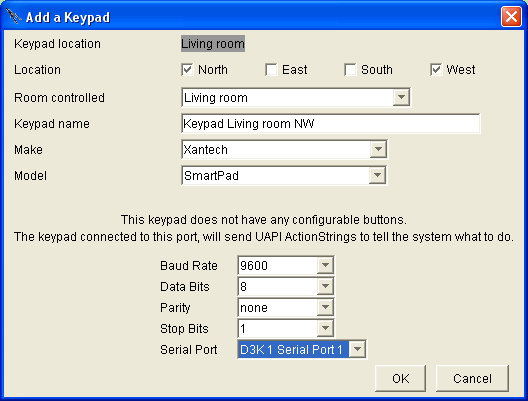
You will get the "Add a Keypad"
menu.
Location: select the location of the keypad
to auto generate the name.
Room controlled: selecting the correct "Room
controlled" is very important. When you select "This Room"
in the Action Tree, you are referring to the room you select with this
dropdown box.
Keypad name: the default name is usually good,
but you can change it if you want.
Make: select "Xantech".
Model: select "SmartPad". This will
work for all 3 versions of the SmartPad.
Baud Rate: the Xantech SmartPad LCD defaults
to 9600 baud, 8 data bits, no
parity, 1 stop bit, no flow control. Please use those settings.
Serial Port: use the dropdown to select the
appropriate serial port.
Click OK.
|
|
|
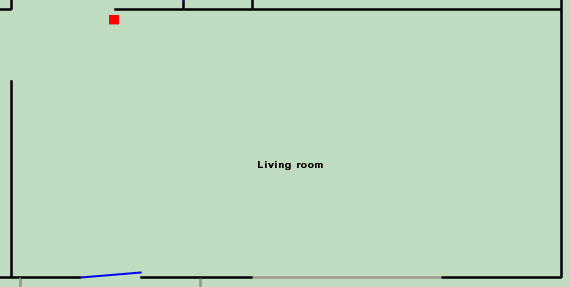
After clicking OK on the menus above a red
dot will appear where you initially clicked to add it.
The Domain Controller is ready to accept UAPI
commands from the display.
Commands that are received on the serial port
you selected above can use UAPI "Relative Addresses" to apply
to the room you selected as the "Room controlled" above. |
|
Download the Application we Wrote for you
We wrote an application for you that you can
download and start using immediately. The path is shown at the right.
Download the applications:
SmartPad
64g with Ubiquity serial.ddp
and
Destiny
Networks Domain Controller.RSL
to your desktop so that you can load it into
the Pronto Pro editor below.
|
http://www.destinynetworks.com/
Downloads/
Password_Protected/
Software for 3rd Party Products/
Xantech SmartPad LCD Display/ |
Download
the Dragon Drop-IR™ application
Go to the Xantech web site (http://www.xantech.com).
Download and install the Dragon Drop-IR™ application
"DragSPLCD" version 1.053 or higher.
|
|
Import
the Destiny RS-232 Commands and Example Project
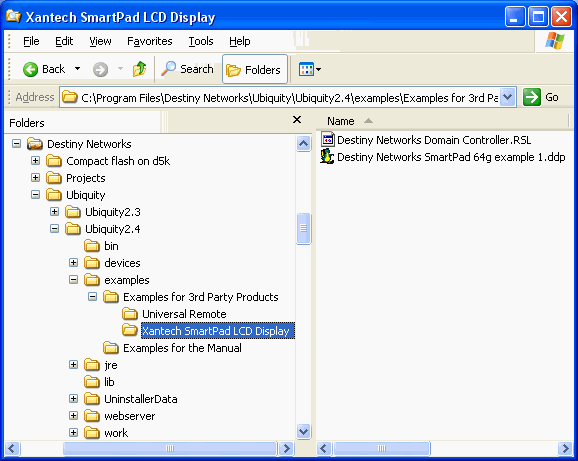
Open up Windows Explorer (not Internet Explorer).
Navigate to the "Dragon Drop-IR (SPLCD)"
folder via "C:\Program Files" and the rest of the path that
you can see in the screen dump at the right. |

|
|
Now, navigate to the "Xantech SmartPad
LCD Display" folder via "C:\Program Files" and the rest
of the path that you can see in the screen dump at the right.
|
|
|
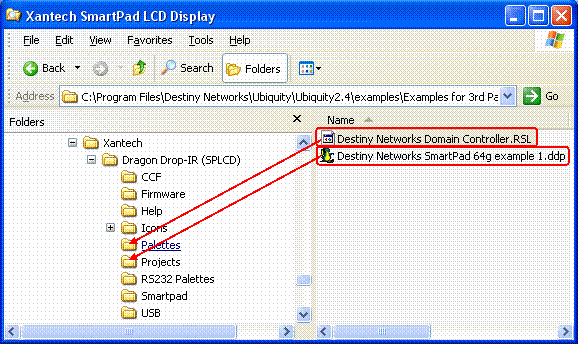
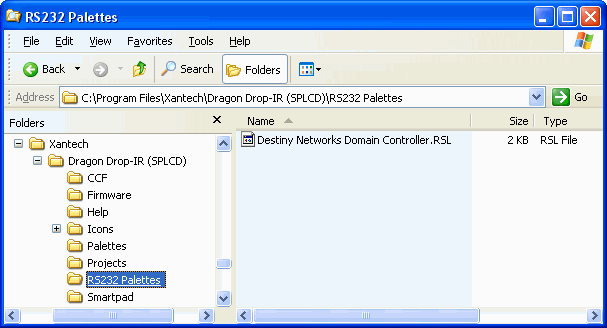
Copy "Destiny Networks Domain Controller.RSL"
from your desktop to the Xantech\Palettes directory. This s a file that
contains the Destiny RS-232 commands for controlling the devices in a
room.
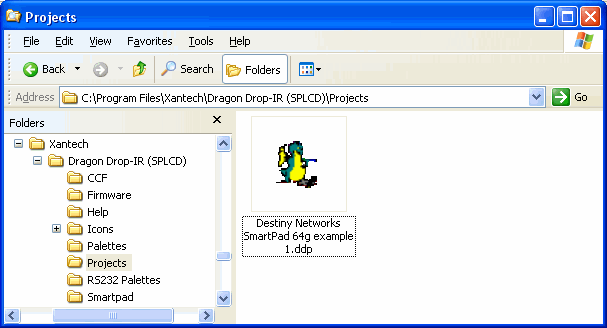
Copy "Destiny Networks SmartPad 64g example
1.ddp" from the Destiny directory to the Xantech\Projects directory.
This is the example project that you will open in a minute.
|
|
|
After copying the files, navigate to the Xantech
RS232 Palettes folder. You should see the Destiny ".RSL" file.
|
|
|
Navigate to the Xantech RS232 Projects folder.
You soul see the Destiny ".ddp" file.
|
|
Working
with the Sample Project
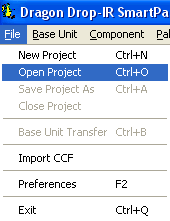
Run the Dragon Drop program (click "Start",
"All Programs", "Xantech", "Dragon Drop IR (SPLCD)".
Open the sample project from Destiny Networks
(click "File", "Open Project").
|
|
|
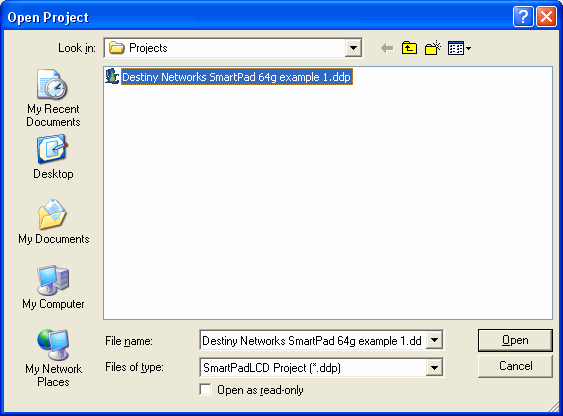
Select the sample project from Destiny Networks.
Click "Open". |
|
|
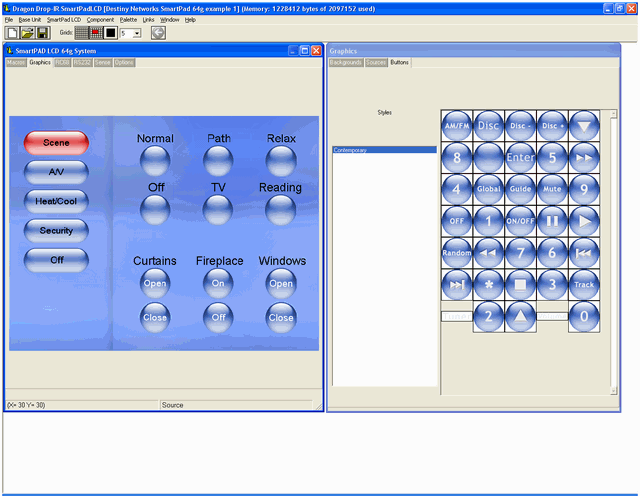
Increase the size of the SmartPad window by
dragging the lower right corner.
Click on the Graphics tab.
Click on the Scene button.
You will get a display something like the
one at the right.
Modify the graphics as you want. |
|
|
Add Macros to the Buttons
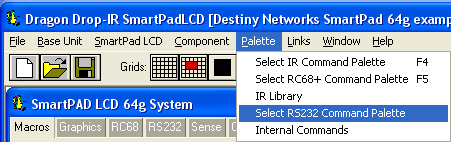
Select "Palette", "Select RS232
Command Palette" from the dropdown menu.
|
|
|
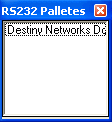
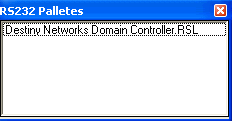
You will get the smaller box shown on the
left. You may want to stretch the side of the box to see the whole line
of text as shown on the right.
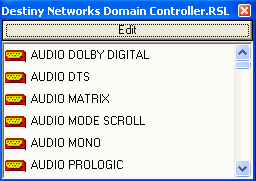
Click on "Destiny Networks Domain Controller.RSL". |
|
|
You will get the menu on the right. |
|
|
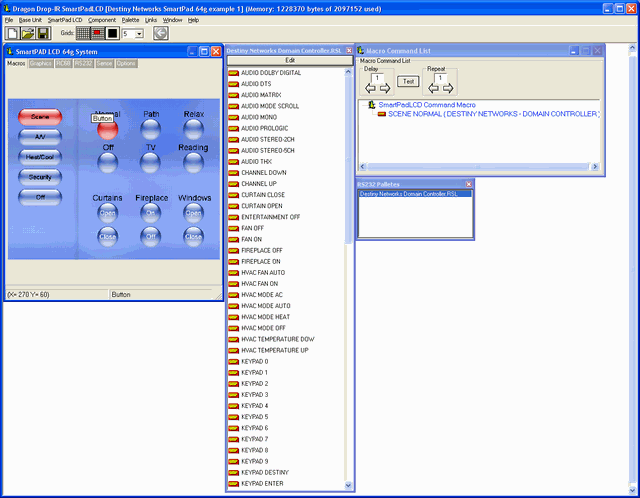
You may want move and resize the windows.
The layout at the right works pretty well.
To add a serial command to a button:
Select the button by clicking on it (make
sure the "Macro" tab is active).
Click on the command you would like to add
in the center window and drag it to the upper right window of Macro Commands.
If necessary, you can Add
RS-232 Commands to the RS232 Palette
Note that the default commands are all "relative"
commands. That is, they refer to "This Room" where "this
room" is the room in which the display is located.
Notes:
Two Groups of Actions
are defined: "Good Night" and "All Awake". These would
have to be added to the project for them to work. The DVD player has been
configured with Destiny Commands. The other AV sources need to be configured.
Please contact Destiny support if you would like some help. The GE Interlogix NX-8E
is the security system being controlled.
Save (Ctrl S) your
project often.
Very often.
After you have finished, transfer the project
to the display.
|
|
Add
RS-232 Commands to the RS232 Palette
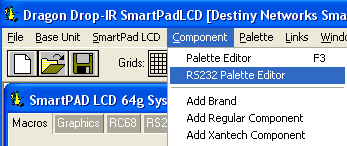
With the Xantech Dragon Drop program open,
use the dropdown menu in the top left to select: "Component",
"RS232 Palette Editor".
|
|
|
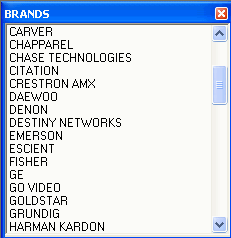
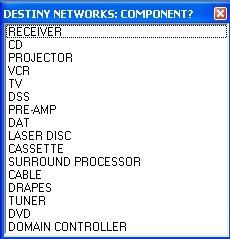
You will get a pop up menu name "Brands".
Scroll until you see "Destiny Networks"
and click on it. |
|
|
You will get a pop up menu name "Destiny
Networks: component?".
Scroll until you see "Domain Controller"
and click on it. |
|
|
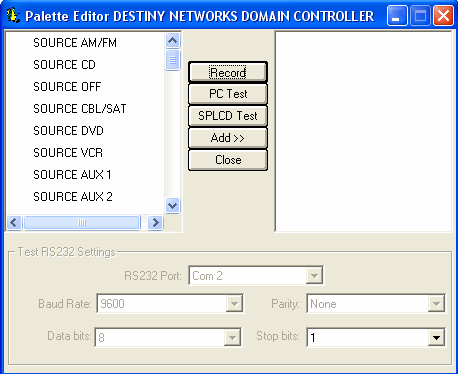
You will get a menu that looks something like
the menu at the right. |
|
|
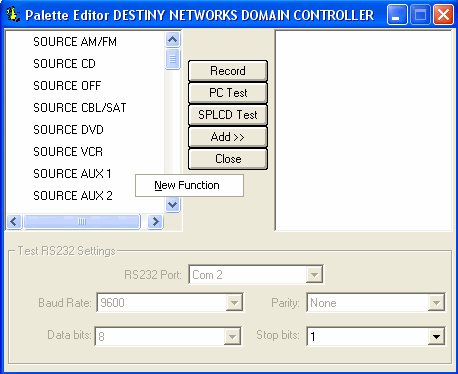
Add an RS-232 command
With you mouse, move the curser into some
white space in the left hand text box and right click your mouse to get
the "New Function" pop up menu shown at the right.
Click on "New Function".
|
|
|
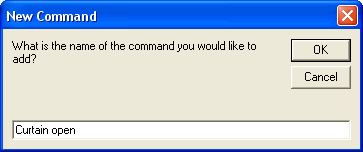
You will get the "New Command" menu.
Enter the name of the new command you would
like to create (e.g., Curtain open).
Click OK. |
|
|
The command you just entered will be added
to the end of the list on the left.
Repeat the process above to add additional
commands starting with right clicking in the white space on the left to
get the "New Function" pop up.
|
|
|
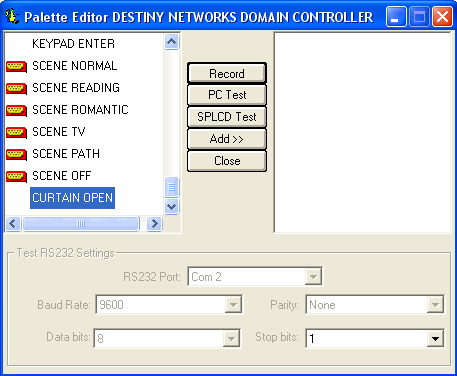
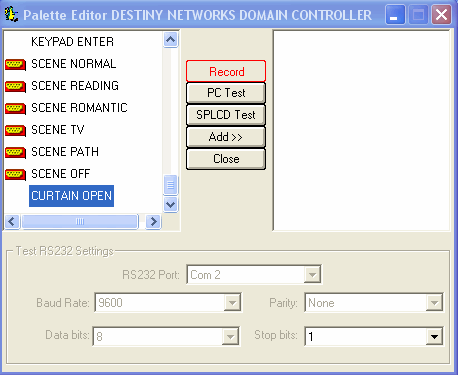
After you have added all the commands, click the "Record" button and then click the command
whose RS-232 command you want to record. Note commands that have already
been recorded will have the little DB-9 icon to the left of them. |
|
|
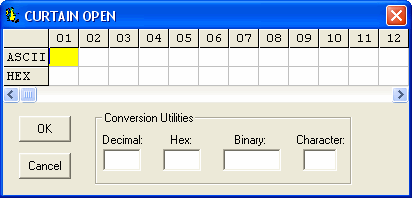
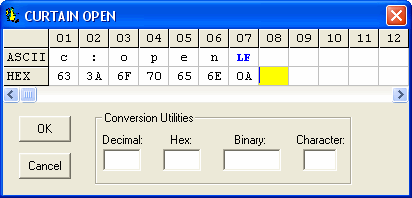
You will get the menu at the right asking
you to type in the command.
Refer to UAPI to determine
the command to type in. |
|
|
Type the command.
To add the linefeed ("LF"), use
the down arrow key to get to the "HEX" row and then type "0A"
(zero, A).
Click OK.
The command will now have an RS-232 string
associated with it. However, there is one more step. |
|
|
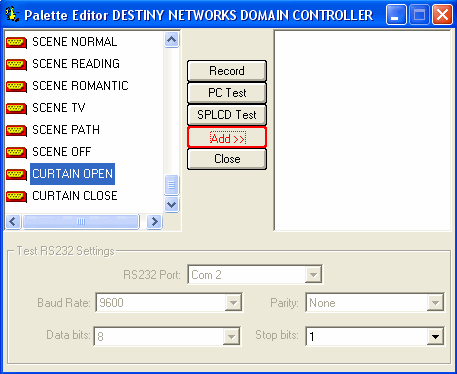
Click the "Add>>" button to
make it red as shown at the right.
|
|
|
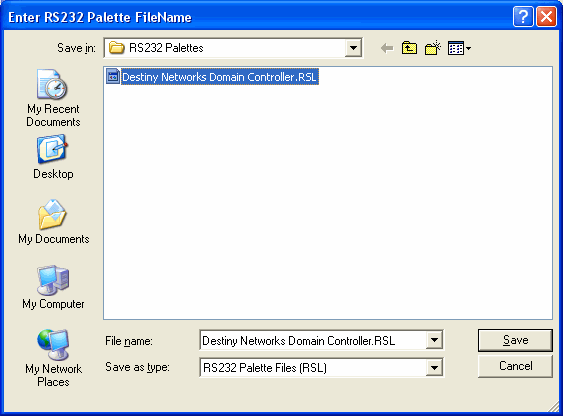
The first time you click a command to add,
the menu at the right will pop up asking you where to save the commands.
If the commands you are adding are generic commands, then you can add
them to the "Destiny Networks Domain Controller.RSL" file of
RS-232 palette commands. However,
note that you will have a lot of clicking to do as shown below. Alternatively,
if the commands are house specific or you want to save some clicking,
then create your own new house file.
Click Save. |
|
|
If you
selected an existing file, you will get the warning at the right.
Click Yes. |

|
|
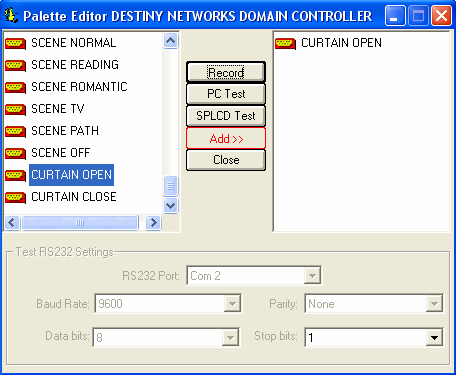
Then click all
the commands in the left hand box of commands so that they appear on the
right. You must click all of them. If you leave any out, you will not
have access to them (they will still exist - you just cannot access them).
After you have added all of the commands,
click the Close button and you will now have an "RS232 Palette"
of commands with RS-232 strings associated with them.
|
|
Test
the communication of the Xantech Display
Connected the Xantech display to the RS-422
converter via a test cable and connect the converter to your PC via a
commercially bought RS-232 cable.
Power up the
display..
Open up Hyper
Terminal at 9600 baud.
Push the "Off" button at the bottom
left of the Xantech display.
|
|
Test the cable
to the Xantech Display
Disconnect the test cable and RS-422 converter
from your PC and from the Xantech Display.
Connect the Xantech Display to the real cable
that goes to the RS-422 to RS-232 converter. Connect the serial cable
to the RS-232 connector of the RS-422 converter.
For the Domain
5000: attach the "Phoenix-to-DB9 converter" to the Domain
Controller side of the cable and connect it to your PC. Make sure that
switches1 and 2 of the Phoenix-to-DB9 converter dip switch are on and
all others are off.
For the Domain
3000: connect the Domain Controller side of the cable to your PC.
For both:
Repeat the communication test above to prove that the cable is good.
Once you know the cable is good, plug the
cable into the Domain Controller (for the Domain 5000, you will need to
remove the converter).
|

|