The Domain Controller supports Miro switches and keypads and connects to the Miro MR232 modem via an RS-232 interface from the Domain 3000 or Domain 2000 or Lantronix UDS200.
Overview:
Installation
Ubiquity Software
Miro Architecture
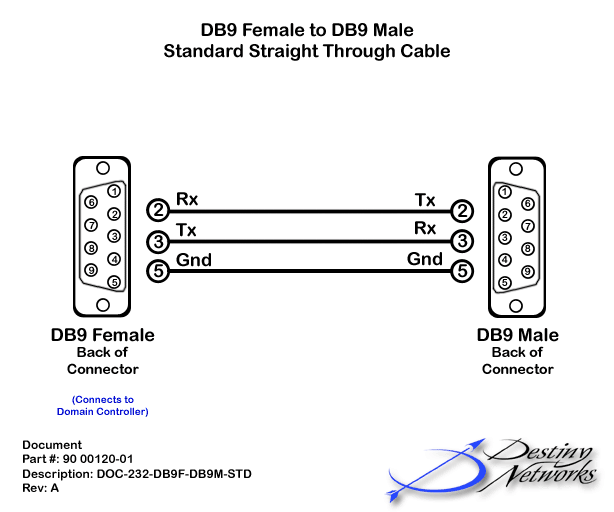
The Domain Controller connects to the Miro Modem via an RS-232 interface.
All keypad and light switch pushes are sent to the Domain Controller and can be used to control other devices in the home.

Domain 3000 Wiring
Connect a standard straight through RS-232 cable from a serial port on the back of the Domain 3000 to the serial port of the Miro Modem as shown.
Installation of the Miro Modem
Use the Miro installation guide to set up the Miro switches, room controllers, and house controller. Create preset lighting scenes using the standard Miro methodology as explained in the Miro Installation Guide.
In addition, all switches must be bound to a room. If there is a "Room Controller" in the room, this will happen automatically. However, if there is not a Room Controller in the room, you will need to do this via Hyper Terminal as explained the Miro MR232 Protocol Guide.
The Domain Controller will be able to access those preset scenes and you will also have the option of using those preset scenes to control other devices and AV components around the home via the Domain Controller.

Test the communication of the Modem
Connect the Modem to your PC with a commercially bought RS-232 cable, and use Hyper Terminal to verify that modem responds properly. Set Hyper Terminal up at 38,400 baud, 8, None, 1, No, and "Send line ends with line feeds".

Get the List of Devices
After verifying that the modem responds, you will want to send the following commands from Hyper Terminal:
TSETUP 1
GETIDL
The first command turns on messages. The second will display a list of all hard wired devices in the network (battery powered keypads will not show up unless they are being used while the modem is executing the GETIDL).
You will need the "Rm-ID" (Room Number) and the "Gp-ID" (Group ID) for each switch. Note that device #0003 at the right does not have a non-zero Rm-ID. This switch cannot be controlled by the Domain Controller until it is given a valid room number via the Miro modem interface using Hyper Terminal.

Test the cable
Connect the actual installed RS-232 cable to your PC and the Miro modem. Run Hyper Terminal again to verify the cable works.
Disconnect the cable from you PC and connect it to the Domain Controller (it uses the same connector and the same "through" cable).
Add the Miro lighting system to the Design Module
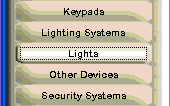
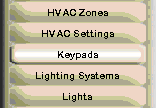
Select the Lighting Systems layer of the Design Module.
Click in the location in the room in which you plan to install the PIM.
![]()
You will get a pop up menu like the one at the right.
Type: select "Miro".
Name: the default name is usually good, but you can change it if you want.
Baud Rate: Miro uses 38400baud, only. The Design Module know that.
Serial Port: use the dropdown to select the desired serial port.
Click OK.

After clicking OK on the menus above, a lighting icon will appear where you initially clicked to add the lighting system.
Add a Light
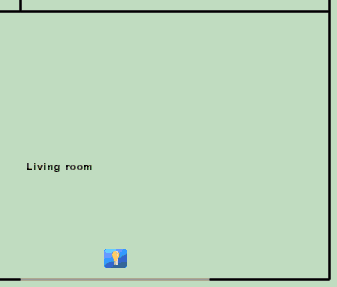
Select the Lights layer of the Design Module.
Click in the location in the room where you would like to add the light.
![]()
You will get a pop up menu like the one at the right. Please see the Lights layer for more information on the menu.
Type: select the type of light to automatically name the device.
Name: change the name if you would like. Note that each light in a room must have a unique name.
Select whether this light is dimmer capable.
Click the checkbox to the left of "Controlled by (and wired to).
Use the dropdown box to the right of "Controlled by" to select Miro.
Enter the Group ID that you obtained from the GETIDL command.
Enter the Room Number that you also obtained from the GETIDL command.
Click "OK".

An icon for the device will appear.
In the Browser GUI, the Room menu will now have the icon of a Light as a device that can be controlled. Each of the Room Scenes will have a default value for the light. The Light will have been added to the Action Tree so that it can be used for Timer Events, GUI Buttons, and Keypad Events.
Miro Lights are Controlled via "Presets"
Please note that the Domain Controller does not set the intensity of each Miro light (like it does with other lighting systems). Instead, the Normal Scene, Reading Scene, etc, select Miro presets in the room. They do this by using the default lighting intensities as per the following table:
|
Light Level |
Default Scene |
Miro Preset Selected |
|
100% |
Reading |
1 |
|
80% |
Normal |
2 |
|
50% |
Romantic |
3 |
|
30% |
TV |
3 (also) |
|
20% |
Path |
4 |
|
0% |
Off |
5 |
Therefore, if you use the "Room Menu" in the Browser GUI to select the Normal Scene in a room, and if the Normal Scene has its default setting of 80%, then the Domain Controller will issue a command to the Miro lighting system to select preset 2 in this room.
Similarly, if you create a Timer Event or GUI button that selects a light level of 80%, then the Domain Controller will issue a command to the Miro lighting system to select preset 2 in this room.
Note that the Domain Controller issues a "RCRP" (ReCall Room Preset) command which sends all switches in the room to the their preset values. Therefore, you only need to add one light switch to a room because that switch will represent all other light switches in the room as it pertains to going to the preset Miro scene.
Add a Keypad
Miro has a different concept for keypad buttons than other lighting systems. Therefore, the Design Module treats them differently, as well. In Miro, keypad buttons do not transmit an address for the button that was pressed. Rather, they transmit an "RRP" command (Recall Room Preset - similar to the RCRP command issued by the Domain Controller). The RRP command makes all light switches in the room go to the desired preset level.
When you add a keypad of the type "Room Controller" to a room, you will get 17 buttons. These buttons correspond to the 17 presets that can be issued for a room. You can add one of these keypads to each room and have different events occur in each room based on the selected preset in that room.
In addition, you can add one keypad of the type "House Controller" to any room you like. This keypad will have 14 buttons corresponding to the 14 "House Presets" available in the Miro system.
For example, if you would like the top right button of a Miro Room Controller (the one that selects preset 1) to also turn on the TV to watch the DVD player, then, in the Design Module, go to the keypad layer and add a keypad as defined below, and then click on the button labeled "?Preset 1?" and use the Action Tree to select "Watch DVD on the Theater TV and Theater Speakers".
Hence, pushing button the top right button of the Miro Room Controller will transmit link preset 1 to all switches in the room and it will send that same information to the Domain Controller, which will cause the action assigned to button 1 to occur, which will play the DVD player.
Select the Keypad layer of the Design Module.
Click anywhere on the floor plan as this keypad will represent all keypad events throughout the house (on the defined network).
![]()
Add a Room Controller Keypad
Select "Miro" as the manufacturer.
For the Model, select "Room Controller".
Each "button" on the menu represents a Miro "Room Preset" (the question marks before and after the presets imply that the Domain Controller will not do anything with the presets).
Click on a button corresponding to the room preset the Domain Controller will receive from the Miro modem. Use the Action Tree to select the event you would like to occur when this preset is transmitted by a Miro keypad.
At the bottom of the menu, enter the "Room Number" in decimal format.
Click OK.
The keypad is now operational.

Add a House Controller Keypad
Click in any room to bring up the keypad menu.
Select "Miro" as the manufacturer.
For the Model, select "House Controller".
Each "button" on the menu represents a Miro "House Preset" (the question marks before and after the presets imply that the Domain Controller will not do anything with the house presets).
Click on a button corresponding to the house preset the Domain Controller will receive from the Miro modem. Use the Action Tree to select the event you would like to occur when this preset is transmitted by a Miro keypad.
Click OK.
The keypad is now operational.

Advanced Use of Presets
By default, the only room presets that you can access are presets 1 - 5 as described above. However, if you need access to all 17 presets, you can get to them by doing the following:
Using Window's Explorer, go to the directory "C:\Program Files\Destiny Networks\Ubiquity\Ubiquity3.3\bin".
Open the file "FloorPlan.lax" using NotePad.
Go to the bottom of the file and add a few carriage returns.
Then add the following line: Destiny.Lights.MapAllPresetsToLevels=1
The bottom of the file "FloorPlan.lax" should look something like the picture at the right.
Now, you will need to restart the Design Module (please be sure to save your work).

Go to the "Lights" layer of the Design Module to add a new light. You will get the menu at the right which looks very much like the old menu except for the new check box at the bottom of the menu.
By checking this checkbox, you will map the first 17 Destiny light levels to the 17 Miro presets (e.g., anything in the Domain Controller that wants to set this light to a level of 7 will actually recall preset #7 in the room in which the light is located).
This mapping of levels to presets can be used by Timer Events, GUI Buttons, Keypad and Remote Control buttons, and Groups of Actions. It will also be used by the Room Scene menu (that is, if you set the level of Normal Scene for this light to be 7, it will select preset 7).
Note, you will have to enable this checkbox on all existing lights in the house to get this functionality.
