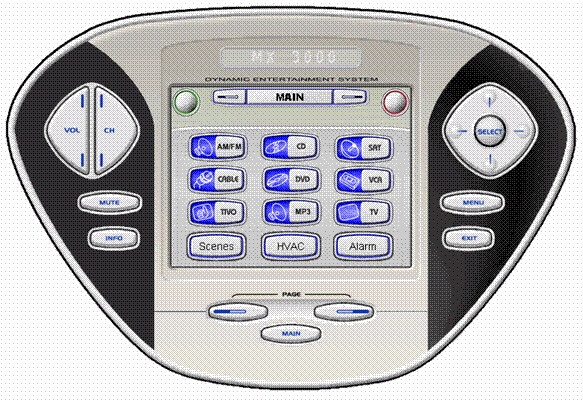
MX-3000
RF to Domain Controller Architecture
The MX-3000 sends an RF signal which is directly
received by the new Powered RF Antenna. The Domain Controller controls
the AV equipment - providing positive control of all AV components and
eliminating the need to write macros to set up paths from sources to displays
and speakers.
This architecture works extremely well and
the MX-3000 signal can be received from a good distance away.
|

|
Download the MX-3000 Application we Wrote
for you
We wrote an application for the MX-3000 that
you can download and start using immediately. The path is shown at the
right.
Download the application:
MX-3000
sending RF code 83.mxf
to your desktop so that you can load it into
the MX-3000 editor below.
|
Click here
to go to our web site for the MX-3000
http://www.destinynetworks.com/
Downloads/
Password_Protected/
Software for 3rd Party Products/
Universal Remote |
Load
the example program
Install and run the MX-3000 Editor program
that came with the product.
Run "Live Update" by clicking on
the icon of the satellite dish at the top right of the menu to get the
latest features and upgrades.
Then, in the MX-3000 Editor application, click
"File", "Open".
|

|
|
The "Open" menu will pop up.
Navigate up to where you save the file you
downloaded from our web site, select it, and click "Open".
|
|
|
Click on the file "MX-3000 sending RF
code 83.rcc" and click "Open".
The project will open.
The suffix "code 83" indicates that
this project will be sending out RF signals that correspond to those that
would be sent out by the RC-1 remote with an address of 83 on the back.
You will use this information below when setting up the Ubiquity software.
|

|
|
Main page 1 provides access to your AV entertainment
equipment and to lighting control, Heating and Cooling, and the Security
Alarm.
Select a source using one of the upper twelve
buttons. This will send out a short command from the remote control to
the Domain Controller requesting that the Domain Controller turn on the
source and all other component in the path from the source to the display
and/or speakers that are required.
After pushing a source button, the MX-3000
will go to the default page for controlling that device.
If your theater uses any subset of these twelve
sources and does not have two or more of the same type of source, then
no programming is necessary - the Domain
Controller can receive the commands that are already loaded into the Theater
Master and translate them to control the actual equipment that exists
in your theater.
Note that hard buttons on the main page issue
Domain RC-1 codes so that the Domain Controller can take the appropriate
action. All of the hard buttons on all other pages punch through to the
main page.
|

|
|
For most sources, the display will bring up
the "Ubiquity" / "Trans"
page as shown at the right. This page contains all of the transport commands
that you would find on the Domain RC-1 remote control. In the example,
the selected source brought up the Transport page with the "Play"
tab active.
Note that these buttons are identical to those
of the Destiny Domain RC-1 remote control, and, therefore, the actions
they take are determined by the Device Description File of the active
source.
Note that all sources "Jump" to
pages under the Ubiquity "device". All other pages in the project
have been hidden. However, those pages were not deleted or changed from
the original example provided by Universal Remote - enabling you to modify
the project, if you like, to use button names that are slightly more intuitive.
Note also, that a number of pages of the Ubiquity
device have been hidden. These pages contain the buttons that were imported
in .ccf format. These are the IR codes you will want to use in macros,
but you definitely would not want to use the graphics on these pages.
|

|
|
If you select the "Keypad" tab,
you will get the display at the right which allows you to enter numbers.
Note that the "Guide"
button is on this page. This is because the Guide button is not
a hard button on the MX-3000.
Note also that the "Fav" button
is on this page. It jumps to the Favorites
page. |

|
|
Select the "Settings" tab to change
the video mode (e.g., anamorphic, widescreen, standard, or scroll through
them) and/or the audio mode (e.g., matrix, THX, stereo-5ch, stereo-2ch,
DTS, Prologic, Mono, or scroll through them). Note that the AV surround
receiver, AV display and/or video processor in the entertainment system
must support these modes for the commands to work and
that the function must be associated with the proper Destiny command key
word (e.g. thx, dts, widescreen, etc) in the Device Description File of
the AV Surround Receiver or Video Processor.
|

|
|
From back at the Main page, if you select
"Scenes" you get the menu at the right. The label at the top
says "Lights", but this is really "Room Scenes" which
usually control lights in the room and may control other devices in the
room, too. |

|
Delete
and/or Re-order some of the Sources
Before making any changes,
save the project under a different name.
On the Main device, select the "Ubiquity"
page.
|

|
|
The source buttons on the main page each contain
an IR code that is the Domain RC-1 IR code to request playing the source
and a jump to the appropriate AV control page.
The bottom three buttons do not send IR codes.
They just jump to their associated page.
Delete any buttons that you do not need by
selecting the button and hitting the Delete key.
To Re-order the sources, click on a source
and drag it to another location or use the arrow keys on your computer.
Note that the order shown is very similar to that of the Domain RC-1 remote
except that the Cable/Satellite button of the RC-1 has been replace with
a Cable button and a Satellite button has been added to the upper right
(where the Off button would reside on the RC-1).
After deleting and rearranging the sources,
click save.
|

|
Program
the Favorites
Use the MX-3000 Editor application to add
favorites to the "Favorites" page. Select this page from the
Ubiquity device as shown at the right. Note that it already has a few
buttons named. You can change the text to change the name, or add graphics
as desired.
To create the IR code for one of the buttons
on the favorite's page, click on that button, then click the "Record"
button (the one with a red circle on it). Now double click the "Keypad"
page (immediately above the "Favorites" page) and click on the
numbers to be sent and the enter key. Do not worry about delays as the
Domain Controller will take care of that for you. Click on the stop macro
button (the one with the black square on it) to stop programming the macro.
You are done.
Note the bonus at the right.
Often, there is nothing left to do but download
the program to the MX-3000 and begin using it. Use Check My Destiny to
check your work.
|

Bonus: Note that this
same macro can be used while watching the satellite receiver and the TiVo
because the Domain Controller will know what commands to send to the source
that is playing at the time.
|
Configure
Ubiquity
If the theater has a second source of the
same type, you will have more work to do on the MX-3000, but if the activities
above complete the programming of the MX-3000, then you are ready to configure
Ubiquity and it will be simple, also.
Go to the "AV Remote Control" layer
of the Design Module.
|

|
|
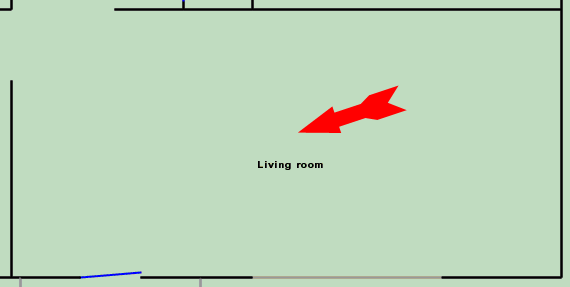
Click in the room in which the TV and/or Speakers
that you want to control is located (it does not matter where the sources
are located).
|

|
Add a Remote
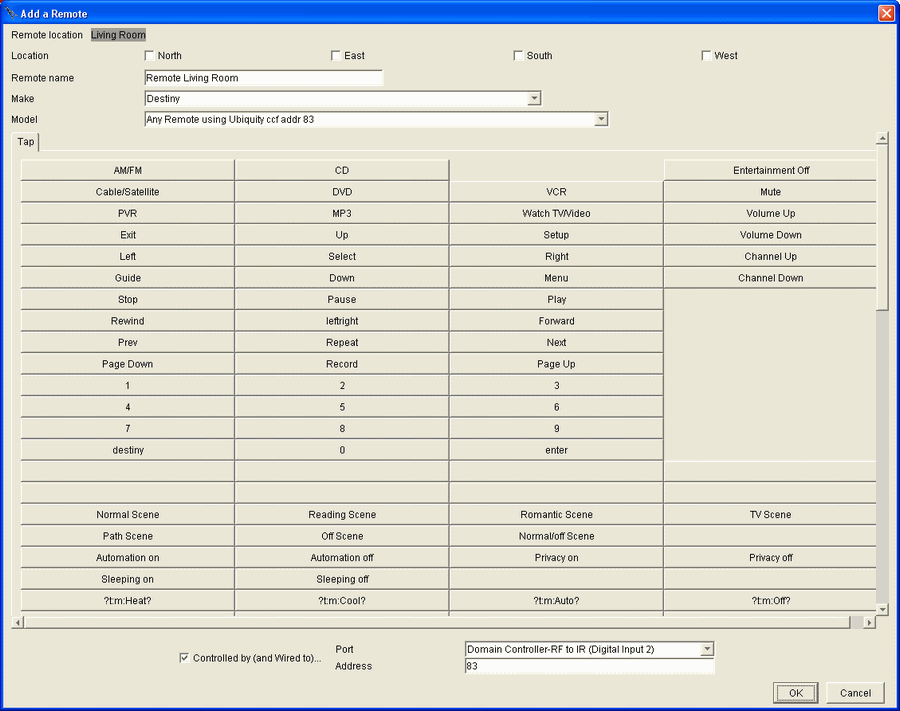
You will get the Add a Remote pop-up menu
shown below.
Select a "Location" if you like.
It is just an auto naming feature.
Change the "Name" if you like, but
the default will work unless there is already another remote by the same
name in this room.
The only "Make" that is available
is Destiny because we will be using the Destiny IR codes.
For "Model" you have 2 choices:
Select "Any Remote
using Ubiquity ccf addr 83" if you want most of the buttons set up
for you. Select "RC-1 extended
with user cmds.xml" if you want 155 RF (IR) codes that you can assign
to the buttons you create (but note that the Scene, HVAC, and Alarm buttons
and functions will not work using this model).
At the bottom of the page, make sure "Controlled
by (and wire to)" is checked.
For the Domain 3000, select the RF to IR (Digital
input 2).
For the address, enter
83. The default set of IR codes that are in the file "Any
Remote using Ubiquity ccf addr 83" is address 83. If you are using
the Sports Bar application, you will see that other code sets are available
(and you would enter a number between 1 and 10)
The buttons in the middle of the menu represent
the buttons of the remote control, meaning that the RF (IR) code that
gets sent by the remote control is a number that is an index into this
menu. Then, each button uses the Action Tree to determine what to do -
as illustrated by the names on the buttons below. You do not need to know
any of this unless you have two sources of the same type (e.g., two DVD
players), or you want to control HVAC or security systems.
Click OK.
You are done. Hook up the wires and use Check
My Destiny to check your work.
|
|

|
|
Note that this software
releases requires that the actual name of the HVAC zone and Security System
be configured into the menu. If you want to control HVAC and/or
the security system from your remote control, then, for those buttons
that have question marks ("?") at the beginning and end of the
name, click on them and use the Action Tree to select the appropriate
command. Refer to UAPI Specification
for RS-232 to figure out the command that should be on each button.
For example, the name "?t:m:Heat\n? can be found in the UAPI specification
to mean "Set the thermostat to heating mode". Therefore, you
would click on this button and use the Action Tree to set the thermostat
in the zone in which the remote control is located to heating mode. Note
that if you are not using this remote control to control HVAC or security,
then you do not need to do this step.
If you want to use the Groups of Actions that
have already been programmed into the MX-3000 remote control, you will
have to create those Groups of Actions. The names are as they appear on
the menu above with question marks around them. For example, the button
"??Outdoor Lights On??" is looking for the Group of Actions
"Outdoor Lights On". Create the Group of Actions "Outdoor
Lights On" using the Events menu. Then, this button will work.
|
|
If you want to create buttons on the MX-3000
a few things that are not listed above, please do the following.
In the MX-3000 open the "Universal Browser"
(the toolbar icon that is 2nd from the right).
Click on the folder at the top right of the
menu.
Navigate to
c:
Program
Files
Destiny
Networks
Ubiquity
Ubiquity
3.2
Examples
Software
for 3rd Party Products |

|
|
You have two choices of .ccf files to choose
from.
Choose "Ubiquity IR codes addr 83.ccf"
if the default button meet your requirements, or |

|
|
Choose "RC-1 Extended with user cmds.ccf"
if you just want lots of RF (IR) codes to assign to buttons that you make.
It will give you 155 IR codes with names 101, 102, 103, etc., as shown
below.
|

|
|
Dragging one of these IR codes onto a button
you create in the MX-3000 will cause that button to send out the associated
user command.
Then, change the associated button in the
Ubiquity "Edit Remote" menu shown below. That is, click on the
button labeled "?101?" and use the action tree to make it do
what you want it to do. |

|
|

|
|
|
|


