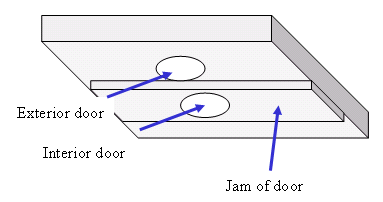
 Before the door is installed
Drill a 3/8” hole for the wire
All the way through the header
“Off center” of the final sensor location
Pull a 22/4 wire and let it dangle
Separate hole for a contact sensor
Protect the wire with a nail plate
After the dry wall and door are installed
Drill a 7/8” hole 5” deep for the sensor
The hole must be completely in the header
Interior doors: in the door jam
Exterior doors: as close to the jam as possible
Pull 10 of wire into the large hole
At final
Attach the sensor flange to the sensor
Splice the wire to the sensor
Push splice to the top of the large hole
Align sensor with notches perpendicular to the door
After the walk test, insert with a touch of silicon glue
 Wire the sensor to the Shub
Connect Shub x1 to a White 22/4 wire to the White wire on the sensor
Connect Shub x2 to a Green 22/4 wire to the Green wire on the sensor
The Shub LED will be normally off, but on when activated
