This examples show one way to cycle 3 sources on to a display such that each source is displayed for a set period of time. In addition, the remote control has a button on it to stop cycling the sources so that one source can be viewed for a longer period of time.
Leave Sources on when Not being Watched
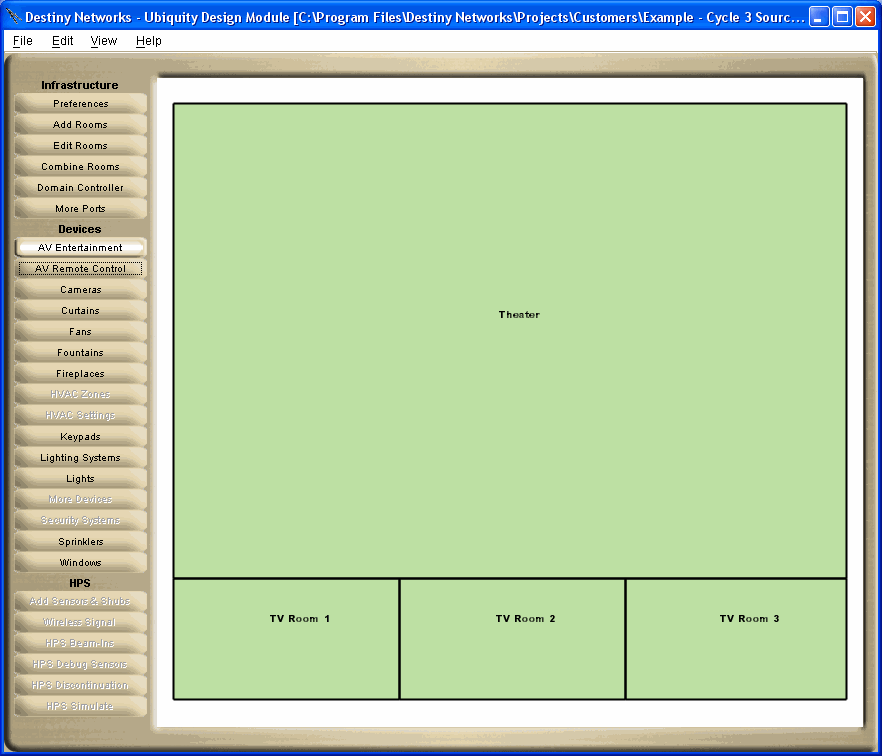
We will want the 3 sources to be on all of the time - even when they are not being played. In Ubiquity, you can do this by unchecking the "Control power (turn on and off as needed" checkbox on the "Info" menu of the AV component. However, this means that will not be turned on by the Ubiquity system, either, and we want to make sure the sources are turned on again every morning. Therefore, we will use a different method. We will add 3 additional rooms to the project - one to turn on each source. After adding the Rooms, the project will look like the one below.
Add the Real AV components to the Main Room
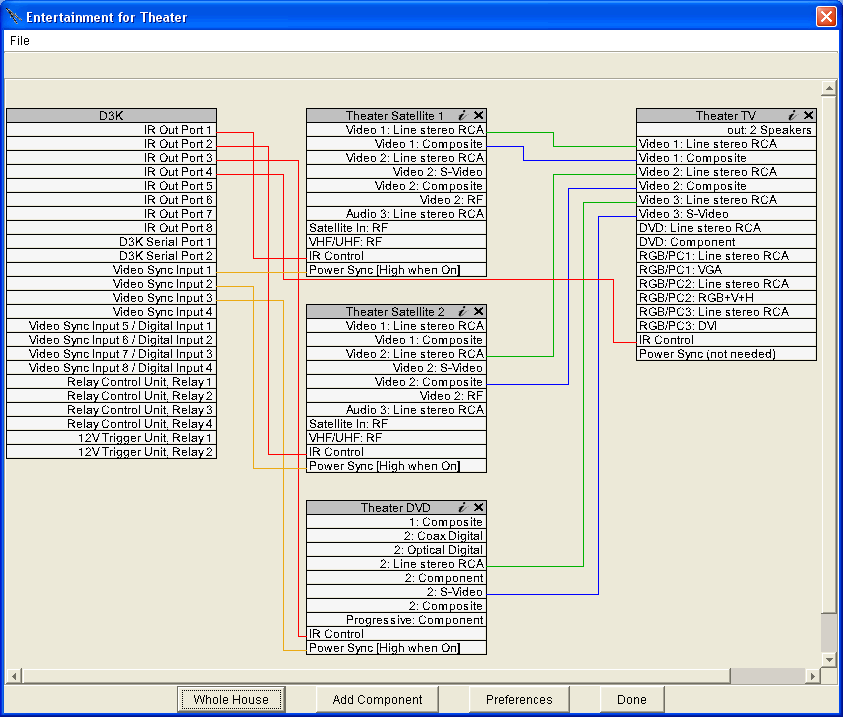
Add the sources, displays, speakers and any other components to the main room. In this example, we added two satellite receivers, a DVD player, and a plasma display with integral speakers.
Wire them up and you will end up with something like the schematic below.
Add Displays to the other Rooms
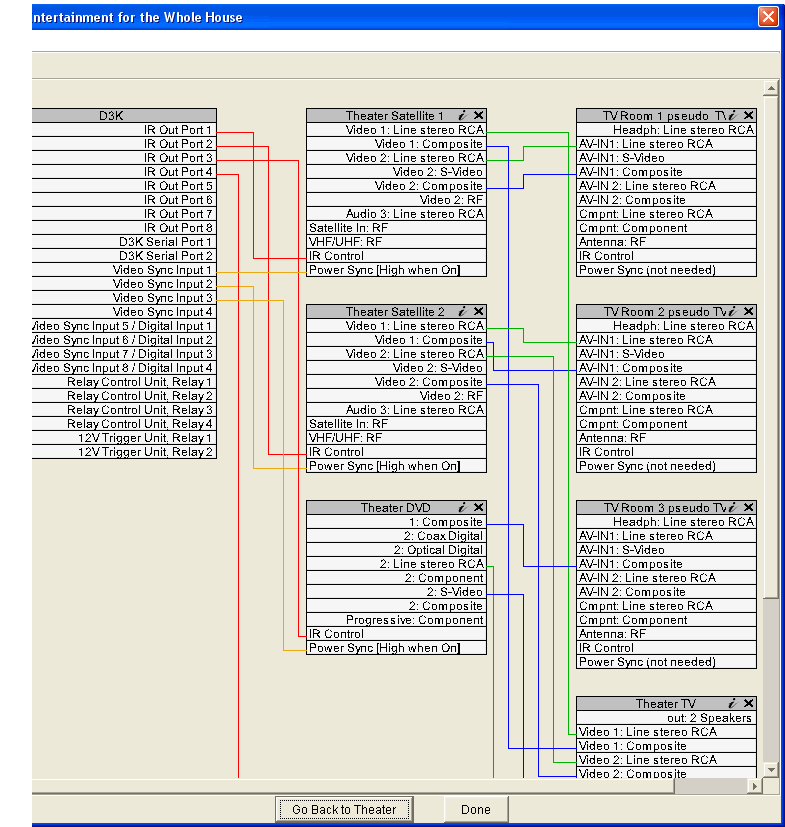
Click on each of the other 3 rooms and add a TV such as the Sharp LCD display with integral speakers to each of them. These TVs do not really exist. Rather, we will use them to turn on all of the sources and to keep them on as we switch from one to another. That is, the software will think that the TV in room 1 is watching source 1. Therefore, when the theater is watching source 2, the software will leave source 1 on because it is playing in another room.
Click on "Whole House" and wire source 1 to the TV in room 1. Do the same for sources 2 and 3.
You should end up with something like the schematic below where the top three TVs on the right are the ones that do not really exist.
Note that the DVD player did not have a 2nd audio output, therefore only the video wire was connected to the TV in room 3. This is OK because either the video or the audio path is sufficient to keep the source turned on.
Configure the Sources on the Remote Control
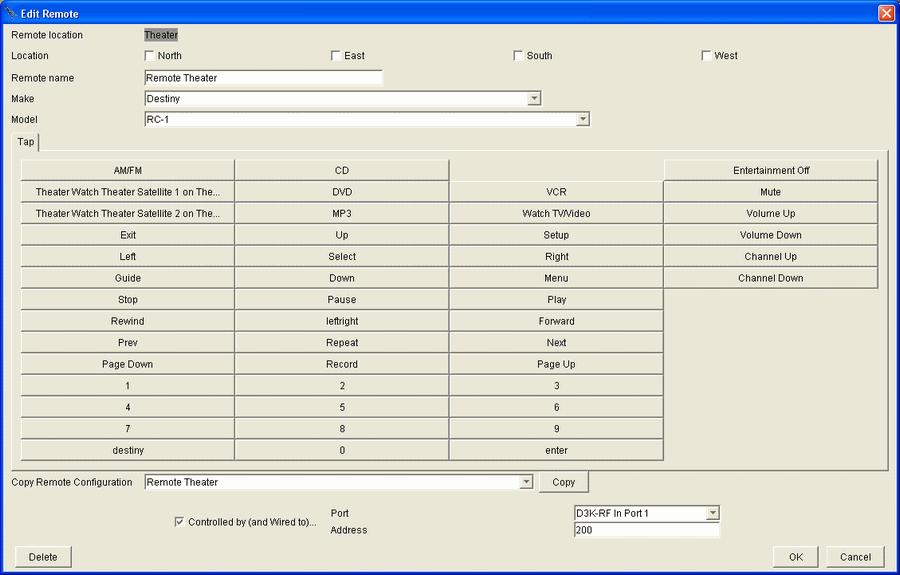
Since we used 2 sources of the same type, we must specify which source is selected by which button on the remote control.
Go to the "AV Remote Control" layer of the Design Module.
Add or open a Remote Control in the Theater room.
Click on the CBL/SAT button to select watching satellite #1.
Click on the PVR button to select watching satellite #2.
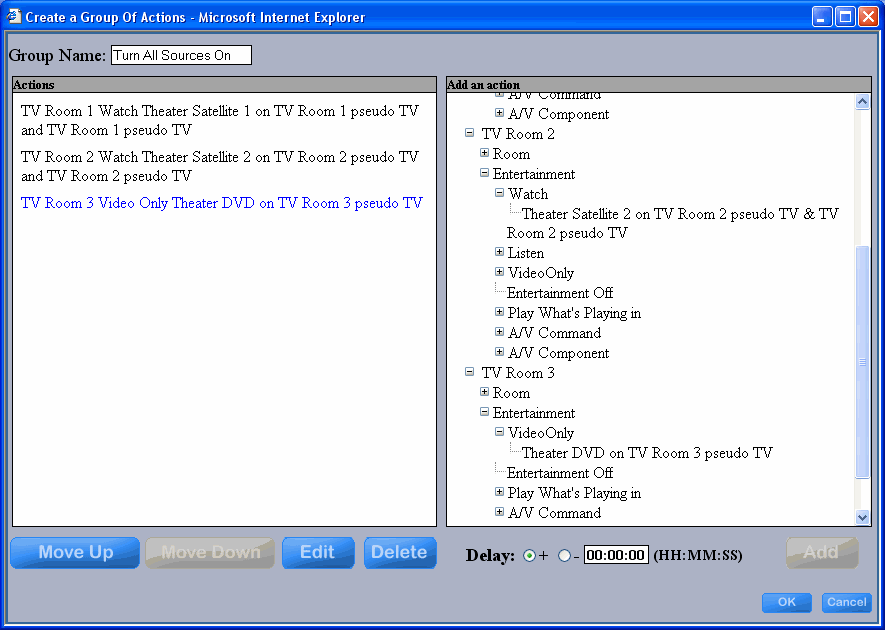
Add a Group of Actions to Turn on all of the Sources
Open the Browser GUI (File / Open Browser GUI).
Click outside of all rooms to open the House Menu.
Click on the Events button to bring up the Event menu.
On the Events menu, click on the "Groups" button.
Click the "Add" button.
Add a new group of actions like the one below to turn on all of the sources by playing them in each of the non-existent rooms.
Add a Group of Actions to Turn off all of the Sources
Create a similar group to turn all of the sources off, but add an action to turn the entertainment off in the Theater room, also.
Add a Group of Actions to Cycle through all of the Sources
Create a Group of Actions called "Cycle Sources" that cycles through the desired sources. The first source should have a "Delay" of zero. The second and subsequent sources should have a "Delay" to match the time line of the sequence of playing the sources. As an alternative to switching sources, you may just want to enter a new channel number.
Add a Group of Actions to repeat the "Cycle Sources" x number of times
Create a Group of Actions called "Daily Cycle" that does the following:
Turns all of the sources on
Calls the "Cycle Sources" the appropriate number of times to cycle it all day
Turns all of the sources off
Add a Timer Event to Start the Cycle Every Day
Create a Timer Event that starts the "Daily Cycle". The "Daily Cycle" Group of Actions will end by itself.