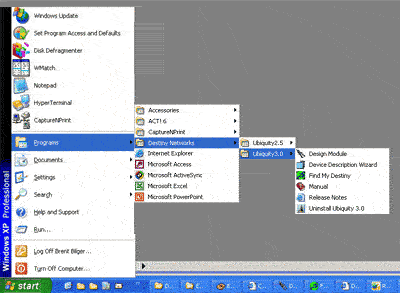
Run the Design Module
Click "Start", "Programs", "Destiny Networks", "Ubiquity 3.1", "Design Module"
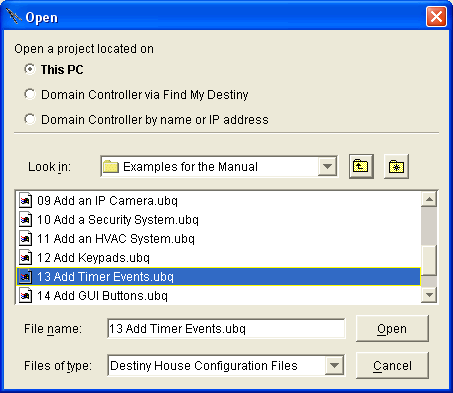
Open the Project: 13 Add Timer Events.ubq
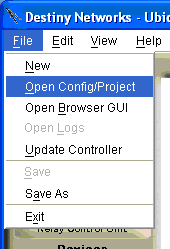
To open the project, select "File", "Open Config/Project"
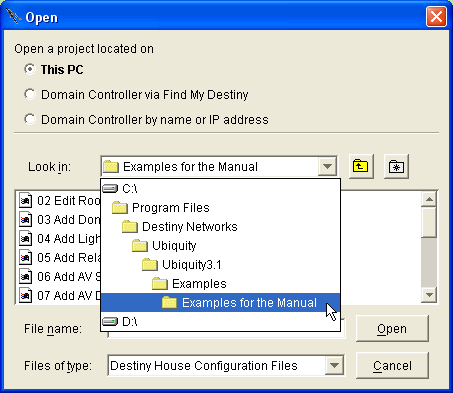
You will get the following menu.
Navigate to "C:\Program Files\Destiny Networks \Ubiquity \Ubiquity3.1\Examples\Examples for the Manual"
You will get the following menu.
Click on the project "13 Add Timer Events.ubq"
Click the "Open" button
The project will open.
Create a Timer Event to Set the Front Yard to Normal scene from 1 hour after sunset to 11pm (randomized by 10 minutes) every day forever
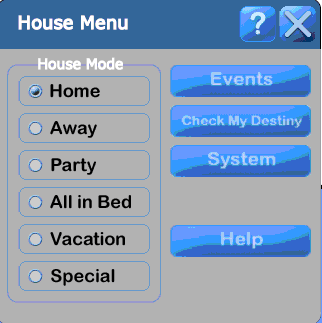
Click outside of all rooms to bring up the House Menu.
![]()
Click on the Events button.
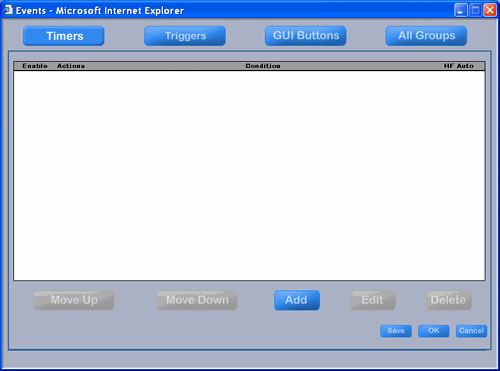
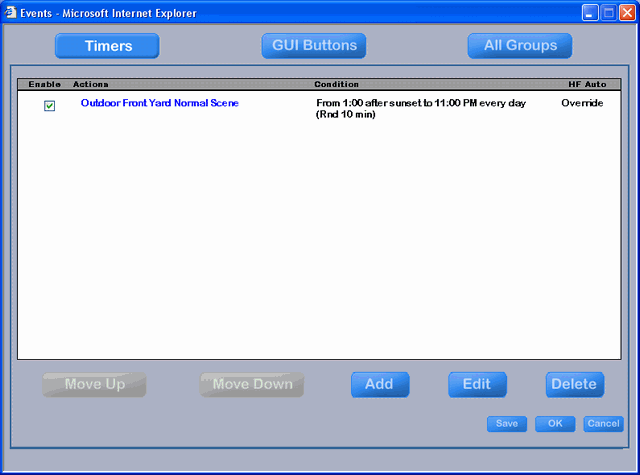
After a short period of getting the message "Loading data, please wait ...", you will get the menu at the right.
There are two things that need to be done:
Select the action to be taken
Define the time that the action should occur.
Click the Add button to start creating a new Timer Event.
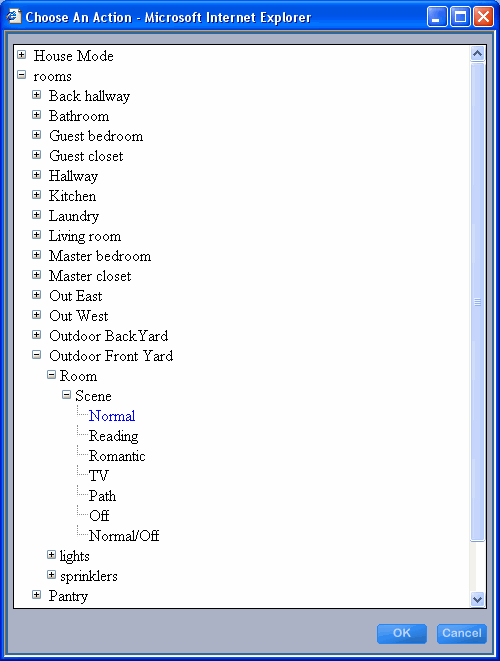
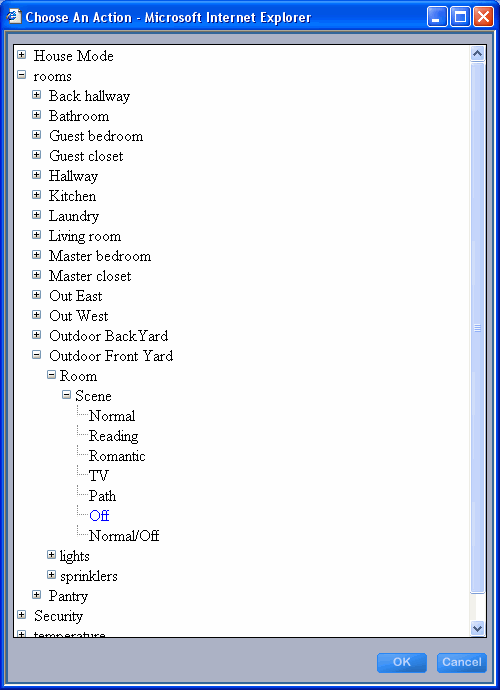
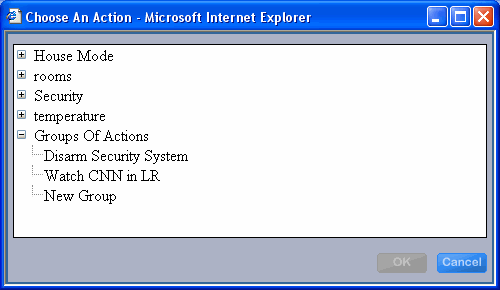
You will get the Action Tree.
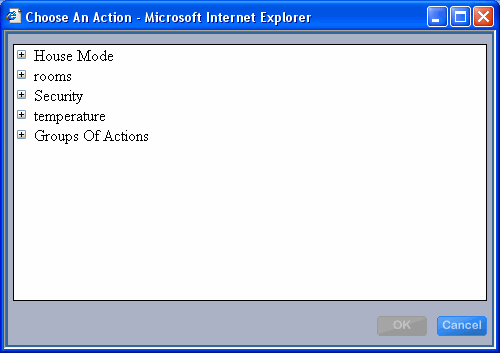
Click on the "+" to the left of each line to expand:
rooms,
Outdoor Front Yard,
Room, and
Scene
Click on "Normal" to highlight this action.
Click OK.
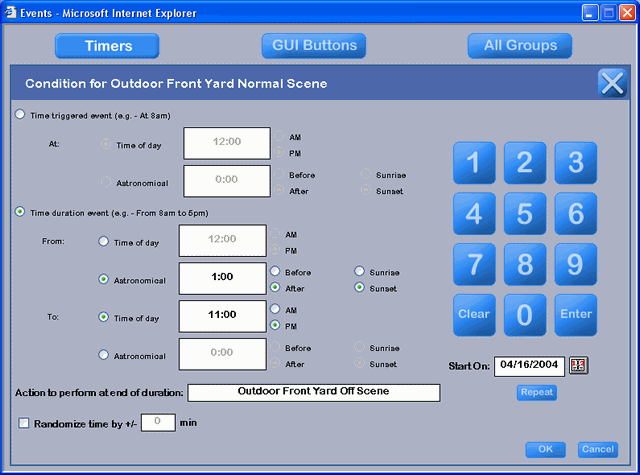
You have now selected the action to be taken. At this point you need to select when it will happen.
When you click OK above, you get a pop up menu to select when the action should occur.
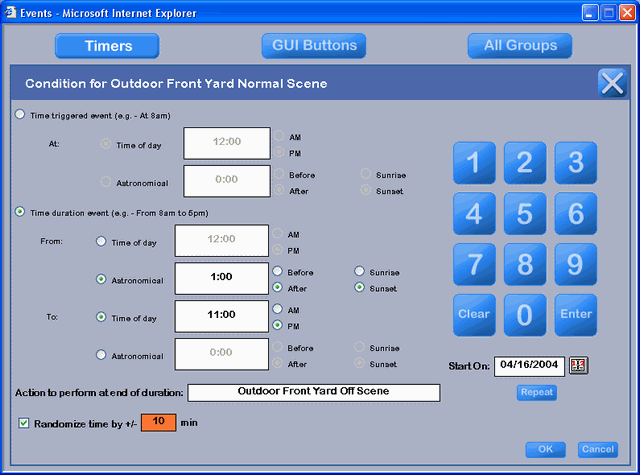
Note that with home automation most events occur for a set duration. Therefore, instead of making you create two events: one to start the action and one to end it, the Ubiquity software enables you to do both at the same time with a "Duration" event.
Note also that 11:59am is one minute before noon, but that 12:00am is midnight and that 12:01am is one minute after midnight.
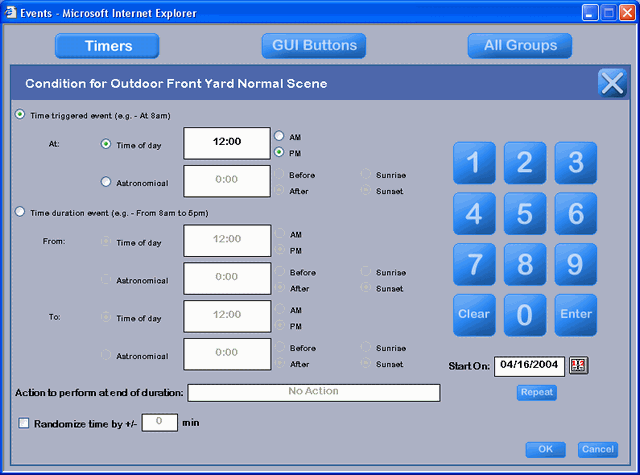
Select the "Time duration event" method of creating a timer event by clicking the radio button on the left about a third of the way down the menu.
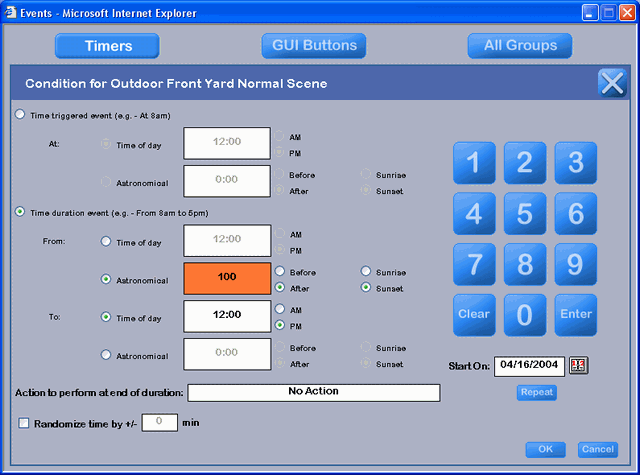
We want to turn on the lights 1 hour after sunset, so click on the radio button to the left of "Astronomical" in the "From" section.
Click on the white text box to the right of "Astronomical". It will turn orange. Click on the keypad at the right to enter the number of hours and minutes after sunset that the action should begin. That is, click 1, 0, 0.
The actions above have been done for the example at the right.
at the lower right of the keypad (you must do this or you will lose the number you entered). The text window will turn white indicating that it has taken the new time.
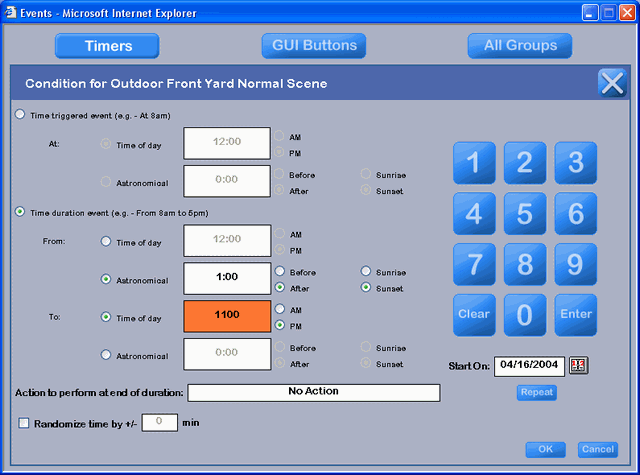
We want to turn off the lights at 11pm, so click on the radio button to the left of "Time of day" in the "To" section (it is the default).
Click on the white text box to the right of "Time of day". It will turn orange. Click on the keypad at the right to enter the time in hours and minutes that the action should end. That is, click 1, 1, 0, 0.
The actions above have been done for the example at the right.
at the lower right of the keypad. The text window will turn white indicating that it has taken the new time.
The time duration has now been entered.
While you have already entered the action that should take place when this event begins, for a Time duration event you need to tell the system what action to take when it ends. To do this, click on the words "No Action" in the long white text box to the right of the label "Action to perform at the end of the duration".

The Action Tree will pop up and it will have automatically opened to the place it suspects you would like to create the action to end the duration event.
Click on Off for the Room scene in the Outdoor Front Yard. It will become highlighted in blue.
Click OK.
And you will get the menu at the right.
Under the keypad you can change the starting date by clicking on the text box or the icon of the calendar to the right of the "Start On" label. It defaults to today - which is fine for us.
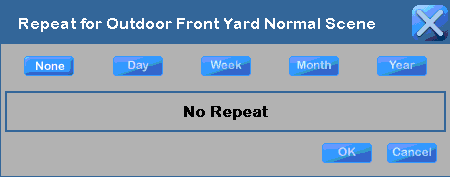
Under that text box, click on the "Repeat" button.
You will get the menu to the right with the default setting of not repeating.
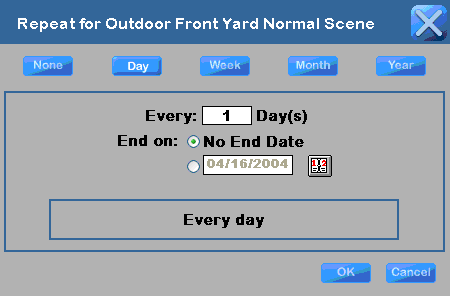
Click on the "Day" button.
And you can accept all the defaults to have the event occur every day.
Click OK.
Click the checkbox at the bottom left of the menu with the label "Randomize time by +/-".
Click the text box at the end of the label. It will turn orange as shown in the example to the right.
Use the keypad to enter 10 minutes (that is, click 1, 0).
at the lower right of the keypad. The text window will turn white indicating that it has taken the new time.
You are now done with the menu.
Click OK.
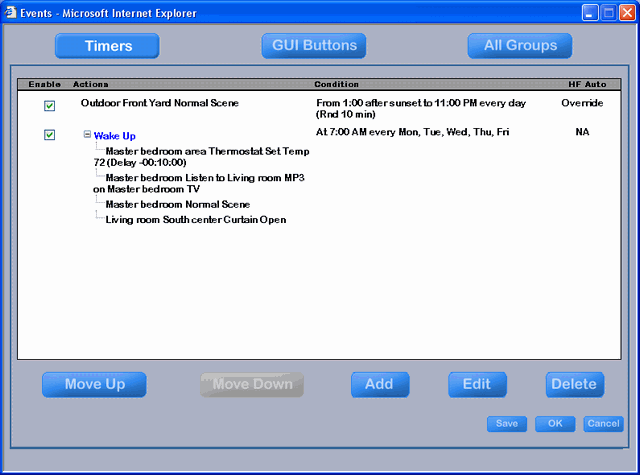
You have added the event.
Create a "Wake up" group of actions including:
Setting the temperature to 72 degrees in the master bedroom area 10 minutes before the alarm goes off
Turning the MP3 music on in the Master bedroom when the alarm goes off
Setting the Room scene to Normal in the Master bedroom when the alarm goes off
Opening the curtains in the Living room when the alarm goes off
Setting the alarm for 7am on weekdays
With the Timer event menu still open, click Add to bring up the Action Tree at the right.
Expand the "Groups of Actions" line.
Click on "New Group".
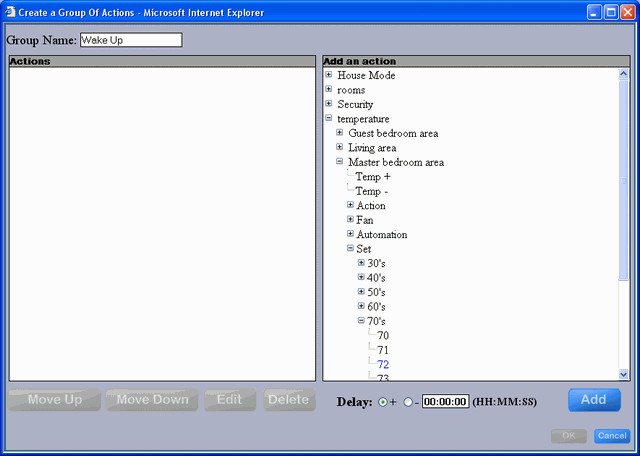
You will get the "Create a Group of Actions" menu.
Add the name of the Group of Actions (i.e., "Wake Up") in the text box at the top left.
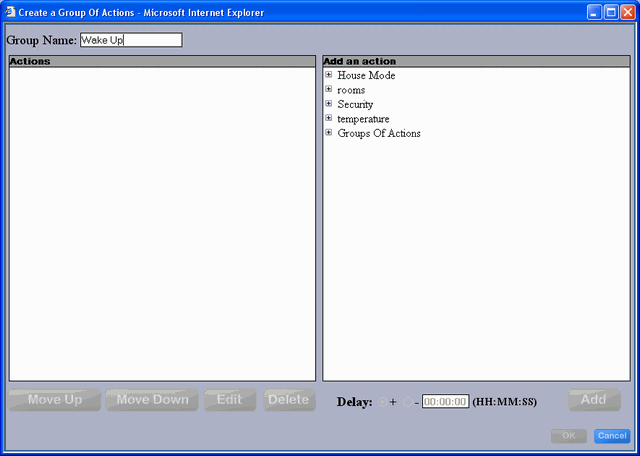
Expand the lines of the Action Tree as shown at the right to highlight the actions of setting the temperature in the Master bedroom area to 72 degrees.
Click Add.
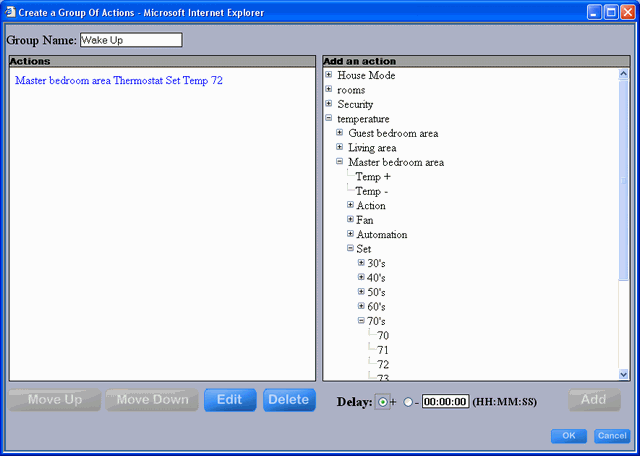
You will get the menu to the right.
With the Action on the left still highlighted in blue, change the "Delay" at the bottom middle of the menu to "-" by clicking the 2nd radio button.
Click on the text box immediately to the right (presently containing the text 00:00:00). This will pop up a keypad to let you change the delay time before this action of the event occurs relative to the time the event occurs.
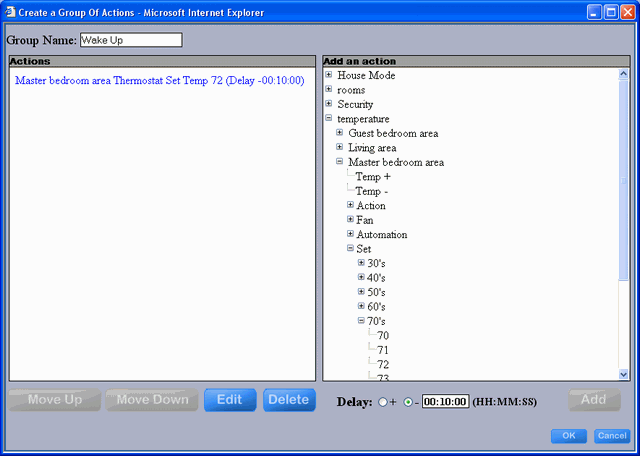
Use the keypad to enter 1, 0, 0, 0 (that is, enter 10 minutes and 0 seconds).
Click "Enter" on the keypad.
You will get the menu at the right with the temperature being set 10 minutes before the alarm goes off. That is, this action has a delay of negative 10 minutes relative to the time at which the group of actions is executed.
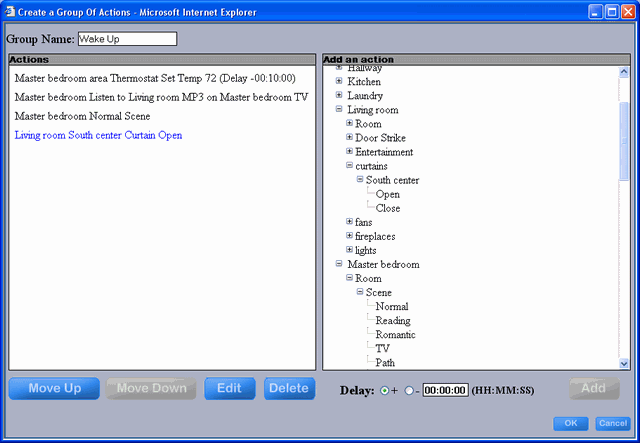
Use the action tree on the right to add the other actions to the group of actions to get the menu at the right.
Turning the MP3 music on in the Master bedroom when the alarm goes off
Setting the Room scene to Normal in the Master bedroom when the alarm goes off
Opening the curtains in the Living room when the alarm goes off
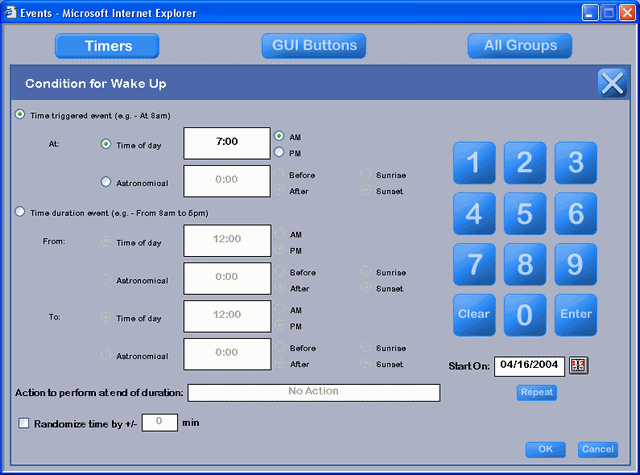
Click OK and you will get the menu to set the time at which the alarm should go off.
Make this a Time triggered event by leaving the default selection.
Click on the text box to the right of "At" "Time of day". It will turn orange.
Use the keypad to enter 7:00. Click "Enter" on the keypad. The text box will turn white.
Click the radio button next to "AM".
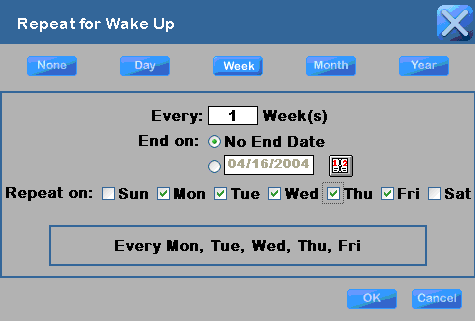
Click the Repeat button.
On the Repeat menu, click the "Week" button.
Check the check boxes next to the days of the week.
Click OK to close the Repeat menu.
Click OK to close the "Condition for Wake Up" menu.
You will return to the Event menu.
Expand the actions of the "Wake Up" group of actions and you will get the menu at the right.
Click OK to save these timer events.