Open the Entertainment Preferences menu
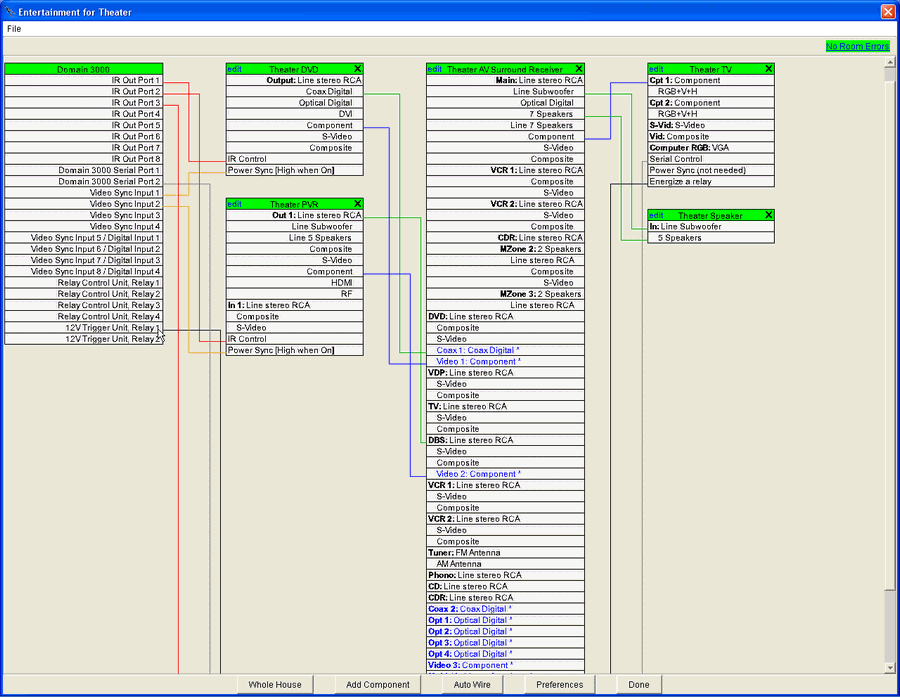
With the AV Entertainment menu open, click on the button labeled "Preferences" at the bottom of the window.
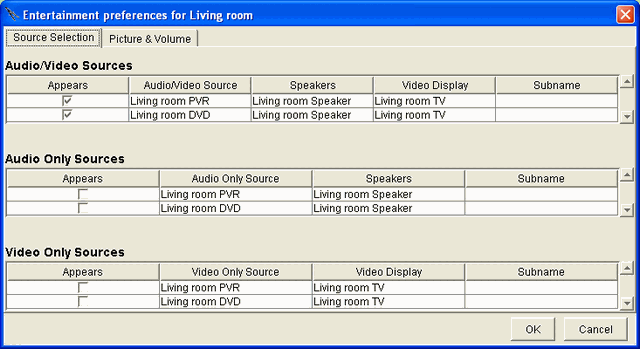
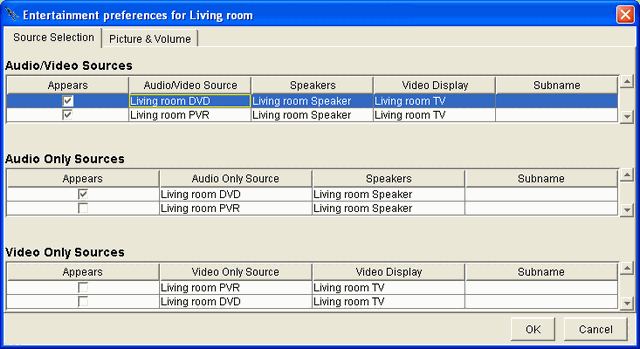
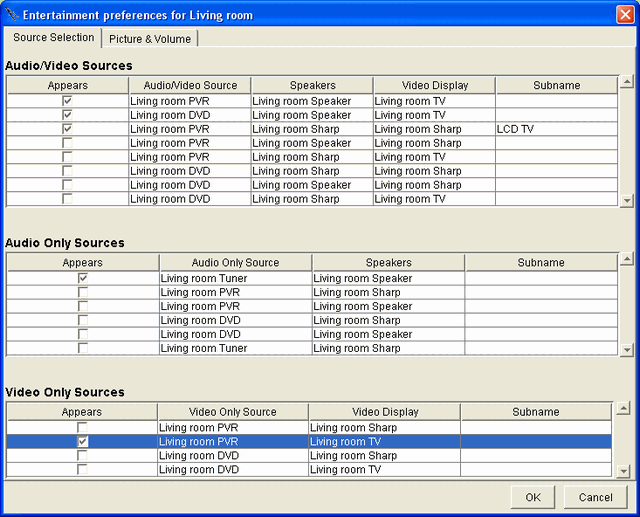
You will get a menu like the one at the right where there are two tabs at the top - the selected one is named "Source Selection" and the other is "Picture & Volume".
The Source Selection menu has 3 subsections: Audio/Video Sources, Audio Only Sources, and Video Only Sources. In each subsection there will be an entry for the path from every source that can play in this room (no mater what room the source is located in) to every set of speakers AND every display in this room.
The "Subname" field provides you that ability to add a subname under the regular name that appears for the source on the Entertainment Browser GUI menu.
Ubiquity will create default routes that usually make sense (based on the capability of the AV source) and create source buttons in the Entertainment Browser GUI menu for the selected paths. You can change which sources appear on a room-by-room basis by checking and un-checking the boxes on this menu in the room that the speakers and/or display exists. To see the updated Entertainment Browser GUI menu, you will have to click "Close" on this menu and then you will have to re-open the Entertainment Browser GUI menu by clicking on the Entertainment icon on Room Menu for the selected room.
Decide which Buttons appear
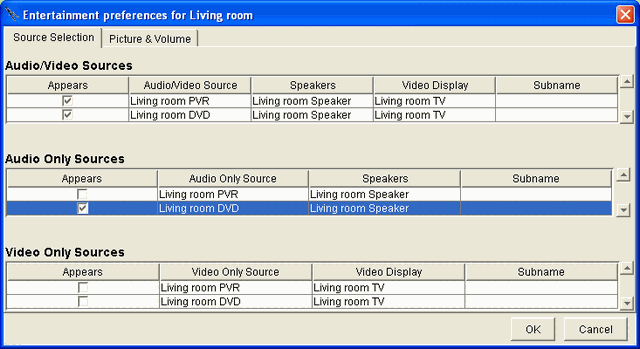
For example, you may want the DVD player to show up as both an "Audio/Video" Source so you can watch the DVD and as an "Audio Only" Source so you can listen to the CD without having the TV turn on.
Do this by adding a check mark to the "Audio Only" Source in the menu at the right.
Click OK to close on this menu.
Re-open the Entertainment Browser GUI menu by clicking on the Entertainment icon on Room Menu for the selected room.
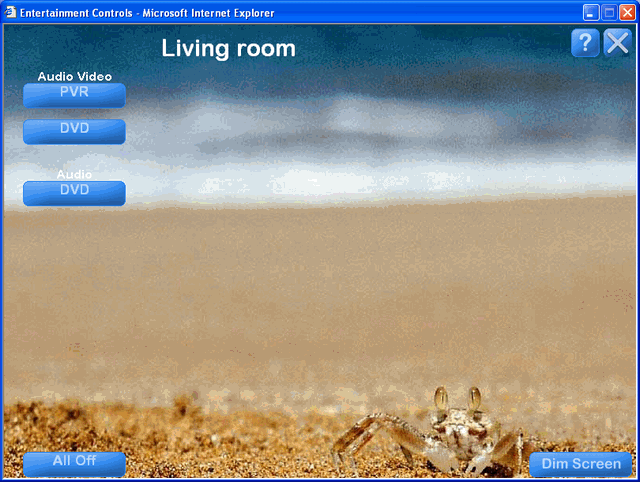
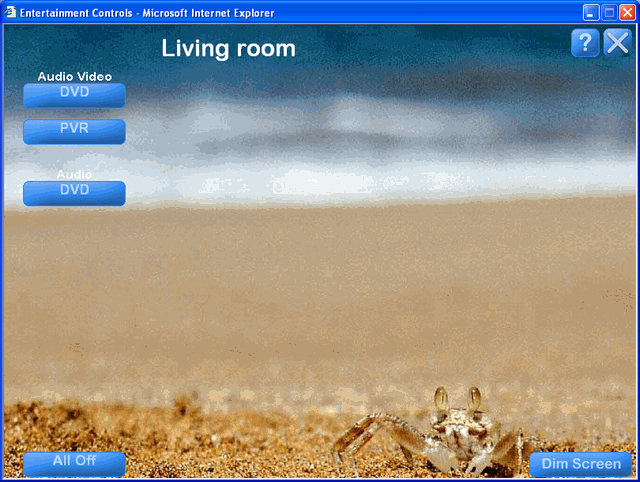
You will see the Entertainment Browser GUI menu at the right.
It now has two subsections: one for "Audio Video" with buttons for watching and listening to the PVR and DVD and one for just "Audio" with a button for just listening to the DVD.
Change the Order of the Buttons
To change the order of the buttons, go back to the Entertainment Preferences menu.
Select the line item whose button you want to move up or down.
Click the up or down arrow on the right.
In this example, the DVD was move up one to be above the PVR.
Click OK.
Re-open the Entertainment Browser GUI menu by clicking on the Entertainment icon on Room Menu for the selected room.
You will see the Entertainment Browser GUI menu at the right.
Note that the DVD button is now above the PVR button in the Audio Video subsection.
Access multiple video displays and speakers in a room
To see how to access multiple video displays and speakers in a room we need to start with a room that has two or more displays and/or sets of speakers.
In the example from Example AV Advanced Theater there are:
Two displays: "Living room TV" and "Living room Sharp" (a 15" LCD TV made by Sharp)
Two sets of speakers: "Living room Speaker" and the speakers on the "Living room Sharp" TV.
Click the Preferences button.
Initially you will get a menu like the one at the right where Ubiquity created paths from the two sources that can be played in the room to the first display and set of speakers that were added to the room, the "Living room TV" and the "Living room Speaker".
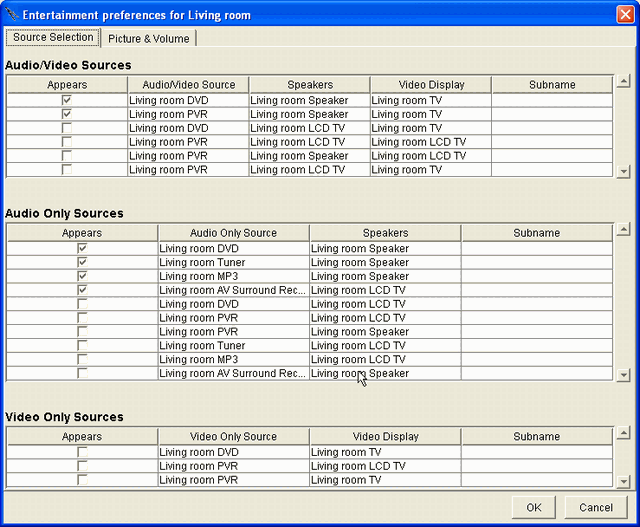
Select the path "PVR to Living room Sharp speakers and Living room Sharp Video Display" by clicking on the "Appears" checkbox for that line (you will have to click on it twice).
Click in the Subname field for this path and enter LCD TV. Push "Enter" ().
Click OK.
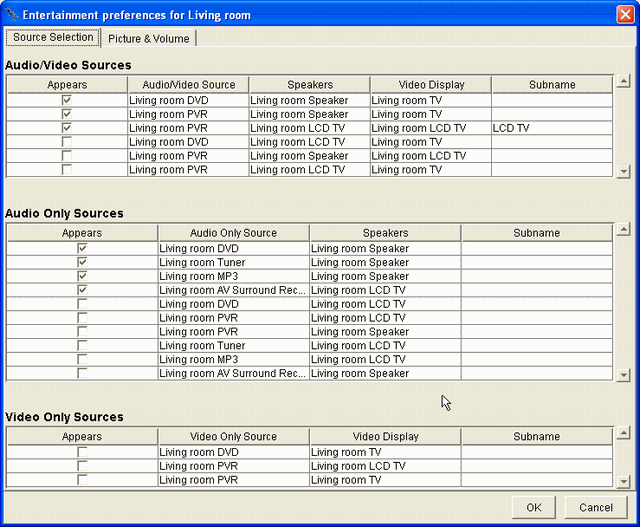
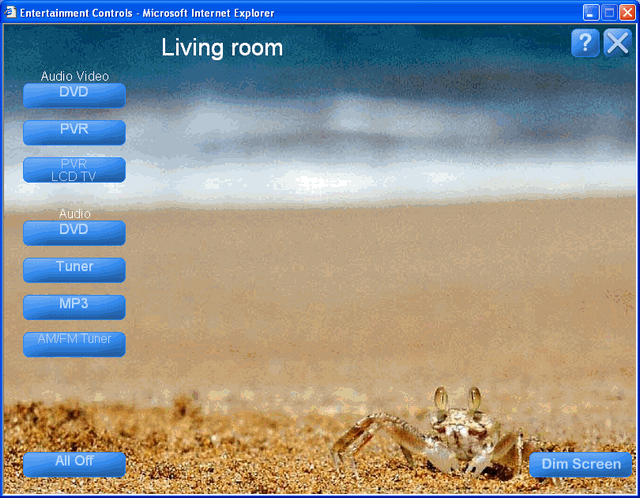
RE-open the Entertainment Browser GUI in the Living room and you will get the menu at the right.
Note that a second PVR button has been added with a subname of "LCD TV". If you click on this button the LCD TV will turn on, not the DLP projection TV.
Give you source-specific selection of video display and speakers
Note that in this example we selected the PVR to be displayed on the LCD TV. Using this method above, you can select which TV and/or set of speakers you would like each source to appear on.
Note that when one TV turns on, the other will turn off. If you want multiple TVs to turn on simultaneously, you can either create a Group of Actions that turns them on or put each in its own room - generating a button for each.
Determine which component in the path controls volume and which controls the video display
When you turn on the Sharp LCD TV in the example above the volume of the speakers that are part of TV may be controlled by the AV surround receiver or may be controlled by the TV itself (the default is the last one in the path to the speakers).
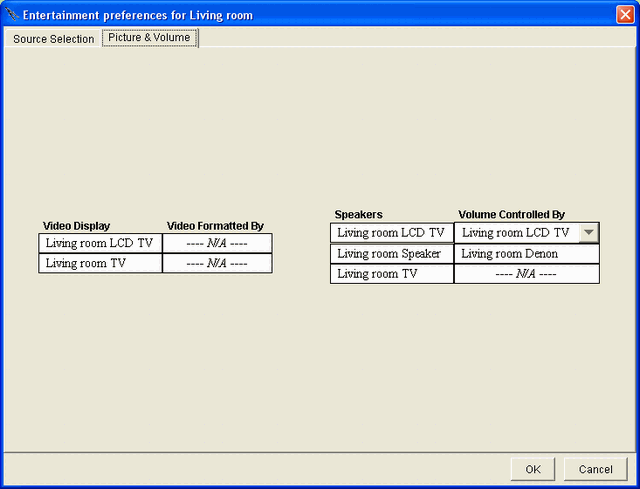
If the default is not what you want, open the Entertainment Preferences menu and select the 2nd tab at the top labeled "Picture & Volume".
On the right hand side, for every set of speakers whose volume can be controlled by more than one component, a dropdown box will appear so you can select the component that you would like to have control the volume.
Similarly, on the right hand side, for every video display whose picture can be controlled by more than one component, a dropdown box will appear so you can select the component that you would like to have control the video picture (e.g., letter box, anamorphic,standard).
Rules for how one button affects another
When a button in the "Audio/Video Sources" subsection is pressed, it will turn off all other buttons.
When a button in the "Audio Only Sources" subsection is pressed, it will turn off buttons in the same subsection and buttons in the "Audio/Video Sources" subsection.
Similarly, when a button in the "Video Only Sources" subsection is pressed, it will turn off buttons in the same subsection and buttons in the "Audio/Video Sources" subsection.
Therefore, pressing a button in the "Audio Only Sources" subsection will not turn off button in the "Video Only Sources" subsection and vise versa.
To Watch football with sound from the radio, we need to create a video only button for the PVR and a audio only button for the Tuner.
Watch football with sound from the radio
The obvious solution is to use the Preferences menu to create that button, but first we need to create an independent path from the PVR to the TV so that selecting the Tuner input on the AV surround receiver does not break the path of the PVR to the TV.
(Alternatively you could pull out the manual for your AV surround receiver and find out how to set it up so that selecting the internal Tuner will not change the selection of the input source.)
Open the Preferences menu for the Entertainment equipment in the Living room.
Check the "Appears" checkbox for Living room PVR to Living room TV.
Click OK.
Re-open the Entertainment Browser GUI.
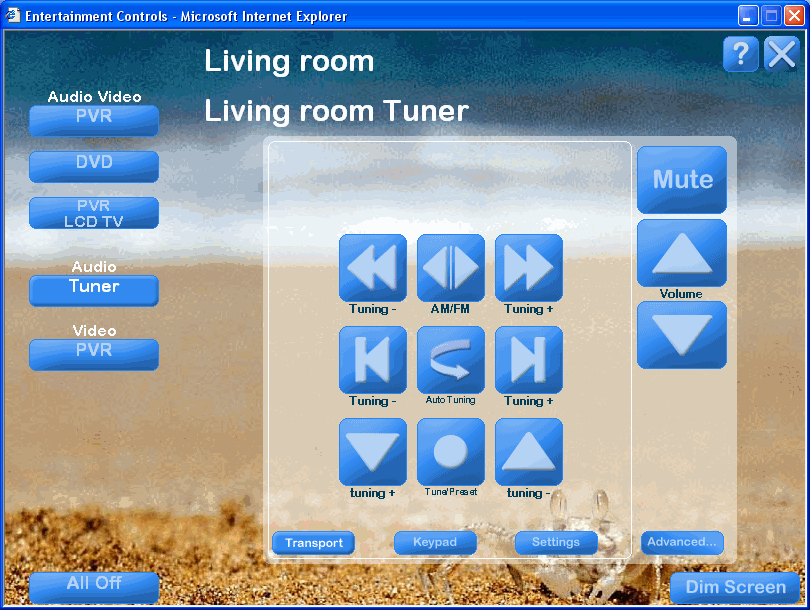
Click on the PVR button at the bottom of the menu. The PVR and TV will both turn on.
Click on the Tuner button. The PVR and TV will remain on and the Tuner and AV surround receiver will turn on. You will be left with the menu controls of the Tuner. If you want the menu controls of the PVR, click it again.
