To open the Scene Settings menu:
Click in the room you want to work on.
This will pop up the Room menu.
Click the "Scene Settings" button at the bottom of the Room menu.
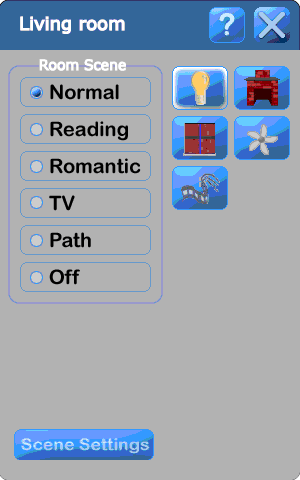
You will get a menu like the one at the right.
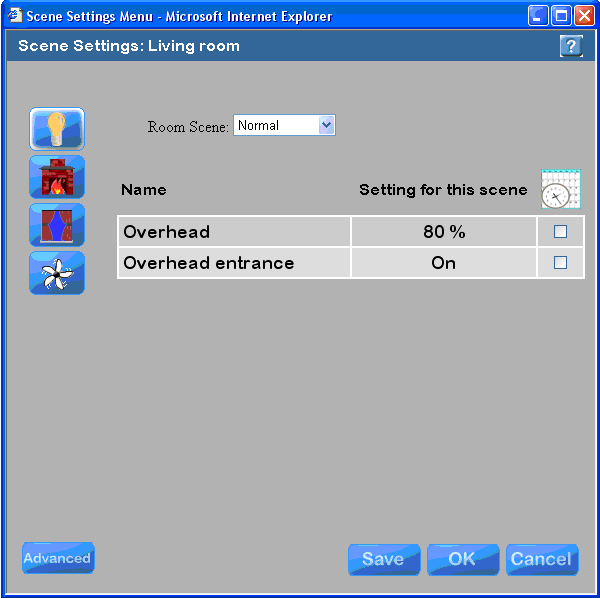
Select the device you would like to work with by clicking on its icon on the left side of the menu. The selected icon will glow (presently the lights are selected.)
Select the Room Scene you want to work with using the dropdown box at the top of the menu (presently, Normal scene is selected).
Then names of all of the devices of the selected type will appear under the "Name" heading. To the right of each name will be the setting that device will go to when the room is in the selected Room Scene. Most devices are "On", "Off", or "No Change" (see below). However, Lights can be dimmable and will then show the percentage of brightness (with 100% being full on). You many want to check out the value of dimming the lights at the bottom of this page.
Note that in this example the "Overhead" light is dimmable, but the "Overhead entrance" light is not (therefore, the only settings available for it are "On" and "Off").
The far right hand column tells you whether or not the device is part of a Timer event. This is just useful information when working with traditional automation.
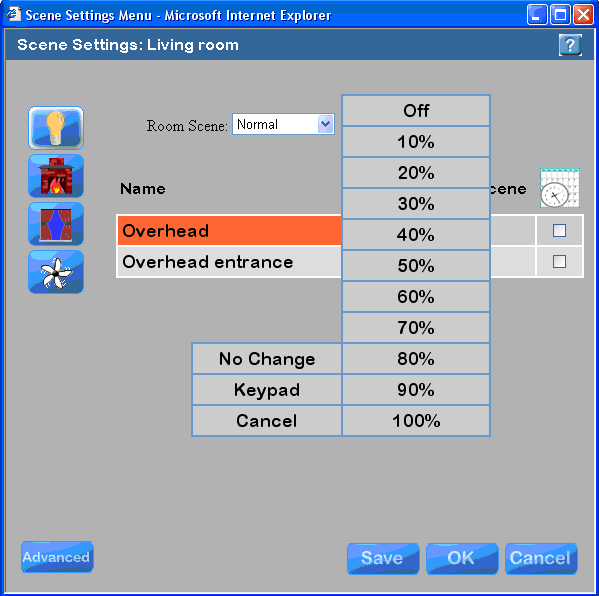
To change the dimming level of a light, click on its present value and a pop up menu will appear on top of it (in the example a the right, clicking on 80% brought up the menu shown).
Click on the dimming level you would like (e.g., 60%). If you want a level between the ones shown, click on "Keypad" and you can enter the value. If you want to leave it as is, click on "Cancel".
Alternatively, you can select "No Change". This means that the on/off status and dimming level of this light will not change when the room goes to the selected scene. Literally, nothing will happen to this light when the room goes into this Room scene. If it was off, it will stay off. If it was on, it will stay on.
When you change the on/off status and/or dimming level the new setting will take effect immediately (referred to a "immediate apply"). This allows you to set up scenes quickly and easily in a room. However, the new setting is not saved until you click either "Save" or "OK".
The "Advanced" button takes you to the "Advanced Device Settings" menu, which enables you to change the settings of multiple rooms simultaneously.
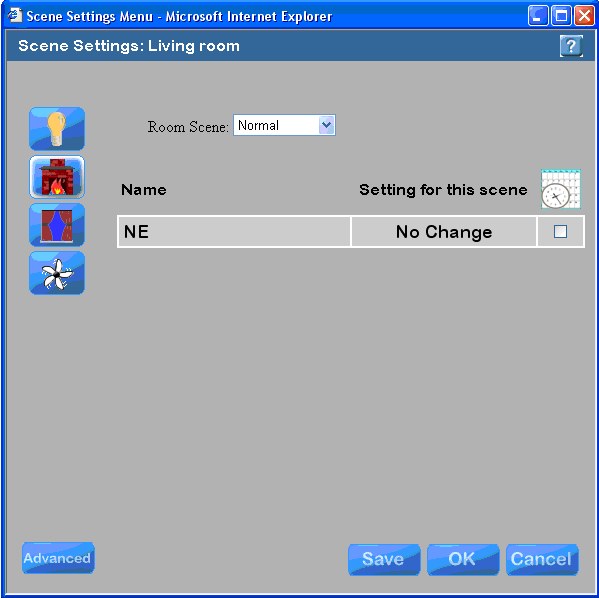
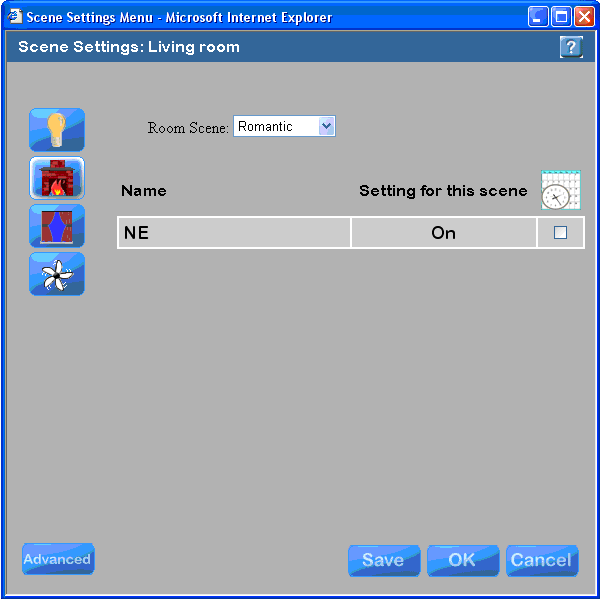
In the Scene Settings menu to the right, the fireplace icon has been selected and the room is in the "Romantic" Room Scene.
The name of the fireplace is "NE" - standing for Northeast. Most relay-controlled devices are named for their compass location within a room.
The "Setting for this scene" for the "NE" fireplace is "On" meaning that when the room is put in the Romantic Room scene, the fireplace will turn on.
In the Scene Settings menu to the right, the room has been changed to the "Normal" Room Scene.
The NE fireplace has a "Setting for this scene" of "No Change" meaning that when the room is put in the Normal Room scene, the On/Off state of the fireplace will not change.
Note that if you want to turn the fireplace On and have the room in the Normal Room scene, then you could first put the room in Romantic scene (turning the fireplace on) and then put the room in Normal scene (leaving the fireplace on). This is not something you would do with any type of graphical user interface, rather it is something you might do if you had a keypad on the wall or table - perhaps one with 6 buttons representing the 6 room scenes.
