If you need more relays than are available on the Domain Controller or if you have a number of relays in one location and would rather pull just one cable to that location, then you may want to add relays from RCS (http://www.resconsys.com/) to the project. The 8CUR Relay Controller provides 8 additional Form "C" relays.
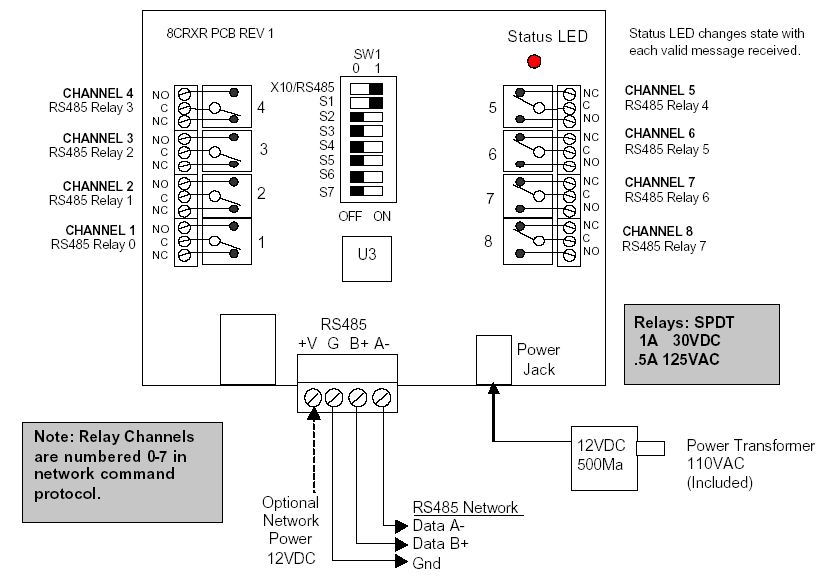
Please note that on the address dip switch (SW1 in the picture below), .
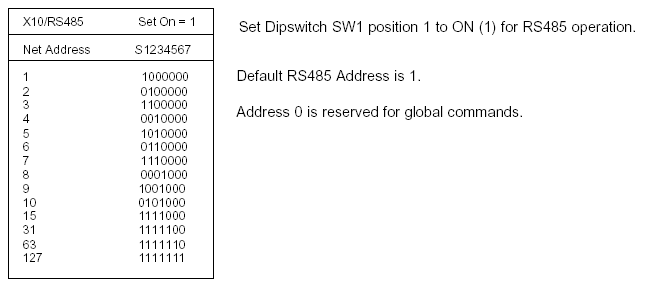
Please note that on the address dip switch (SW1 in the picture below), .
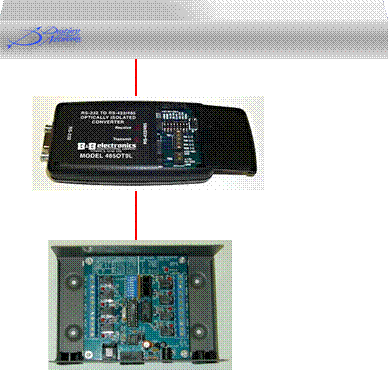
ArchitectureThe picture at the right shows the architecture for using the 8 CUR. The Domain Controller serial port is connected to a B&B Electronics RS-232 Converter to create an RS-485 interface. The RS-485 interface from the B&B Electronics RS-232 Converter is then connected to one or more RCS 8CUR modules. |
| ||||||||||||||||||||||||
|---|---|---|---|---|---|---|---|---|---|---|---|---|---|---|---|---|---|---|---|---|---|---|---|---|---|
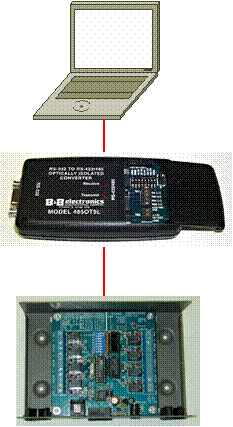
Test with your PCBefore connecting the 8 CUR to the Domain Controller, connect it to your PC with a standard straight through RS-232 cable. That is, connect your PC to the B&B Electronics RS-232 Converter via the RS-232 cable as show at the right. |
| ||||||||||||||||||||||||
|
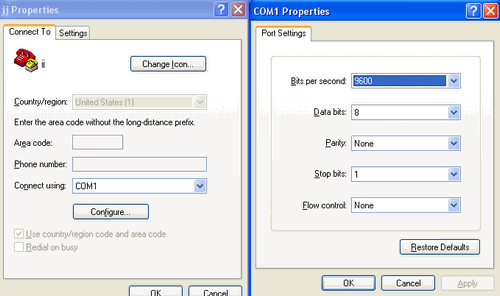
Open Hyper Terminal and use the setup as shown at the right. |
| ||||||||||||||||||||||||
|
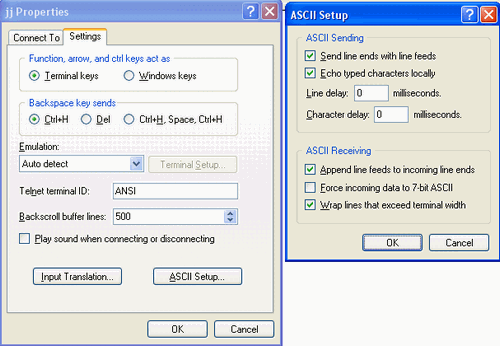
Select "File / Properties" and "ASCII" setup and configure the menus as shown at the right. |
| ||||||||||||||||||||||||
|
Command format (from the RCS 8CUR manual) Commands are case sensitive. All commands are terminated with a carriage return [cr].
aa = address, 0x01=0x00x7F, 0x00 is a global address.
|
|||||||||||||||||||||||||
|
Using the command format information above, send some commands to the RCS 8CUR relay modules and listen for the click that says the relays are working. In the example at the right, RCS 8CUR address "03" had relay #5 set to energized and then to un-energized. If it works with the PC, then remove the plug from the PC and plug the same cable into the Domain Controller. After following the steps below, the Domain Controller should be controlling the relays. |
| ||||||||||||||||||||||||
|
To add the RCS 8CUR Relay controller, please do the following:
|
|||||||||||||||||||||||||
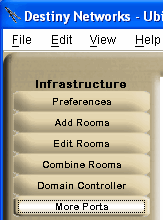
Select the More Ports LayerSelect the "More Ports" layer of the Design Module. |
| ||||||||||||||||||||||||
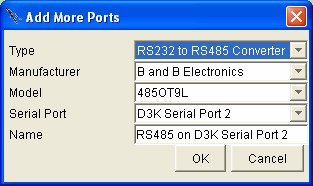
Add RS-232 to RS-485 ConverterIf the Domain Controller you are using is a Domain 3000, then you will have to convert one of the RS-232 ports to an RS-485 port before you can add an RCS 8CUR Relay Controller. The same is true if you want to connect the controller to a Global Cache. Click in the location in the room where you want to add the RS-232 to RS485 converter (typically, close to the Domain Controller). |
| ||||||||||||||||||||||||
|
You will probably get the menu at the right. If not, on the "Type" dropdown box select "RS232 to RS485 Converter" and fill in the rest of the boxes as shown at the right. Click OK. |
| ||||||||||||||||||||||||
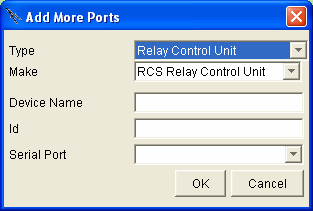
Add the RCS 8CUR Relay ControllerClick in the location in the room in which you plan to add the additional ports.
|
| ||||||||||||||||||||||||
|
You will get a pop up menu like the one at the right. From the "Type" dropdown box, select "Relay Control Unit.
|
| ||||||||||||||||||||||||
|
The menu will change to look like the one at the right. From the "Make" dropdown box select "RCS Relay Control Unit". |
| ||||||||||||||||||||||||
|
Give the relay controller a name that pertains to its function (e.g., Amplifier for relays that will turn on amplifiers). Open up the controller and determine the identity of it from the dip switches as shown above (). Select the serial port Click OK
|
| ||||||||||||||||||||||||
|
After adding the Relay Controller, a red dot will appear where you initially clicked to add it. If you want to change any of the parameters of that Relay Controller, click on the red dot and make sure the "Edit Relay Controller Unit" menu pops up. It is the one that also has a "Delete" button on it - otherwise, you will be adding a second Relay Controller. Now these relays are available to :
|
| ||||||||||||||||||||||||